

Step 26
Make a new layer and use a small brush with the color #c2c5e3 to paint more drops and details for the falling drops of the liquid.

Step 28
Open the light effect pack and select the images named 26, 42, 29, 39 to add to the positions around the liquid on the ground. Use Ctrl+T to resize these images and make the light’s direction upwards. Change the mode of these layers to Screen 100%.


Step 29
Select all of the light layers and hit Ctrl+G to make a group for them. Change the group’s mode to Screen 100% and make a Hue/Saturation adjustment layer within this group. Bring the Saturation values down to -78:

Step 30
Make a new layer on top of the layers and use a soft brush with the color #adadad to paint some glow around the moon. Change this layer mode to Screen 100% and use a layer mask to reduce the light effect, especially on the moon.


Step 31
Create a new layer and use the same brush to paint around the liquid/drops. Change this layer mode to Hard Light 100% and use a layer mask to decrease the glow effect, making it appear more subtle.

Step 32
Make a Gradient Map adjustment layer on top of the layers and pick the colors #e10019 and #00601b. Lower the opacity of this layer to 20%.

Step 33
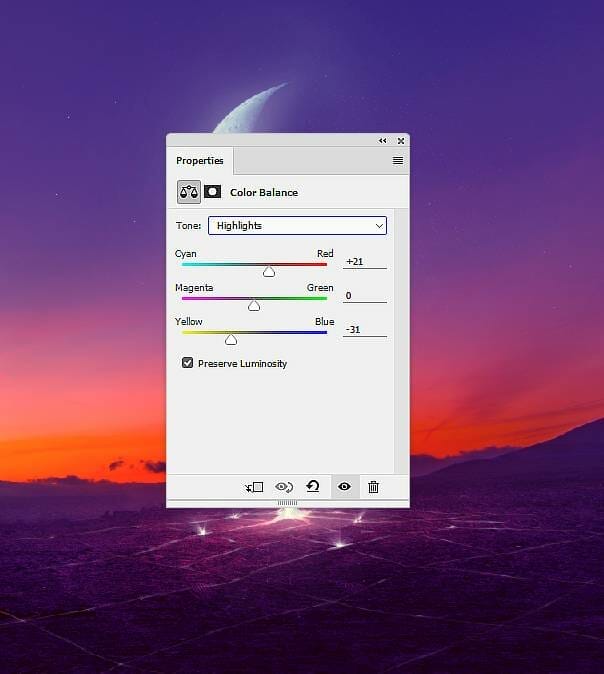
Add a Color Balance adjustment layer and change the Midtones and Highlights settings:

Step 34
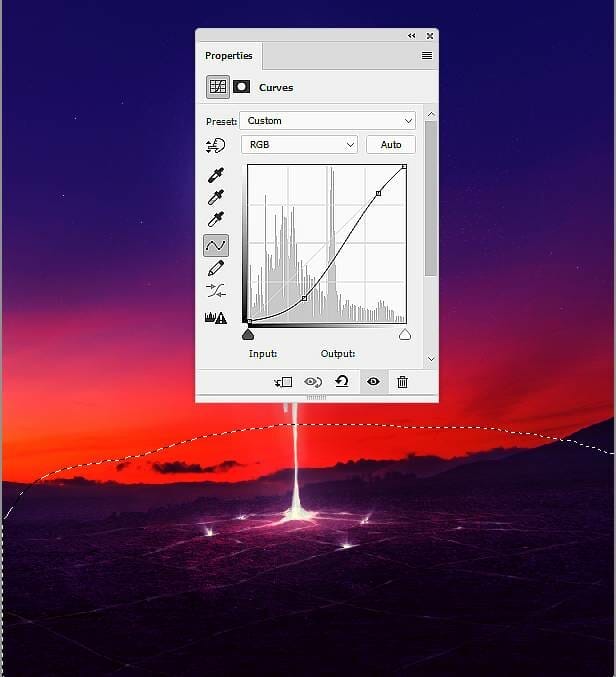
Create a Curves adjustment layer to enhance the contrast and color of the whole scene. On this layer mask, use a soft black brush with the opacity about 20% to reduce the dark effect on the ground.
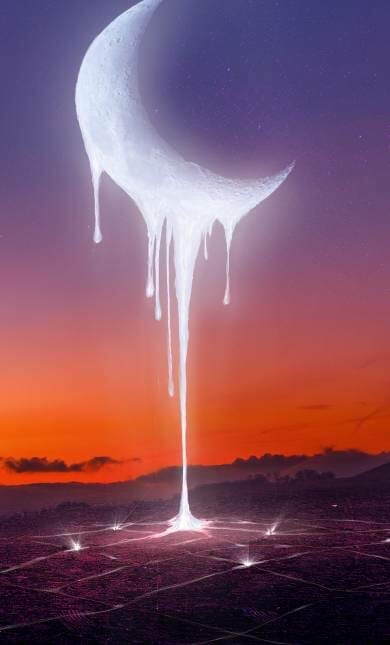
Final Result

Download the PSD
One response to “How to Create a Surreal, Fantasy Melting Moon Scene with Adobe Photoshop”
-

Genial, muchas gracias, que tenga gran día. Saludos
Leave a Reply