
Now start painting over the object you want to remove. Create a new layer, If it’s noticeable, go back to clone other pixels and continue painting.


Step 11
Add Adjustment Layer “Curves”
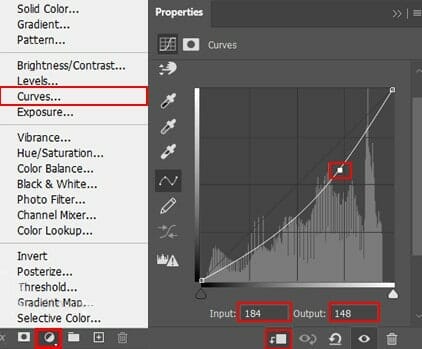
Step 12
Add Adjustment Layer Color Balance, then use Brush Tool(B) Soft Round with foreground color black and paint on Elephant.


Step 13
Now add seome highlight to elephant, use Brush Tool(B) Soft Round with foreground color white and paint on the spine of an elephant. Blend mode change to Overlay with Opacity to 60%.

Step 14
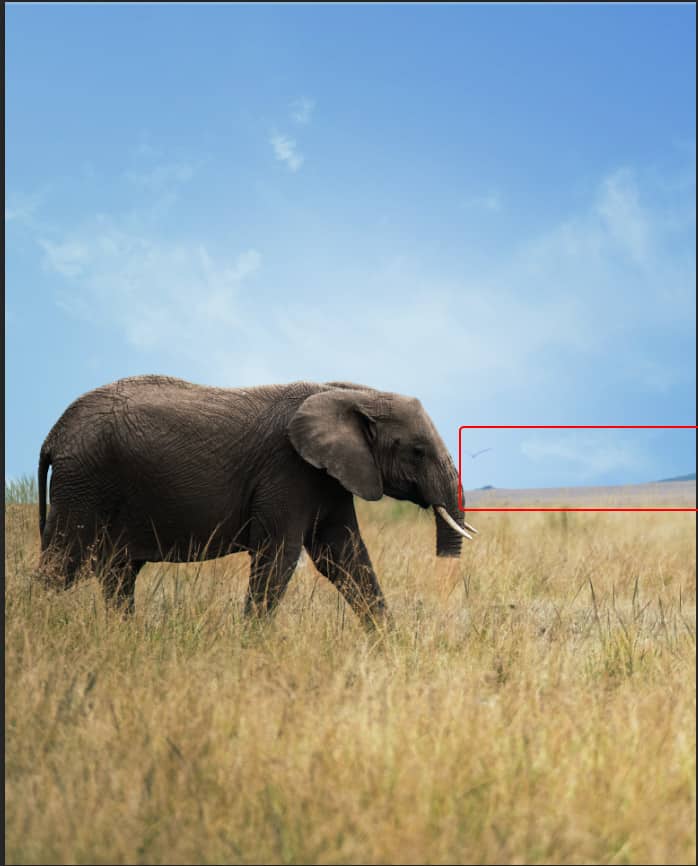
Next, select Field and go to File > Open and select Field. Use Rectangular Marquee Tool(M). With the Rectangular Marquee tool, drag over the area you want to select. Hold down Shift as you drag to constrain the marquee to(release the mouse button before you release Shift to keep the selection shape constrained).

After the selection area has been created, simply copy (Ctrl / Cmd + C) and Paste (Ctrl / Cmd + V) it to our work canvas(Below Elephant Layer). Then position the image with the transform tool (Ctrl / Cmd + T). Hold Alt + Shift and resterize like image below. In Photoshop CC only hold Alt to resterize al sides together. Then create layer mask and use Soft Round brush with foreground color black and remove sky.
Step 15
Add Adjustment Layer Color Balance

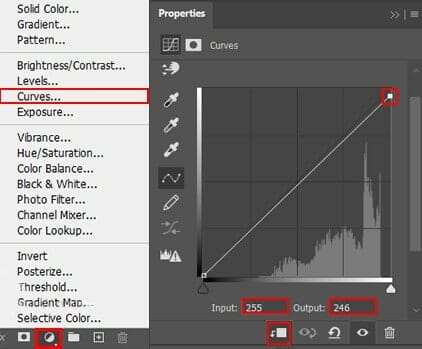
Step 16
Add Adjustment Layer Curves
Step 17
Next we will open another Elephant. After you open the image, use Quick Selection Tool(W) and select only tusk. After the selection area has been created, simply copy (Ctrl / Cmd + C) and Paste (Ctrl / Cmd + V) it to our work canvas. Then position the image with the transform tool (Ctrl / Cmd + T). Hold Alt + Shift and resterize like image below. In Photoshop CC only hold Alt to resterize al sides together.


Now duplicate tusk (Ctrl/Cmd + J) and go to Edit > Puppet Warp.
In the options bar, adjust the following mesh settings:

Mode
Determines the overall elasticity of the mesh.
Choose Distort for a highly elastic mesh good for warping wide-angle images or texture maps.
Density
Determines the spacing of mesh points. More Points increases precision but requires more processing time; Fewer Points does the opposite.
5 responses to “Learn How to Create a Surreal Scene of Elephant with a Palm Trunk”
-

beautiful artwork!
-
Sorry about the broken PSD link. It’s fixed and working now.
-
Pitty the PSD download is not working
-
problem link psd :)
-
great tuto ! just a little problem with link psd :)
Leave a Reply