
Expansion
Expands or contracts the outer edge of the mesh.
Show Mesh
Deselect to show only adjustment pins, providing a clearer preview of your transformations.
To temporarily hide adjustment pins, press the H key.
In the image below, click to add pins to areas you want to transform and areas you want to anchor in place. Moving a pin on the puppet mesh. Adjoining pins keep nearby areas intact.
To rotate the mesh around a pin, select it, and then do either of the following:
- To rotate the mesh a fixed number of degrees, press Alt (Windows) or Option (Mac OS), and position the cursor near to, but not over the pins. When a circle appears, drag to visually rotate the mesh.


We will now make two more copies of the Tusk, and position them on another elephant Tusk. The procedure is the same we will only change in the Puppet warp settings the tusk angle, that it is not much curved.
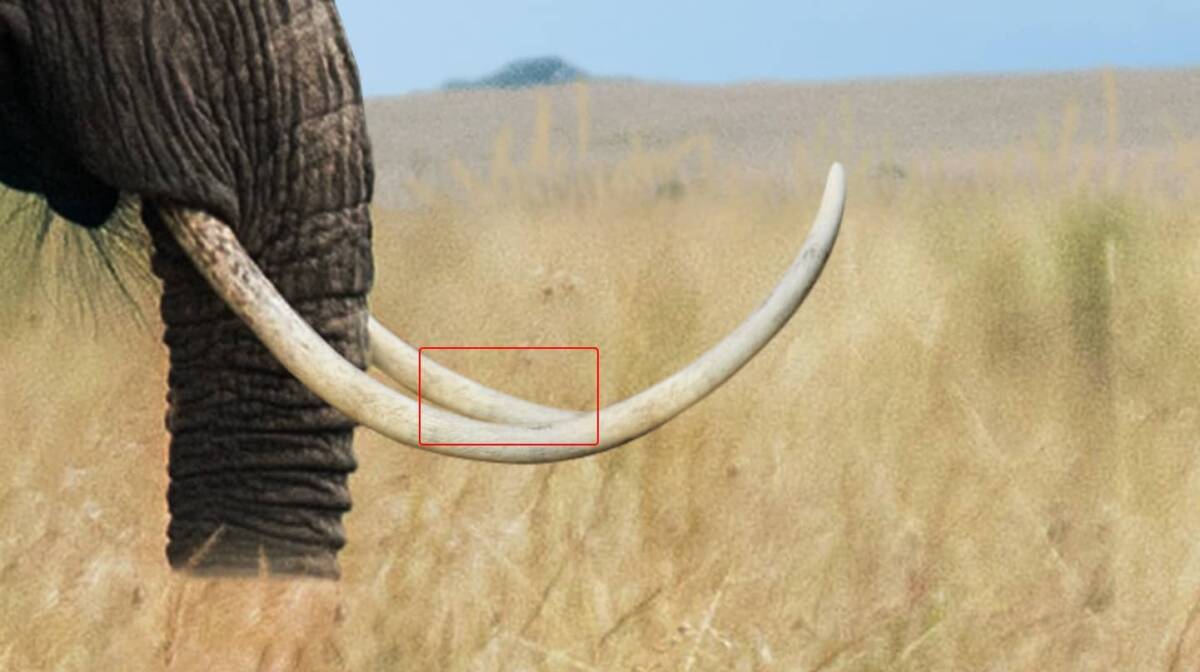


Then select all tusk layers (Hold Ctrl/Cmd + Left Click) and put to group (Ctrl/Cmd + G)

Step 18
Next we will open Elephant photo. After you open the image, use Quick Selection Tool(W) and select only nose. After the selection area has been created, simply copy (Ctrl / Cmd + C) and Paste (Ctrl / Cmd + V) it to our work canvas. Then position the image with the transform tool (Ctrl / Cmd + T). Hold Alt + Shift and resterize like image below. In Photoshop CC only hold Alt to resterize al sides together.

Now repeat the same procedure as in step 17, go to Edit > Puppet Warp and transform nose.


Step 19
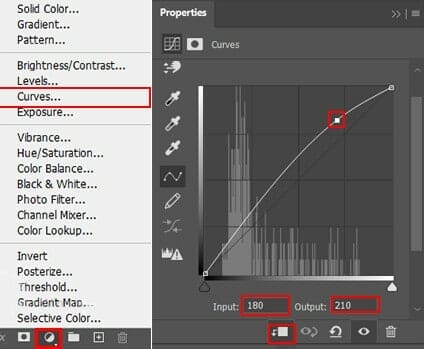
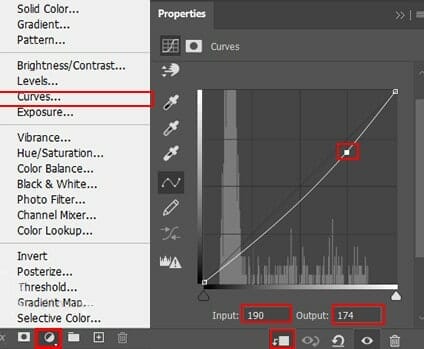
Now we will add some Adjustment layers to blended it. Add Adjustment Layer “Curves”

Step 20
Add Adjustment Layer “Selective Color”

Step 21
Add Adjustment Layer Curves and press Ctrl/Cmd + I to invert and use Brush Tool(B) Soft Round with foreground color white and paint the Highlights parts on nose.

Step 22
Add Adjustment Layer Curves and press Ctrl/Cmd + I to invert and use Brush Tool(B) Soft Round with foreground color white and paint the Dark parts on nose.

Step 23
Now, create a new layer and use Soft Round brush with foreground color white and paint the outside of nose. Blend mode change from normal to Overlay with opacity 50%.

Step 24
In this step duplicate nose (Ctrl / Cmd + J) and open Puppet Warp (Edit > Puppet Warp). Use the same procedure as in previous steps.
5 responses to “Learn How to Create a Surreal Scene of Elephant with a Palm Trunk”
-

beautiful artwork!
-
Sorry about the broken PSD link. It’s fixed and working now.
-
Pitty the PSD download is not working
-
problem link psd :)
-
great tuto ! just a little problem with link psd :)
Leave a Reply