

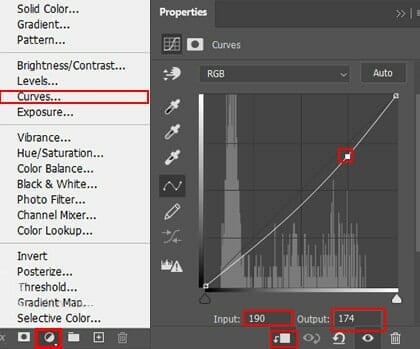
Step 25
Add Adjustment Layer Curves

Step 26
Add Adjustment Layer Selective Color

Step 27
Add Adjustment Layer Curves and press Ctrl/Cmd + I to invert and use Brush Tool(B) Soft Round with foreground color white and paint the Highlights parts on nose.

Step 28
Add Adjustment Layer Curves and press Ctrl/Cmd + I to invert and use Brush Tool(B) Soft Round with foreground color white and paint the Dark parts on nose.
Step 29
Create a new layer and use Soft Round brush with foreground color white and paint the outside of nose. Blend mode change from normal to Overlay with opacity 50%.

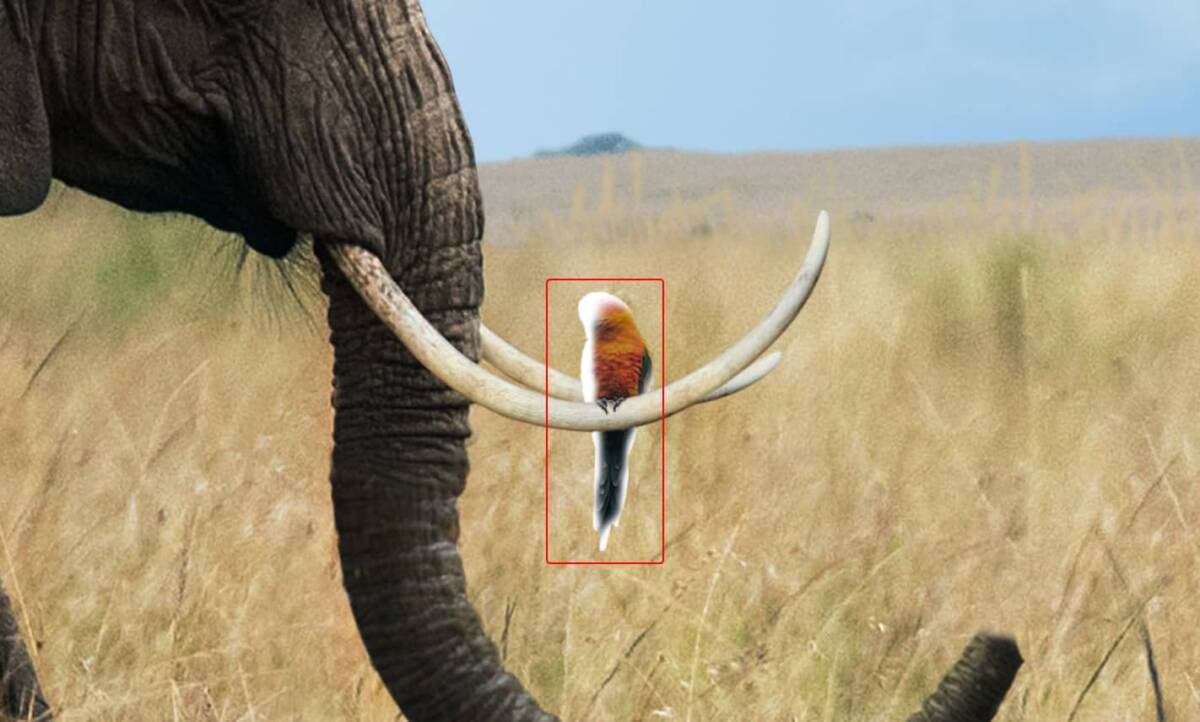
Step 30
Now open Parrot, After you open the image, use Quick Selection Tool(W) and select Parrot. After the selection area has been created, simply copy (Ctrl / Cmd + C) and Paste (Ctrl / Cmd + V) it to our work canvas. Then position the image with the transform tool (Ctrl / Cmd + T). Hold Alt + Shift and resterize like image below. In Photoshop CC only hold Alt to resterize al sides together.


Step 31
Add Adjustment Layer Curves

Step 32
Add some Highlights to Parrot, create a new layer and use soft round brush with foreground color white and paint outside of parrot. Blend mode change to Overlay with Opacity 75%.
Step 33
In this step we will open Palm. Go to File > Open and select Palm, then go to Select > Color Range…


Now in this settings for Select use Sampled Colors, selection checked and Selection Preview Grayscale. Then use a Eyedropper and click on sky, then use a Eyedropper+ and click on white background, over the palm. Fuzziness set to 24. Then press OK.

After the selection area has been created, simply copy (Ctrl / Cmd + C) and Paste (Ctrl / Cmd + V) it to our work canvas. Then position the image with the transform tool (Ctrl / Cmd + T). Hold Alt + Shift and resterize like image below. In Photoshop CC only hold Alt to resterize al sides together.

Next we will go to Puppet Warp (Edit > Puppet Warp) and adjust the shape of the palm for the nose.


Step 36
Add Adjustment Layer Selective Color and use Soft Round Brush with foreground color black and paint on treetop to remove colors.
5 responses to “Learn How to Create a Surreal Scene of Elephant with a Palm Trunk”
-

beautiful artwork!
-
Sorry about the broken PSD link. It’s fixed and working now.
-
Pitty the PSD download is not working
-
problem link psd :)
-
great tuto ! just a little problem with link psd :)
Leave a Reply