
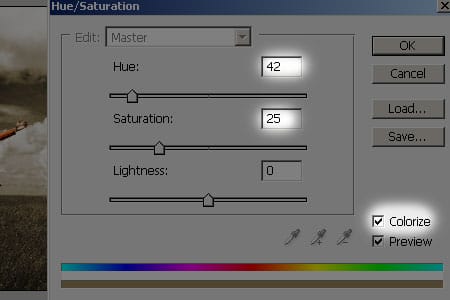
Photoshop CS3:
If you’re using Photoshop CS3, you can use the Black and White adjustment to add a sepia tone. This will give you more adjustable settings compared to using the Hue/Saturation adjustment. First, adjust the settings to get the black and white look that you like. Or, you can scroll through the presets menu to select one of your own. I chose the Red Filter preset to bring up the reds and darken the sky.

Checkmark the Tint and adjust the tone to create a sepia effect. Click OK when done.

Final Results

Red

Blue and Cyan

Yellow and Green

Red, Yellow, and Green
3 responses to “Selective Sepia”
-

awesome
-
gregregerg
-
Beautiful! :)
Leave a Reply