

Step 12
Press OK.

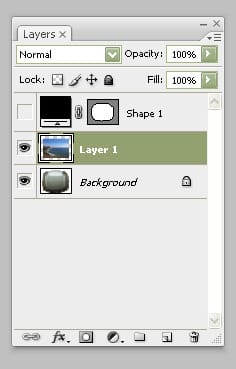
Step 13
In the Layer palette, click the Eye icon of the shape layer since we don’t need it, and click the Eye icon of Layer 1 and click Layer 1 to select it.
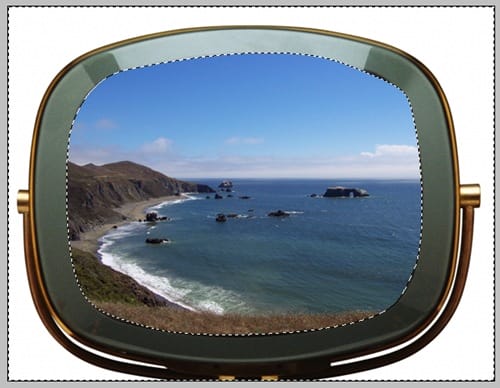
Step 14
Go to Select>Inverse and press Backspace to delete the pixels outside of the television screen on the beach layer.
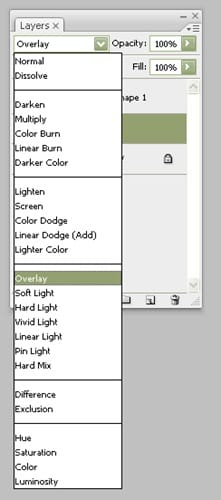
Step 15
Change the layer blending mode of Layer 1 to Overlay.
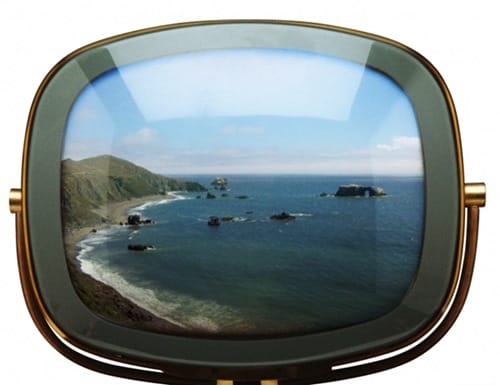
Step 16
This overlays the beach image onto the television screen, but the beach photo’s angle needs to protrude a little bit in the middle to fit the television screen.
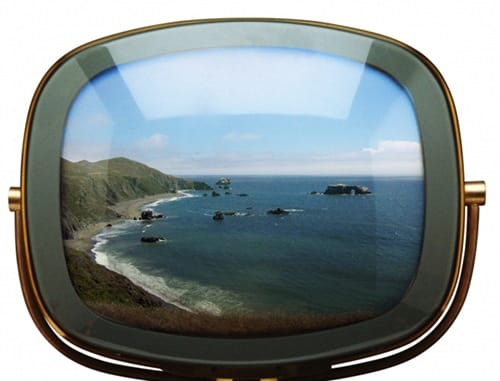
Step 17
With Layer 1 still selected in the layers palette, go to Filter>Distort>Lens Correction. Set the Remove Distortion to about -14, or until it adds some barrel distortion to fit the screen.

Step 18
The problem here is that the beach is now moved outside of the screen area. Click the Eye icon of the shape from earlier and repeat steps 11-14 to remove the area around it again. Now we have an image that is seamlessly blended with another, using both the overlay blending mode and adding some lens distortion to match the background. Be sure to remove any pixels that on top of the area outside of the screen by selecting it with the polygonal lasso tool and press Backspace to remove them.
5 responses to “Blending Two Images Seamlessly with Photoshop”
-

better to use a clipping mask or layer mask rather than to invert the selection and delete the rest. Once you’ve deleted stuff you can’t recover it and adjustments are sometimes necessary or desirable. Good tutorial though!
-
if i m going to join two image like face of one image and body of another image then how to make same color of face and body…. rply
-
Thanks for info. For a newbie like me I need more in depth, step by step. Found this site http://www.photoshopessentials.com/photo-effects/sunglasses/
It’s similar but a lot more detail -
Thanks for a great tutorials…
I want to know more about photoshop. please help me… -
thanks for a very weel tutorials
Leave a Reply