
Set layer Blending Mode to a “Multiply” and reduce Opacity to 69%, Fill to 60%.

Step 42
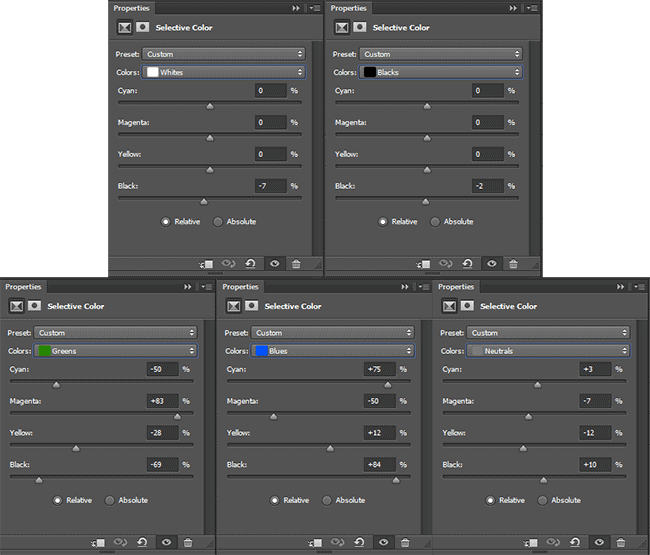
Next adjustment layer is “Selective Color” (Layer > New Adjustment Layer > Selective Color…). Use image below to adjust the settings for each color. As you can see from the result, I added more blue and green tints in the color range. It looks a bit strange, but the next adjustment layer will put everything in its place.
Step 43
Now we take down a bit color, saturation and add a bit of darkness. I use adjustment layer “Black & White” (Layer > New Adjustment Layer > Black & White…) with preset “Red Filter” to remove color from dark areas of the image. Try experimenting with different presets to find an interesting option for you. Reduce layer Fill to 40%. On adjustment layer mask with soft black brush restore original color of runes. On this tinting is over.

Step 44
I decided to add a bit of detail and emphasize mysticism in a picture and is therefore used Brush Tool (B) with feather brush and black color to draw on foreground a bit of flying feathers. Try to keep the feathers more dense and do not apply it more than a third of the working area.

Step 45
In the last step I create a vignette to focus the viewer’s attention only on the center of the image. With Rectangular Marquee Tool (M) draw a rectangle a little smaller than working area. Inverse selection via Cmd/Ctrl + Shift + I or go to Select > Inverse. Press Shift + F6 or go to Select > Modify > Feather and set Radius to 60px. Fill selection with black color (D > Opt/Alt + Del or go to Edit > Fill > Color…).

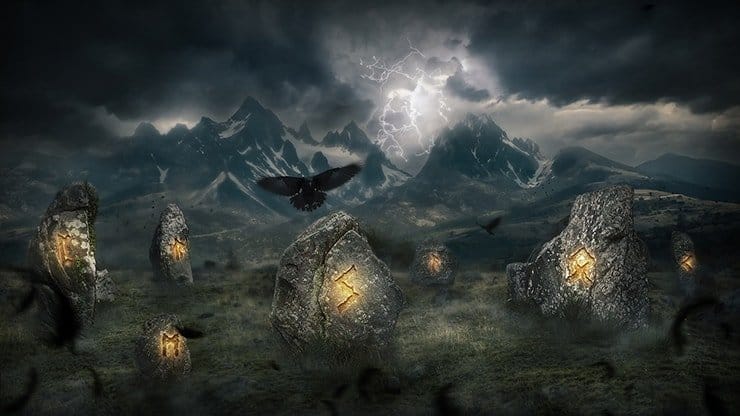
Final Results
That’s all, dear reader! I hope you liked my tutorial and you find it useful for themselves and enjoyed the workflow. In tutorial I sometimes mention a realistic option. The image below is shown it. This is the second version of my picture where I decided to create a more realistic in terms of real life. I removed all unnecessary effects and runes. I also flip whole image horizontally (Image > Image Rotate > Flip Horizontal). A little adjust sky and mountains. That all.
6 responses to “Create a Mystical Photo Manipulation of the Great Ragnarok in Photoshop”
-

totally cool. I figured it might be way more steps, but when you are dealing with stock images and things, it goes much faster.
-
Thank you very much! I am very pleased to hear that! Optimization process an important part of the picture. This helps to save time and organize steps. Feel free to share your final result!
Maria.
-
-
What brush you use in 35 step??
-
I greatly love this good picture
-
Missing lightning image
https://pixabay.com/en/lightning-weather-rocket-983/ -
Unbelievable… ???
Leave a Reply