
Step 4
Select the Clone Stamp Tool (S) then set the brush size to 100 pixels and Opacity to 50%, change sample to “All layers”. Paint over the object shown in the image below. Choosing the right texture paint over remnants of the stone and continue mountains. Try to match the areas of source clone to place where you put them.

Step 5
I decided to build the mountain to create depth in the image. Go to File > Place (Place Embedded) and open “Mountains” image. The most important thing at this stage is as possible pick the exact position of the mountains, that this image was a continuation of the basics. Do not worry about the color.

Step 6
Add a layer mask and remove all unnecessary trees and base of the mountains. Use Brush Tool (B) with the settings from Step 4. It is important to create the impression of integrity of the mountains and the background. For me was to create background realistic as possible.

Step 7
Create a merged copy of image with Cmd/Ctrl + Opt/Alt + Shift + E and convert it to Smart Object (Right click on layer > “Convert to Smart Object” or go to Layer > Smart Objects > Convert to Smart Object). Go to Filter > Camera Raw Filter (Cmd/Ctrl + Shift + A). This is powerful and quick tool to editing pictures without using a lot adjustment layers. So let’s get started from white balance and toning. Set following settings – Temperature: +3, Tint: -10, Exposure: -0.25, Contrast: +5, Highlights: -10, Shadows: -10, Whites: -10, Blacks: -5.

Now reduce noise from picture. Not all noise can be removed because otherwise we lost details in the foreground. So I use middle settings. Go to “Sharpness” tab and set for “Sharpening” Amount: 15, Radius: 1.2, Detail: 25. Set for “Noise Reduction” Luminance: 25, Luminance Detail: 60, Luminance Contrast: 10, Color: 20, Color Detail: 50, Color Smoothness: 50.

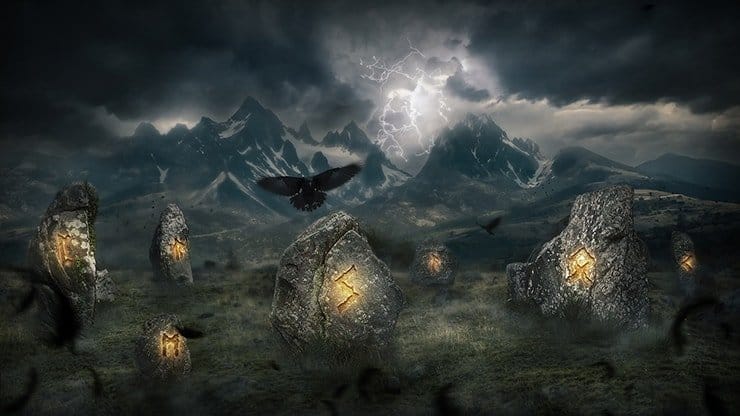
Step 8
Now we replace the sky. I decide to change clouds to more smooth sky to increase the tension in the atmosphere and the overall environment. Go to File > Place (Place Embedded) and open sky image. Increase image size until it fill working field and move it up as shown in image below.
6 responses to “Create a Mystical Photo Manipulation of the Great Ragnarok in Photoshop”
-

totally cool. I figured it might be way more steps, but when you are dealing with stock images and things, it goes much faster.
-
Thank you very much! I am very pleased to hear that! Optimization process an important part of the picture. This helps to save time and organize steps. Feel free to share your final result!
Maria.
-
-
What brush you use in 35 step??
-
I greatly love this good picture
-
Missing lightning image
https://pixabay.com/en/lightning-weather-rocket-983/ -
Unbelievable… ???
Leave a Reply