
Step 12
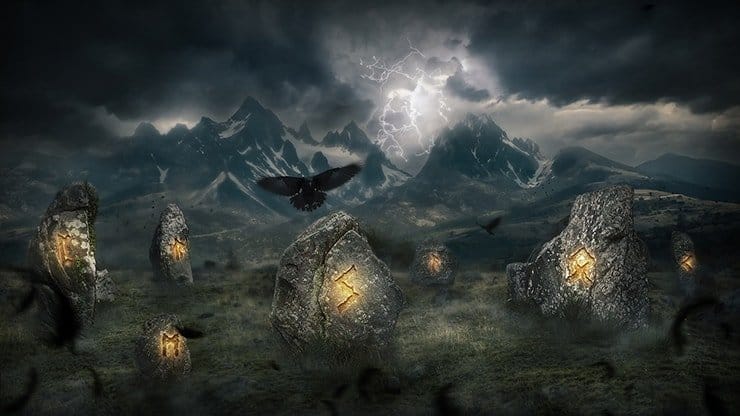
Go to Filter > Render > Difference Clouds. You see on the transition of black and white formed a stripe. This is Lightning. Inverse image (Cmd/Ctrl + I or go to Image > Adjustments > Invert…) to lightning become a white. Do not worry, that the clouds stayed around the lightning.

Step 13
Go to Image > Adjustments > Levels… or press Cmd/Ctrl + L to open Levels adjustment window. Set for for blacks value 235 an click OK. So we have removed all unnecessary leaving only lightning. If you want more glow around the lightning just play with the settings. Use “Hue/Saturation” adjustment to colorize your lightning. Go to Image > Adjustments > Hue/Saturation… or use Cmd/Ctrl + U. In window that appears check mark “Colorize”, change Hue to 225 and increase Saturation to 50.

Step 14
With Free Transform Tool (Cmd/Ctrl + T or Edit > Free Transform) reduce the size of lightning. Hold Shift key to make it proportionally. Change layer Blending Mode to “Screen” and place it not far from the original lightning. Repeat Steps 11 – 14 several times to create more lightning. You can also use other colors. Do not be afraid to experiment. Merge all created lightnings into one layer ( select layers > Cmd/Ctrl + E or Layer > Merge Layers…) and be sure to use “Screen” Blending Mode. On this work with the background is completed. Group all layer via Cmd/Ctrl + G or Layer > Group Layers.

Step 15
Now add the stones. As in all cases to start go to File > Place (Place Embedded) and open “Carnac Stones 1” image. Resize it so stones consistent with perspective and the entire image. Use Quick Selection Tool (W) to select stone and grab to selection bit of grass, it will be helpful for the image and increase the realism.


Step 16
Use “Refine Edge” at the panel properties in the upper part of the screen to clear selection. In window that appears use brush to clear a grass. Check mark “Smart Radius” and set Radius to 1.0px, Shift Edge to -10. Add a layer mask to remove background (use “Add Layer Mask” button in the layers panel or by going to Layer > Layer Mask > Reveal Selection).
6 responses to “Create a Mystical Photo Manipulation of the Great Ragnarok in Photoshop”
-

totally cool. I figured it might be way more steps, but when you are dealing with stock images and things, it goes much faster.
-
Thank you very much! I am very pleased to hear that! Optimization process an important part of the picture. This helps to save time and organize steps. Feel free to share your final result!
Maria.
-
-
What brush you use in 35 step??
-
I greatly love this good picture
-
Missing lightning image
https://pixabay.com/en/lightning-weather-rocket-983/ -
Unbelievable… ???
Leave a Reply