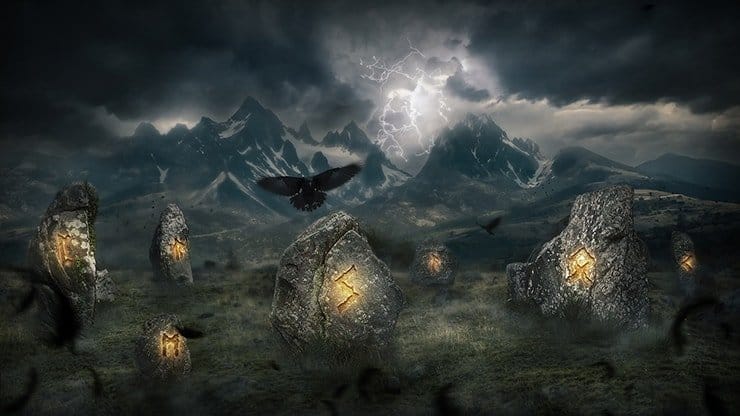


Step 36
Create two new layers to finish glow effect. For first layer Blending Mode “Color Doge”, Opacity: 45%, Fill: 50%. Use brush from previous step and draw glow with color #f5c157. For second layer Blending Mode “Color Doge”, Opacity: 70%, Fill: 45%, color: #f8d65b. Group all layers with runes into one (Cmd/Ctrl + G or Layer > Group Layers).


Step 37
Before proceeding to the final effect remains one small thing. To increase the drama and tension of the situation shown in the picture, as well a little bit to adjust lighting. I created a new layer with “Soft Light” blending mode and gray fill (hold Opt/Alt and click on “Create a new layer icon”. In window that appear set Blending Mode “Soft Light” and check mark “Fill with Soft-Light-neutral color (50% Gray)”). Use Dodge and Burn Tool (O) with Exposure: 20% or use Brush Tool (B) with Opacity: 20 – 30% and black & white colors on this layer to create lighting.

Step 38
Here we are at the end of this tutorial. In this first part we will sharpen the entire image. Group all layers into one group (Cmd/Ctrl + G or Layer > Group Layers) and create a copy of entire image. Use Cmd/Ctrl + Opt/Alt + Shift + E to make merged copy and convert it to Smart Object (Right click on layer > “Convert to Smart Object” or go to Layer > Smart Objects > Convert to Smart Object). Go to Filter > Sharpen > Smart Sharpen… Set the settings as shown in image below.

Step 39
Add one more sharpening filter. Go to Filter > Sharpen > Unsharp Mask. Set Amount: 75%, Radius: 1.0 pixels, Threshold: 32 levels and click OK. This filter is needed to improve the clarity of detail.

Step 40
Now’s work on the depth of field. Make one more merged copy (Cmd/Ctrl + Opt/Alt + Shift + E) and convert it to Smart Object. Go to Filter > Blur > Gaussian Blur with Radius: 5.0pixels. Fill with black Smart Filter layer mask and use soft white brush with Opacity: 50% to remove blur and restore the clarity of the main objects.

Step 41
Now comes the color. Toning the image is a very important detail. Colour helps the viewer understand what is happening in a picture, or to capture the mood of the author. Go to Layer > New Adjustment Layer > Gradient Map… or use “Add new Fill or Adjustment Layer” icon. Create a gradient with following sequence #030303 > #141818 > #2a5157 > #808080 > #cfaa86 > #dfd0b8 > #fdfde.
6 responses to “Create a Mystical Photo Manipulation of the Great Ragnarok in Photoshop”
-

totally cool. I figured it might be way more steps, but when you are dealing with stock images and things, it goes much faster.
-
Thank you very much! I am very pleased to hear that! Optimization process an important part of the picture. This helps to save time and organize steps. Feel free to share your final result!
Maria.
-
-
What brush you use in 35 step??
-
I greatly love this good picture
-
Missing lightning image
https://pixabay.com/en/lightning-weather-rocket-983/ -
Unbelievable… ???
Leave a Reply