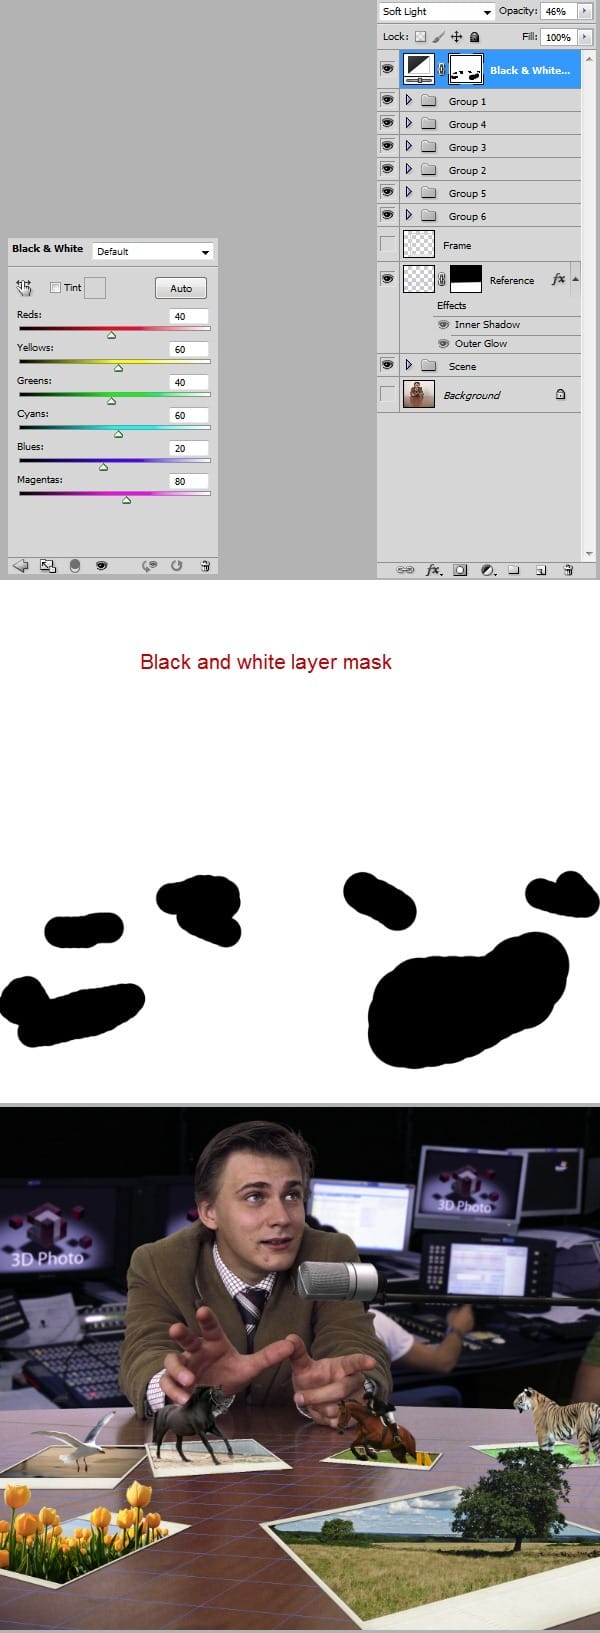
Step 30
Let’s increase the contrast of the midtones by using a Black&White adjustment layer. Use the settings shown below. We want to leave our 3D pictures intact so mask them away.

Step 31
We notice that the background it is too saturated so we will use a Hue/Saturation adjustment layer to desaturate it. We also want to increase the saturation of our 3D pictures and of our character skin so we will use a Vibrance adjustment layer.

Step 32
Let’s darken the scene a little. We will use two adjustment layers, one set to normal and one set to multiply blend mode. You will notice that I masked away the 3D pictures and the characters face so they will not be affected by the darkening .

Step 33
Now we will lighten the pictures and also the space around them. Add a curves adjustment layer and fill the mask with black. Using a white soft brush mask over the 3D pictures and the face in the layer mask. Because we are using a white brush on a black background we are revealing the effects of the curves adjustment layer only in the white and gray areas. Remember that black conceals and white reveals.

Step 34
As a final step I added a Curves Adjustment layer with blend mode set to soft light to darken up a bit the horses and the tree. Now you can turn off the visibility of the “Reference” layer.

Final Results
![image002[1] image002[1]](https://cdn.photoshoptutorials.ws/./images/stories/b8f7a1f7d6b8_10F8C/image0021.jpg?strip=all&lossy=1&webp=82&avif=82&w=1920&ssl=1)
Authors Comment
One response to “Create a Scene with Popup Photos in Photoshop”
-
Yeah Poznań blisko mam do niego


 In this tutorial we learned how to use some advanced channel masking techniques in order to acquire difficult selections. We also learned how to make a regular photo look like a 3D picture. I hope I will live long enough to see this technology becoming realityJ. You can see some of my other art deviations
Leave a Reply