

Step 10
Create A New Layer and name it ‘Lens Flare’. Using the Paint Bucket Tool, fill in your canvas with a solid black (#000000) color

Now go to Filter> Render> Lens Flare. Adjust it like so:
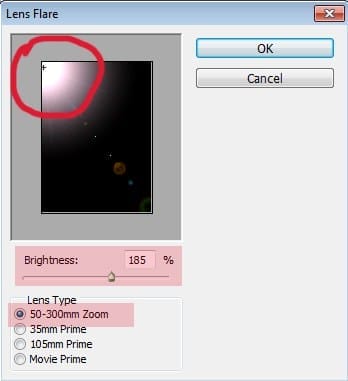
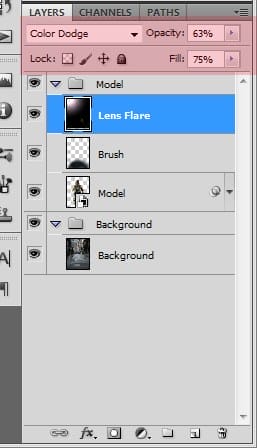
Try to position the Flare at the top Left corner of the Canvas. Then set the layer’s Blend Mode to Color Dodge with the Opacity at 63% and Fill at 75%
Step 11
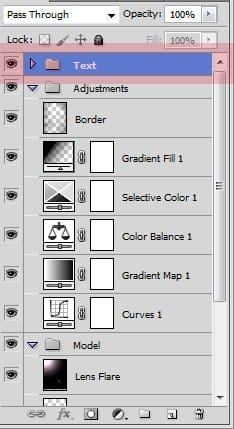
Now we move on to the coloring adjustments . Create a New Group and name it as ‘Adjustments’.

Step 12
We’ll start by trying to make the overall photo dark with Curves. Click on the Adjustments Layer Icon> Curves. Adjust it like so:

Step 13
Now use the Gradient Map to add a brown fill effect to it. Click on the Adjustments Layer Icon> Gradient Map. Adjust it like so:

Change it’s Blend Mode to Hue.

Step 14
We’ll darken the colors with Color Balance and while we’re at it give it a bluegreen-ish tint. Click on the Adjustments Layer Icon> Color Balance. Adjust it like so:

Step 15
To give the image a more darken look and change some of the colors as well, we’ll use Selective Color.Click on the Adjustments Layer Icon> Selective Color. Adjust it like so:

Step 16
To make the bottom part a darker, use the Gradient Fill, Click on the Adjustments Layer Icon> Gradient Fill. Adjust it like so:


Step 17
Create A New Layer and name it ‘Border’

Select the Brush Tool. With Hardness at 0%, Brush Opacity at 30-45% at the size of your choice, brush over all four corners of the canvas. I also brushed over his waist area and other parts near there. The parts I brushed over are shown in red:

Feel free to re-adjust the Combat Soldier’s arm (or other parts of the body) brightness if you feel that it looks weird.
Step 18
We’re almost done! Time for the texts. Create a New Group and name it as ‘Texts’
Step 19
Open a texture from the Movie Credits Texture Pack of your choice just making sure that the credits are written in white. Place it on the bottom of the canvas. Change it’s Blend Mode to Lighten.Doing so would only show the white parts and hide all the black ones.

Step 20
Time for the title. Grab your Text Tool and type in your movie’s title. ‘Fearless’ was the only word that came into my mind when I made this poster so I used that. You don’t have to use the same one as I did obviously.
6 responses to “Create an Action Movie Poster in Photoshop”
-

why i cant download psd file? :(
-
This action hero isn’t messing around! I’ve often looked at film posters and wondered what kind of work goes into them. I grew up with some classic film posters such as the original Star Wars that were painted. However, modern ones can be captivating when they use the right blend of color, positioning, and shapes. On a more technical note, can I make posters using Photoshop elements or do I need Photoshop to make one as described here? Thanks!
-
Great! Thank You.
-
http://i.imgur.com/HSBosmx.png I had fun with this tutorial .. Thank you ! But one thing was i couldn’t find the Gradient fill in the adjusment icons so i skiped the darkening .
-
Nice design
-
-
Nice tutorial
Leave a Reply