
Step 29
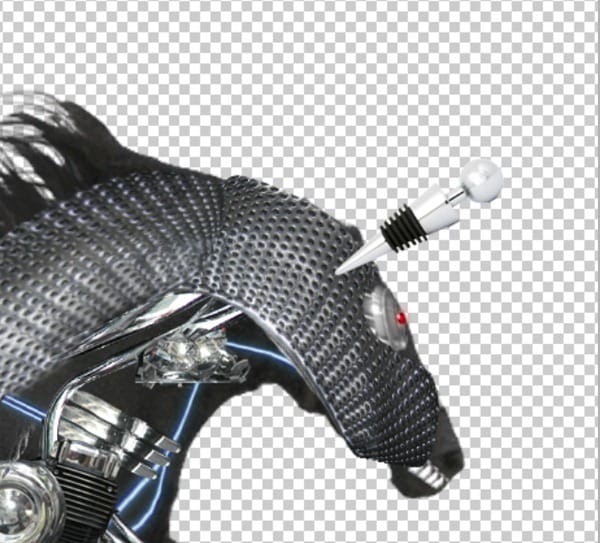
Open file “Wine Stopper” and select the object. Make a new layer from selection than copy and paste it into our horse document. Use Free Transform to position the layer like shown below.
Step 30
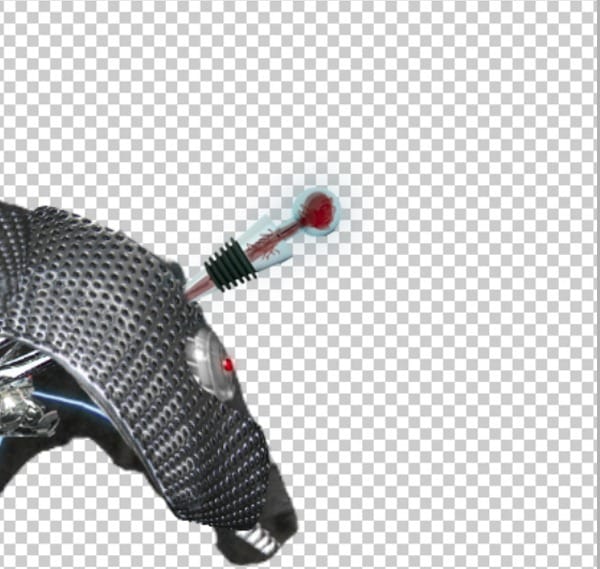
Use a light grey brush to brush inside our object then double click the layer to enter advanced blending mode and use the settings shown below. Group these 2 layers and name the group “Horn”.

Step 31
Add a layer mask to “Horn” group and mask away the horn until it looks like in the image below.
Step 32
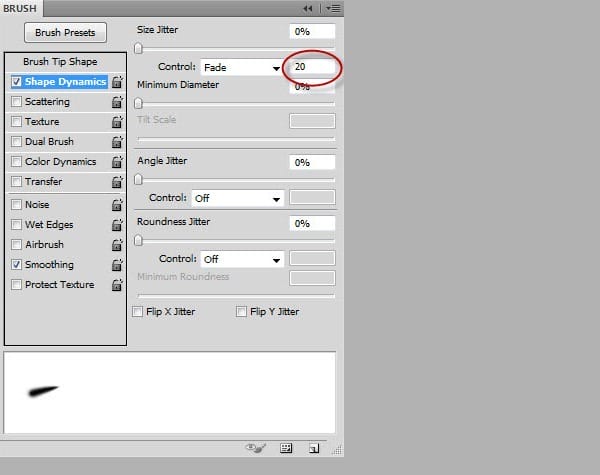
For the next steps a Wacom tablet is very helpful but you can also do a good job without it. To make the brush strokes look good we will use the Pen Tool (P) to make paths than we will select the Brush Tool (B) and press Enter to stroke the paths with the current brush ( you can also right click the path with the pen tool selected and choose “Stroke Path”). To control the way our path is stroked we will have to open Window > Brush , select Shape Dynamics, change Control to Fade and tweak the amount until our strokes look good.
Step 33
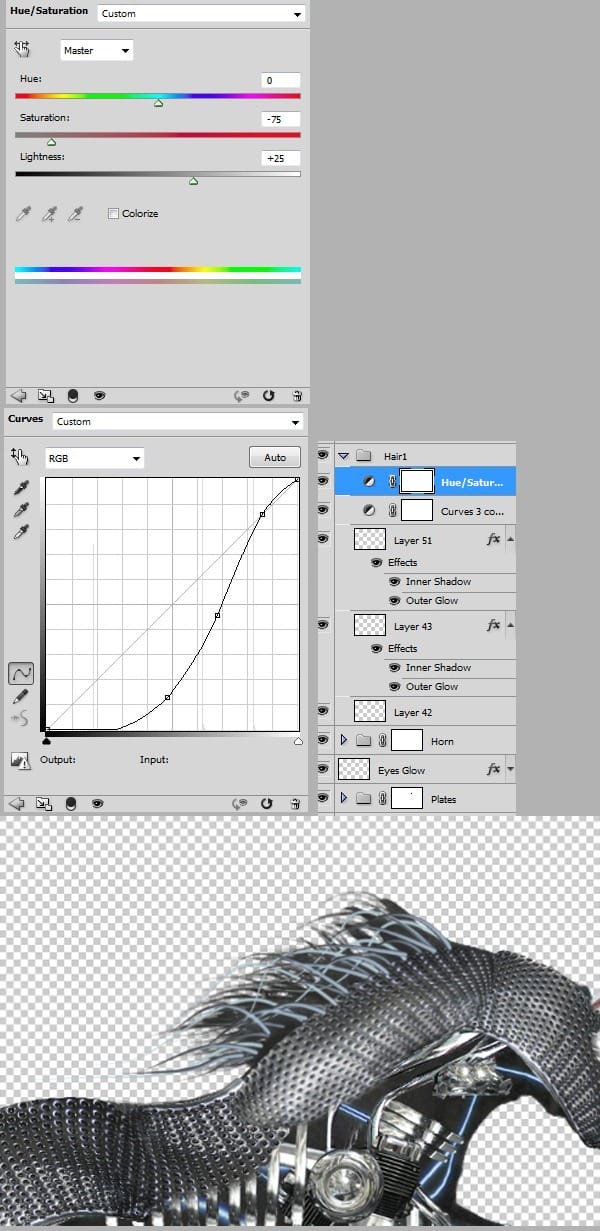
Make 3 new layers and using the technique described above make some “metallic hair”. On the firs layer the hair should be longer, on the second shorter, and on the third medium. You can vary the thickness for a better effect. Add some layer effects to the upper 2 layers like shown below.

Step 34
Add a curves adjustment layer and use the settings shown below. Add a hue/saturation adjustment layer and use the settings show below. Select the 3 “hair” layers and these 2 adjustment layers and make a group. Name this group “Hair1” and change the blend mode from Pass Through to Normal.
Step 35
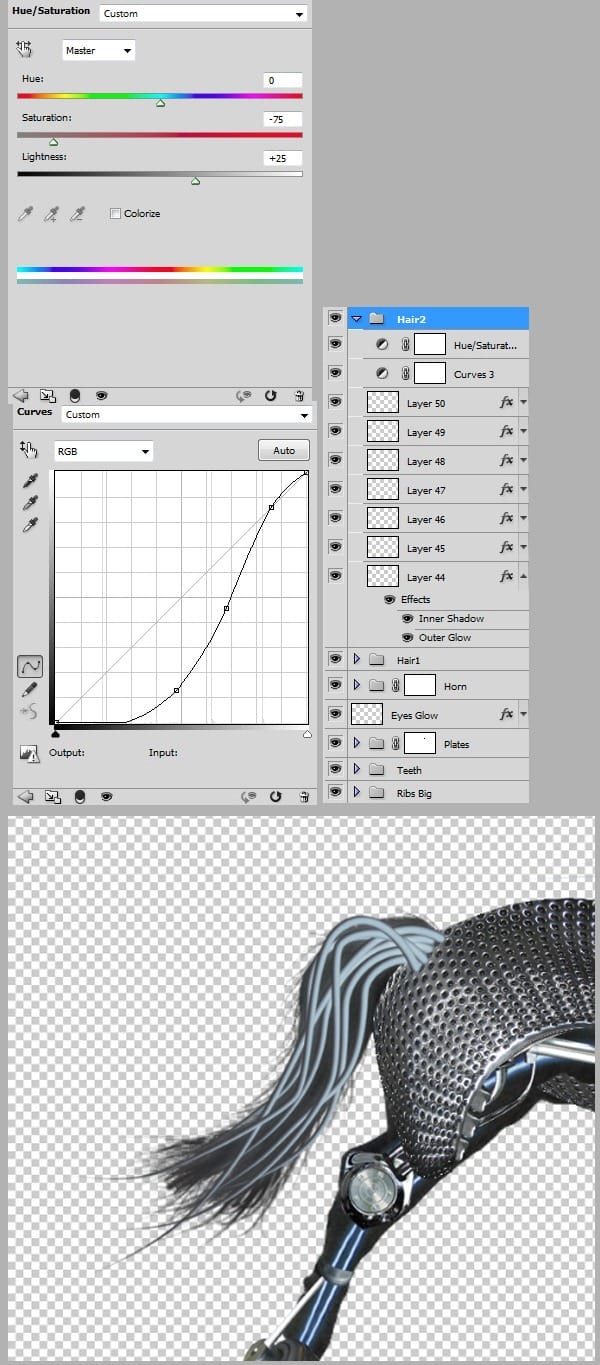
For the tail make 7 new layers and make a “metallic hair” on each. Apply the effects shown below to each layer.

Step 36
Add a curves adjustment layer and use the settings shown below. Add a hue/saturation adjustment layer and use the settings show below. Select the 3 “hair” layers and these 2 adjustment layers and make a group. Name this group “Hair2” and change the blend mode from Pass Through to Normal.
Step 37
Select “Horse” layer and make a duplicate.Choose Filter > Artistic > Plastic Wrap. Press Ctrl+I to invert. Choose Filter > Stylize > Find Edges. Lower the opacity to 35 % . Group the horse layer and the duplicate layer and name this group “Horse”. Add a layer mask and mask away the hair.
3 responses to “Create an Amazing Mechanical Horse in Photoshop”
-
Why don’t you click on next page…..?
-
why you dnt copmlete it…..?
-
it`s on the next page, just click on them shazia.x
-


Leave a Reply