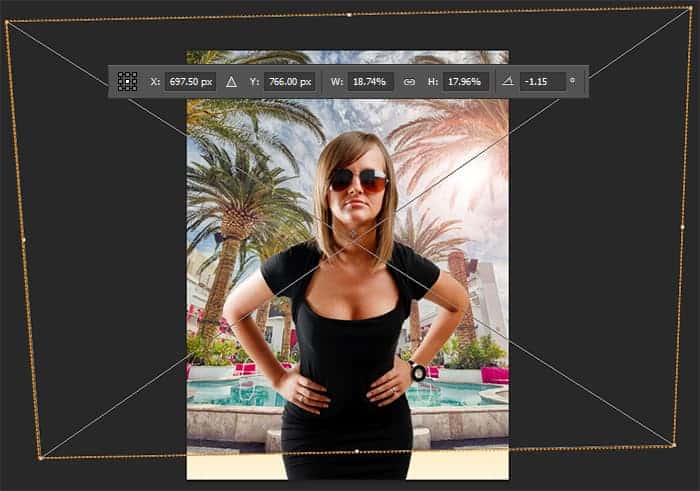
Step 5
Go to File > Place…/Place Embedded and open “swimming-pool-731886” image. With Free Transform tool (Ctrl/Cmd+T or Edit > Free Transform) resize the layer like shown in the image below. Also use Perspective Tool (right click in transform mode > Perspective) to reduce lens distortion in the image.
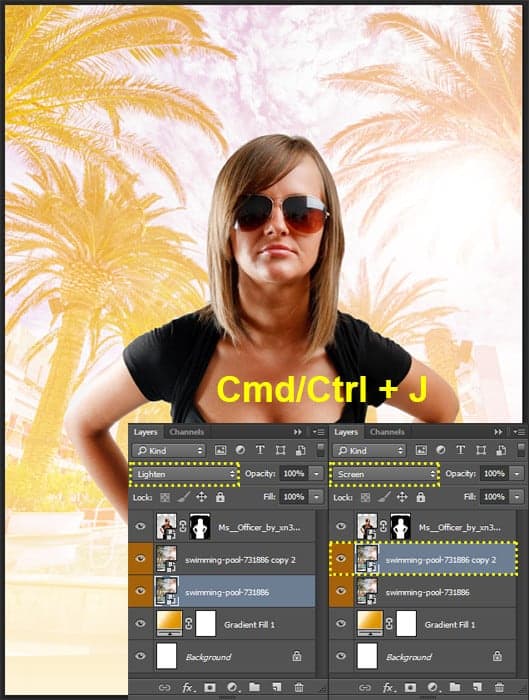
Step 6
Now change layer Blending Mode to “Lighten”. The Lighten blending mode compares the color information for each pixel of the base and the blend color and applies the lighter color as the result. Duplicate this layer (Layer > Duplicate Layer or Cmd/Ctrl + J) and change Blending Mode to “Screen”. With Screen blend mode the values of the pixels in the two layers are inverted, multiplied, and then inverted again. Using these two modes complements the first photo with missing parts from the second, thus getting a nice bright image.
Step 7
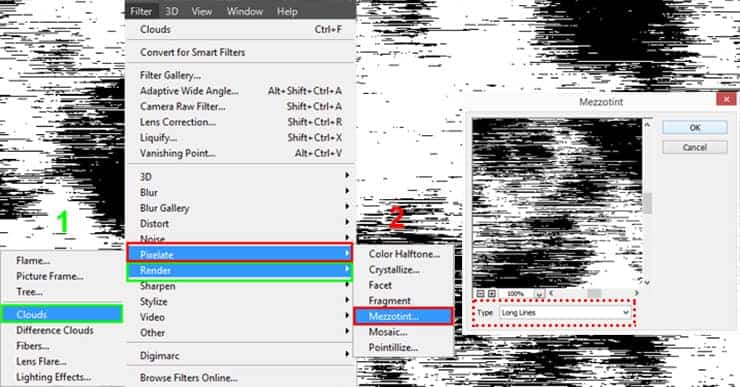
Now create the texture in the image. I think that the lines would look interesting and give poster style to the image. So, create a new layer by using “Create a new layer” icon at the bottom of Layer panel or use Cmd/Ctrl + Shift + N. Set default background and foreground colors (D). Go to Filter > Render > Clouds. On a cloud texture apply filter “Mezzotint” (Filter > Pixelate > Mezzotint…). Set Type to “Long Lines” and click OK.
Step 8
To transform the texture into lines go to Filter > Blur > Motion Blur. Set Angle: 45 degrees and maximal Distance – 2000 pixels. To lines became more evenly throughout the working field, apply the filter again via Cmd/Ctrl + F or Filter > Last Filter…(Motion Blur). Everything is good! The result was a perfect texture. You can experiment with different blur angle to get interesting results.

Step 9
Press Cmd/Ctrl + L or go to Image > Adjustments > Levels… to open “Levels” adjustment window and set for blacks: 90, midtones: 1.30 , whites: 210. This will help you to create a contrast between the dark and light lines. Now hide model layer by clicking on eye icon near thumbnail.

Step 10
Go to Tab Channels, hold Cmd/Ctrl and click on RGB thumbnail or “Load channel as selection” button to select only white lines. When you select lines go to tab “Layer”, create a new layer (Cmd/Ctrl + Shift + N) and fill selection with white color (D, Cmd/Ctrl + Del or go to Edit > Fill > Color).
9 responses to “Create a Chic Summer Style Poster in Photoshop”
-

One of the best portrait I have ever seen.
-
i like the final design, but your tutorial is confusing as fuck = /
-
Fantastic tutorial…..
-
Thank you! ?
-
I have tried to download the images which are needed to follow the tutorial and my Norton keeps blocking it saying it’s a dangerous site
-
images 404 Not Found
-
Some images are not tutorial
-
Most of the tutorial images are not showing.
-
Good !!
Leave a Reply