
Step 11
Lock transparent pixels and use Brush Tool (B) with large size around 700px, Hardness: 0% and Opacity around 50%. Use different colors from “Swathes” window to colorize lines (I use #ff4c00, #ee00ff, #662d91, #00aeef). Set layer Blending Mode to “Overlay”. Group all background layers via Cmd/Ctrl + G or do to Layer > Group Layers (except gradient layer).

Step 12
Now turn on a model layer and make selection from a layer mask (hold Cmd/Ctrl and click on layer thumbnail). Hold Opt/Alt and add a layer mask to group with background images. It is necessary that the background is not working on a model when we add effects.

Step 13
Now back to the model. Probably you were looking forward to this part. Keep an eye out for my actions and a little experimentation will help you discover in this picture has some interesting variations. So, for now hide all except model layer. Go to Select > Color Range… Set Select to “Shadows” and Range: 10, Fuzziness: 25%.

Step 14
Duplicate selection from a model layer (Cmd/Ctrl + J) and hide this layer. Go back to the model layer, again go to “Color Range” and set Range: 0, Fuzziness: 3%. Duplicate selection and move this layer over the previous in a layer stack. Repeat this process a few more times with different values to get almost full range image. I used 8 layers to create result like in image below. Do not worry if some parts are missing. This is part of the visual image.

Step 15
Hide original model layer and let deal with each layer. For dark layers (shadows/midtones) set layer Blending Mode to “Overlay” and “Screen” for light tones. Lock transparent pixels on each layer. Take a Brush Tool (B) with settings – Size: 500px, Hardness: 0, Opacity: 50%, colors: #0072bc, #92278f, #39b54a. Paint only on “Overlay” layers to create color tint.

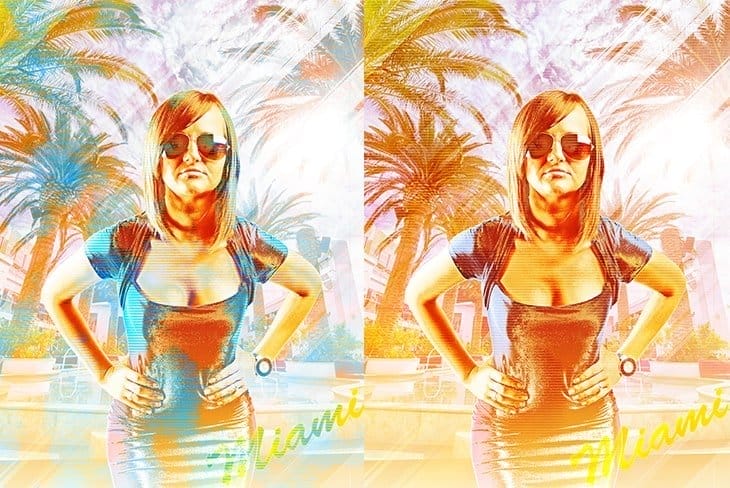
Step 16
To create a brilliant texture of the dress change Blending Mode for the layer of Step 13 to “Divide”. Now you have a choice of what to do next. The first option is to leave model as is and continue to effect or you can turn on the original model layer and set Opacity to 73%, Fill to 40%. These are two different types of model. It is a creative process and what colors you will use it’s only your solution. Next in tutorial, I will continue with the original model layer turn off.
9 responses to “Create a Chic Summer Style Poster in Photoshop”
-

One of the best portrait I have ever seen.
-
i like the final design, but your tutorial is confusing as fuck = /
-
Fantastic tutorial…..
-
Thank you! ?
-
I have tried to download the images which are needed to follow the tutorial and my Norton keeps blocking it saying it’s a dangerous site
-
images 404 Not Found
-
Some images are not tutorial
-
Most of the tutorial images are not showing.
-
Good !!
Leave a Reply