
Step 17
Group all layers with a model (Cmd/Ctrl + G) and duplicate it (Cmd/Ctrl + J). Merge the resulting copy (Cmd/Ctrl + E or go to Layer > Merge Layers). Change Blending Mode to “Overlay” and Fill to 70%. If you decide to leave the original layer with the model simply go to next step.

Step 18
Duplicate merged model layer two times and convert each layer to Smart Object (right click on layer > Convert to Smart Object). Go to Filter > Other > High Pass… Set Radius to 10 pixels. This layer is increase the sharpness of detail and show even the smallest details.

Step 19
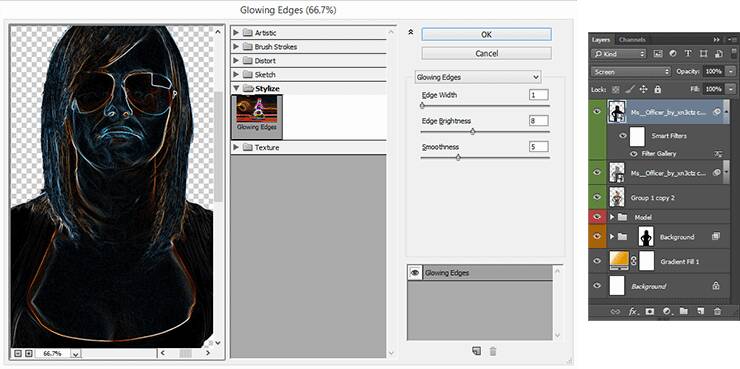
For a top model layer add a filter “Glowing Edges” from Filter Gallery (Filter > Filter Gallery > Stylize > Glowing Edges) with settings Edge Width: 1, Edge Brightness: 8, Smoothness: 5. Set layer blending Mode to “Screen”. This layer is to create a glowing edge of the image, which is very good showing the effect of drawing. With similarly effect works filter “Find Edges” (Filter > Stylize > Find Edges) only the outlines will be dark. In case of this filter you should use “Multiply” Blending Mode.
Step 20
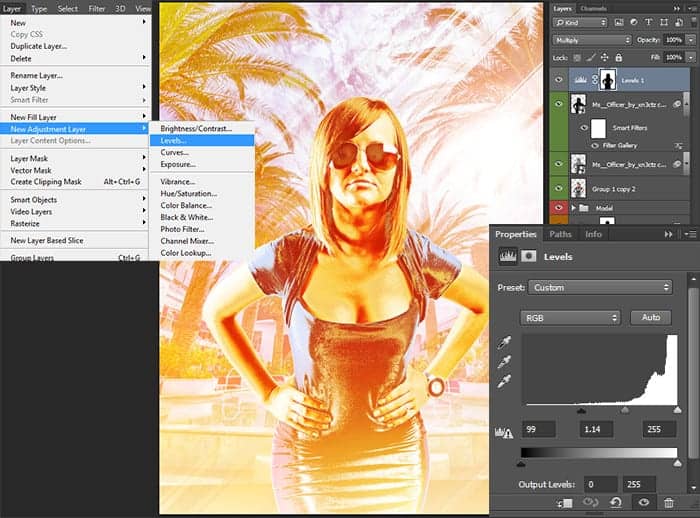
Add a bit of contrast in a picture. Go to Layer > New Adjustment Layer > Levels… or use “Create new fill or adjustment layer” icon at the bottom of Layer panel. Set Blacks: 99, Midtones: 1.14, Whites: 255. Change layer Blending Mode to “Multiply”. Hold Opt/Alt and drag the layer mask from “Background” group on an adjustment layer so as not to affect to the model.
Step 21
Now play around with color. In this step, you can open three possible tinting of the image. Create a new adjustment layer “Gradient Map” (Layer > New Adjustment Layer > Gradient Map…) below “Model” group. Set up gradient #030303 > #0c0b0b > #3a3732 > #77736a > #92b9cc > #cfe0e8 > #fcfcfc.

Step 22
Click on adjustment layer mask and go to Filter > Render > Clouds. Now we need to make contrast clouds. Press Cmd/Ctrl + L or go to Image > Adjustments > Levels… to open “Levels” adjustment window and set for blacks: 105, midtones: 1, whites: 120. Need a good contrast to create areas with color.
9 responses to “Create a Chic Summer Style Poster in Photoshop”
-

One of the best portrait I have ever seen.
-
i like the final design, but your tutorial is confusing as fuck = /
-
Fantastic tutorial…..
-
Thank you! ?
-
I have tried to download the images which are needed to follow the tutorial and my Norton keeps blocking it saying it’s a dangerous site
-
images 404 Not Found
-
Some images are not tutorial
-
Most of the tutorial images are not showing.
-
Good !!
Leave a Reply