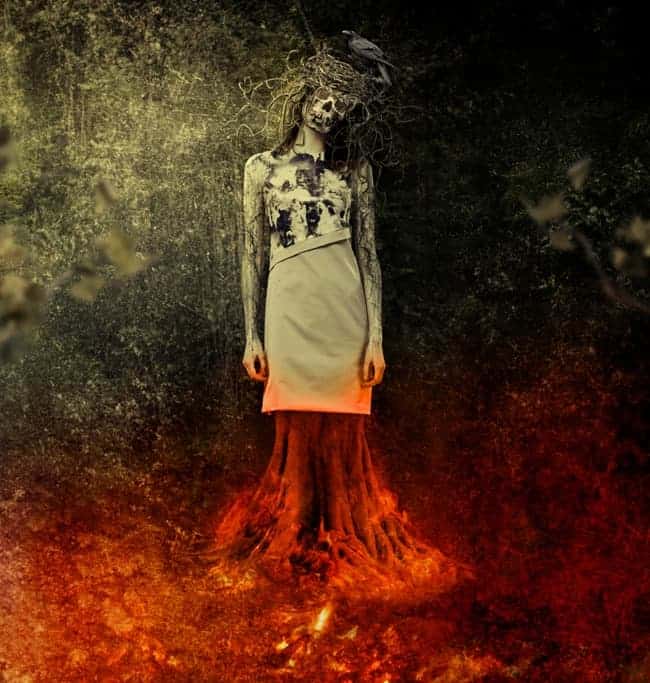
Want to create something creepy in Photoshop? Then try out this tutorial by Jenny Le. In this tutorial, you’ll learn how to create an abstract scene that features a creepy flaming tree-woman. You will learn various manipulation techniques such as creating lighting effects and applying textures.
Preview of Final Results
Tutorial Resources
- Model
- Skull
- Texture
- Forest background
- Fire background
- Tree
- Branches 1
- Branches 2
- Nest
- Crow
- Wood texture
- Vines
- Fire
Step 1
Create a new document with size of 1000×1050 px and fill it with white (feel free to use your own size and color). Open texture image. Use Move Tool to drag it into our white canvas, take Free Transform tool (Cmd/Ctrl+T) to lower the size to 40%:

Step 2
I don’t like some details on the texture so I make a new layer (Cmd/Ctrl+Shift+N), active Clone Tool (S) and remove them:

Step 3
Place forest stock onto the texture and change the mode to Soft Light 100%:

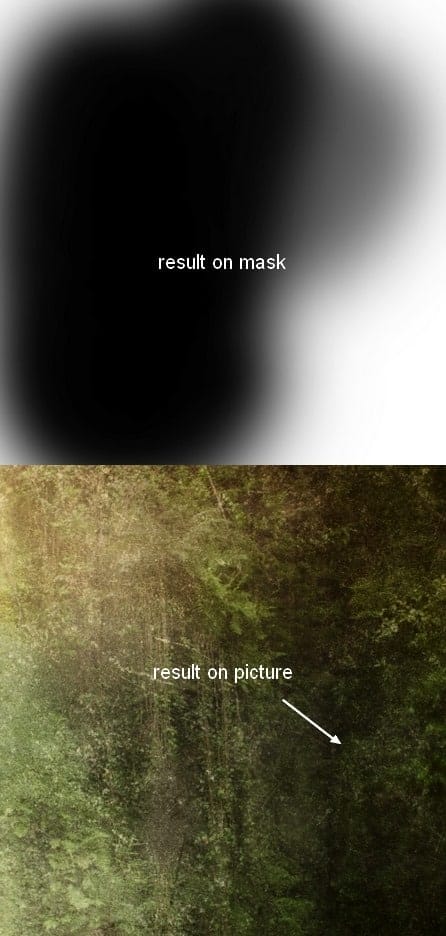
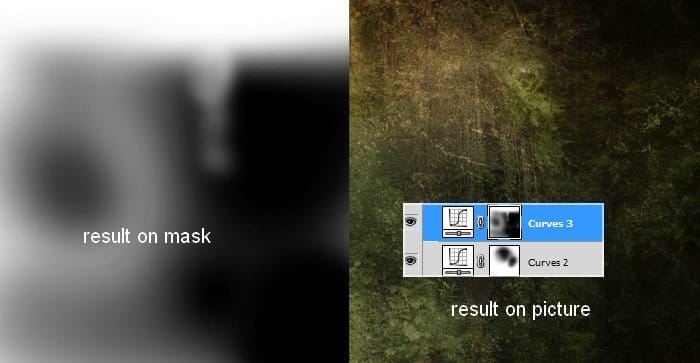
Click the second button at the bottom of Layer Panel to add mask to this forest layer. Use soft black brush with opacity from 30-70% to blur some parts on it. You can see how I did it on layer mask and result on picture:

Step 4
Duplicate this layer and flip it horizontally (Edit-Transform-Flip Horizontal). Move it to the right then use layer mask to remove hard edges:
Step 5
To edit all forest layers together, make them selected then hit cmd/Ctrl+G to create group for them. Change the mode of this group from Pass Through (default group mode) to Soft Light 100% (it’s very important to keep the same effect as before grouping). I name these layers “1” and “2”.
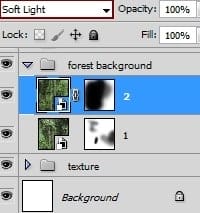
On 2 layer, go to Layer-New Adjustment Layer-Curves:

On Curves layer mask use soft black brush with varied opacity to erase or blur some parts:

Because the mode of this group changed to Soft Light 100% (no Pass Through) so this Curves layer only affects the layers inside this group (forest ones).
Step 6
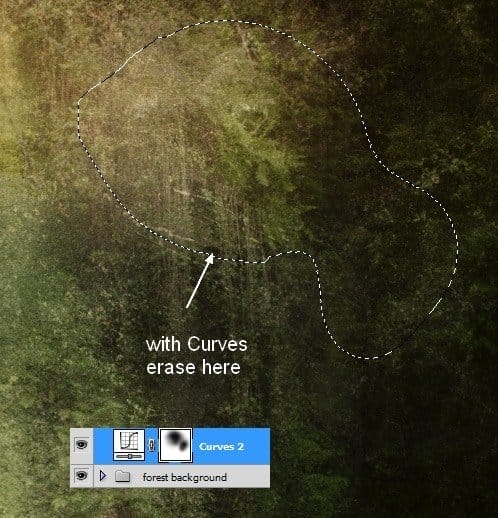
To change the lightness of the background (texture, forest) I make a Curves layer on the top:

Use black brush to clear selected part shown in the screenshot:
Make another Curves layer to continue darkening the background. Try brushing on the layer mask to get similar result below:

Step 7
Extract model and place her at the top center (I didn’t take the legs as we don’t need them):
19 responses to “Create a Chilling Abstract Using Photos and Textures”
-
good
-
Nice tutorials
-
Awesome tutorial. I like to do composites that are similar to this, but my process is a bit longer. I think you just showed me a few shortcuts, which is nice!
-
Wow! Very good! Thanks you very much.!!
-
Wow.
-
I believe the purpose is not to have you use the same photo at all. It simply shows you how to do the effects, and you can then choose your own photos to edit.
-
Absolutely beautiful works.. This is what called “Creativity”.
-
Very good.
-
But you can download the PSD file and there are the stock images
-
WHAT exactly is the purpose of trying to have us follow a tutorial with stock images that are not free?? Are we expected to purchase them JUST for the purpose of following this tutorial? I’m confused.
-
Try to understand it from the writers view. I wish everything is free but bot everything is free on the web and often times the photos needed are not available free. The way I see tutorials is learn… but don’t copy. The tutorial appears like it can be completed with a different model picture. Find a model picture on DeviantART or use Google.
-
I m Agree jordan sir.
-
You don’t have to use the photo they linked to. There are plenty of free stock photos and they work on this tutorial. The point is to learn not to copy.
-
-
Good tutorial. Only downside is you have to pay for the model’s picture.
-
check the PSD ;)
-
-
I like this effect but
-
too much photo-manipulation tutorials
-
didnt help
-
good


Leave a Reply