
Step 8
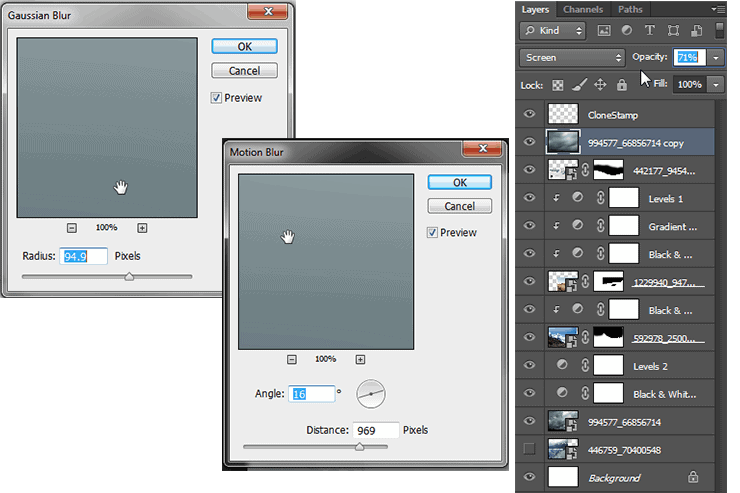
Lets catch up a little here about our layers. Working with so many can get confusing quickly so now would even be a good time to group layers together and color code them (as I’ll do later in the tutorial) to do that just Shift select the layers you want to group and press Control + G or Command + G on mac, also available in the right click drop down. As you can see I also have a layer called Clone Stamp on top, this is the layer I used to brush out the small guy in front of the rock bridge. A tool thats pretty simple to use and a quick Google search will let you know everything you need! Lets give our landscape a background sky and some atmosphere, we can accomplish both with one photo in fact! Grab the Clouds stock photo and bring it in both on bottom and on top (as you can see in my layers below. The bottom one we’ll just throw a Black and White and Levels adjustment layers on there (both set to auto). As for using it as atmosphere you’ll have to rastersize the layer (Right click > Rastersize) and then go and do Filter > Blur > Gaussian Blur and Filter > Blur > Motion Blur with the settings below. Setting the layers blending mode to screen and lowering the opacity will give us a really organic and natural haze. It really should be barely noticeable but it will ad a sense of realism to the piece as a whole.
Step 9
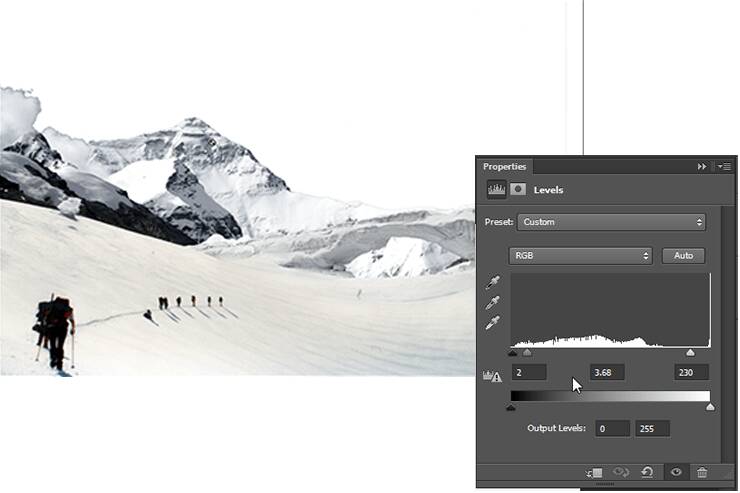
I also want to add a sense of distance and scale to the mountain in the background but a little more intensely than the little haze we just did. So I actually took a brush with about a 20% opacity and started drawing out the mask so we can see though to the background a little bit. If you keep doing this you can get results like below where it will actually look like the clouds are coming in front of the mountain, adding a real sense of scale to the image. For the sake of the composition I also flipped the mountain horizontally and adjusted it levels so it matched the lighting in that part of the clouds as you can see below. Use this as reference before moving ahead to make any adjustments you’d like.
5 responses to “How to Create a Cinematic Snowy Mountain Crash Site Scene in Photoshop”
-

some pict are missing
-
this is boring
-
Some links of the images are down…
-
It is professionnel
-
is there any tutorial for it ? i will try for sure .
Leave a Reply