Brush size: 400px
Hardness: 0%
Opacity: 40%
Flow: 100%
Color: #000000
Now paint over the highlighted area.

The result should be similar to this:

Step 10
Now we will add some fur to our wolf.
So first change the color of background to any dark color so we can easy see our furs.
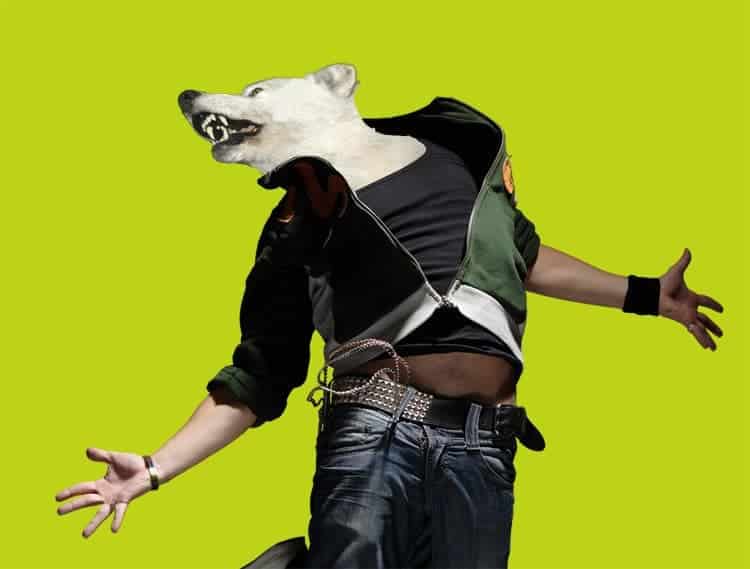
Now use fur brush which we have downloaded.See as below
Use ink drop tool to select the color tone of wolfs hair.

Have patience and work as much as you can over this particular step because it will improve your digital painting skills.
The result should be similar to this:

Step 11
Now merge wolf and dancer layer and drag them to our main canvas and name the layer “wolf fancer”.
As you can see i have further worked on our wolf by adding different color tones you can also expriment with the color tones and the leanth of the fur.

Now add a vector mask to our wold dancer layer and use 15 grunge ps brushe to hide some of it’s areas.

The result should be similar to this:

Make a duplicate of wolf layer and change it’s layer mode to “Multiply” and opacity to 65%.

Step 12
Now open Space texture which we have downloaded.

Change it’s layer mode to “Screen”.
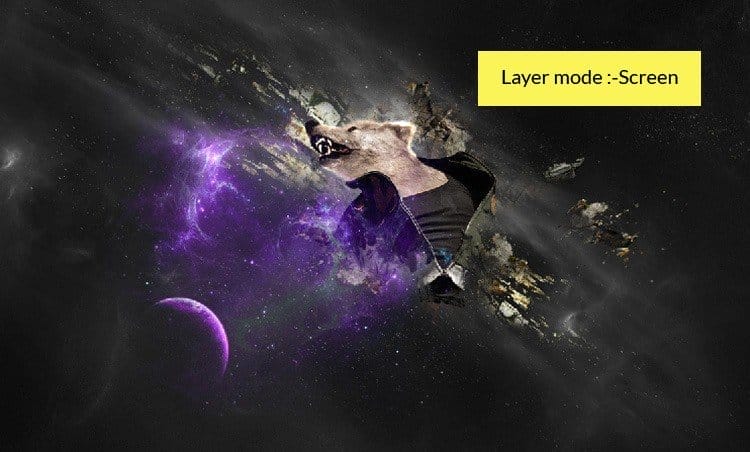
Make a duplicate of space texture and move it to the right.See as below :

Step 13
Now we are going to set the atmosphere or you can say mood of our scene.
Note this these few adjustment layer are going to be on the top of every layer.
So first create a Selective color adjustment layer which can be found by pressing on the Create New Fill/Adjustment layer button shown on the layer window:
When the Selective color box opens, input the following:
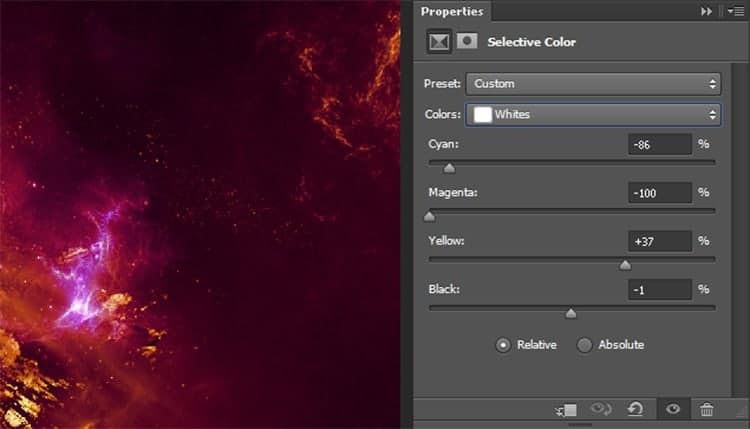


The result should be similar to this:
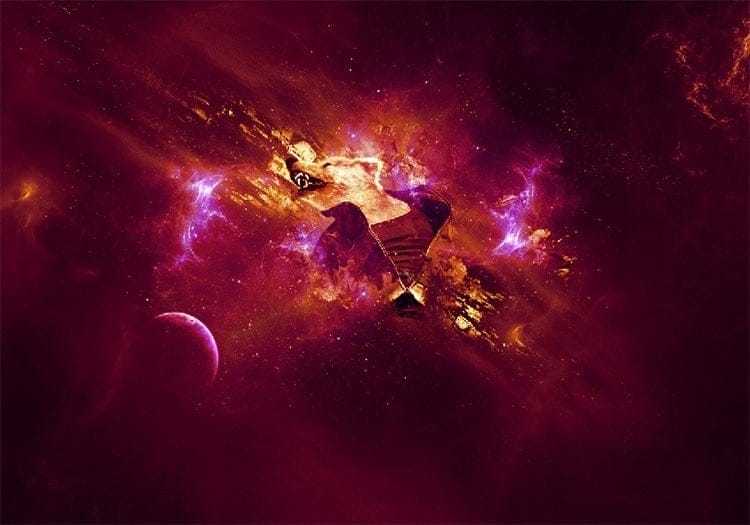
Step 14
Now select the mask of selective color layer.
Now activate Brush tool (B) with these settings :
Brush size: 400px
Hardness: 0%
Opacity: 40%
Flow: 100%
Color: #000000
Now paint over the highlighted area.

The result should be similar to this:

Step 15
Now create a color balance adjustment layer which can be found by pressing on the Create New Fill/Adjustment layer button shown on the layer window:
When the color balance box opens, input the following:

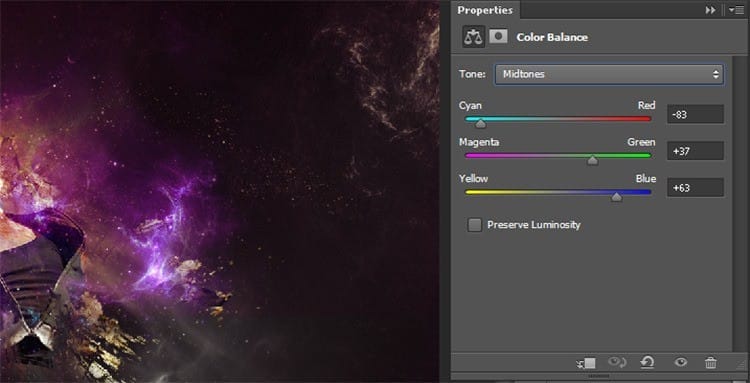
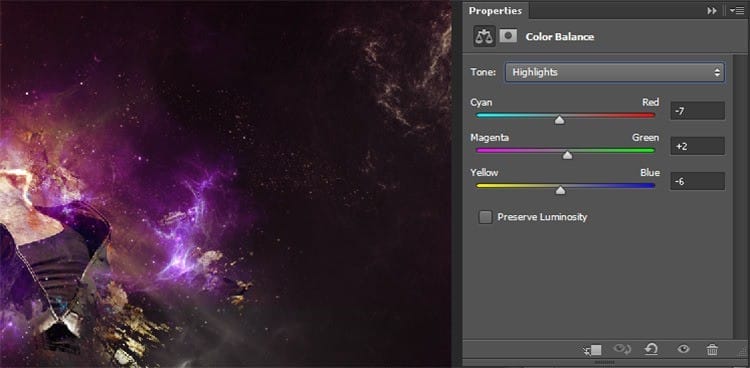
The result should be similar to this:
3 responses to “Create a Dynamic Night Club Poster in Photoshop”
-
wow.. Fantastic steps.. I really like it. keep up :-)
-
Wonderful tutorial..Thanks for sharing
-
Thank you for the feature :)


Leave a Reply