

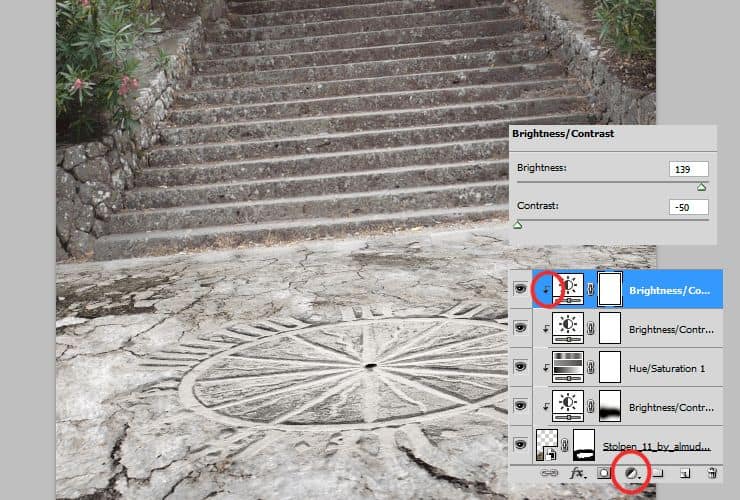
Step 11
At the end, add again Brightness/Contrast adjustment layer. Right-click on adjustment layer and choose “Create clipping mask” (Alt+Ctrl+G or Layer > Create Clipping Mask).
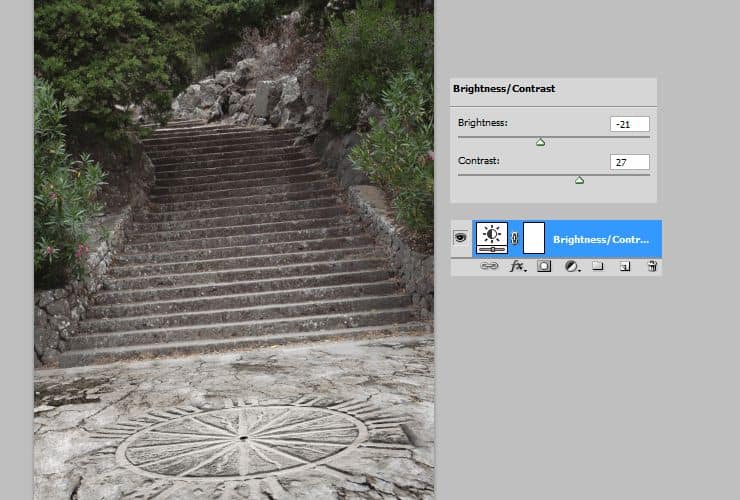
Step 12
Adjust whole background. Add Brightness/Contrast adjustment layer.
Add again Brightness/Contrast adjustment layer. Then, by using mask (white canvas next to layer thumbnail) and soft, big brush erase first plan of background.

Add some colors. Add Color fill adjustment layer (Layer > New adjustment layer…) and set color of fill to #18bc7c. Then, change blending mode to Pin light. Decrease opacity around 40%.

Duplicate color fill layer. Drag it and drop to “New layer” symbol or go to Layer > Duplicate layer…. Change blending mode to Hue and decrease opacity to 80%.

Add again Brightness/Contrast adjustment layer. Then, by using mask (white canvas next to layer thumbnail) and soft, big brush erase last plan of background.

Duplicate this layer (Layer > Duplicate layer… – or drag and drop it to “New layer” symbol) and change duplicated Brightness/Contrast, by clicking on it twice. Decrease brightness. Then, decrease opacity of this layer to around 40%. By making this step you can simply duplicate layer and layer mask without repeating all steps.

At the end, you should mark ligher parts on the picture – here: small dot on ground, where fire will glows. Add Brightness/Contrast adjustment layer (Layer > New adjustment layer…) and set it as is shown. Then, mask part which should be lighter. Use soft round brush.

Step 13
Place model stock. Drag it from folder and drop to your file. Use hard round brush to mask details and body shape.

Step 14
Erase leafs on feet. Add new layer. Right-click on layer and choose “Create clipping mask” (Alt+Ctrl+G or Layer > Create Clipping Mask). Use clone stamp tool and erase leafs. Click with alt to make source, then click where leafs are.

Step 15
Add new Hue/Saturation layer (Layer > New adjustment layer…). Right-click on adjustment layer and choose “Create clipping mask” (Alt+Ctrl+G or Layer > Create Clipping Mask). You’ll decrease saturation of bottom part. Let’s mask top part of the canvas, by soft round brush wih dynamic opacity.
8 responses to “How to Create a Fantasy Photo Manipulation with Fire”
-

thanks for an awesome tutorial. wish i could post what i made of it on here :(
-
The end result is nice, but waaaay too many layers!
So sick of making layers… Need to find better methods.
Thanks. -
why u dont use Photoshop cs6 for this tutorial? It’s hardly to understand while Im using CS6
-
Link of ”Grunge map” had died. I dont understand step 4, how to do it ??
-
Diego Armando
-
link to Grunge maps Weird 0001 2 (L) cgitextures is broken. Tree sidebar PNG is a pay file. Love your tutorial. Thank you
-
amazing
-
Nice
Leave a Reply