
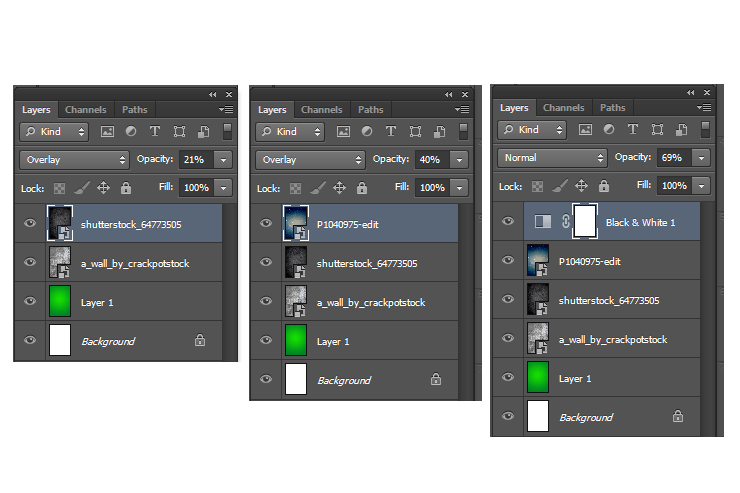
Step 5
Now that we’ve got our background all grouped up and organized its time to bring in the main subject. Depending on what you chose to use this part will be a little different but the process is the same. We’ll be using the pen tool to define our shapes the filling them with color by closing the shape and right clicking then selecting fill path. That will bring up the menu below where you’ll want to change the contents section to COLOR and select the color you want from the color picker. Remember to make all new shapes on new layers, with something like this you can end up with a lot of layers so its important to stay organized with groups and proper names (I.E. “body” “wings” and so on) and then even further you can group all these groups into one called “Bird” or whatever you’d like to call it. This will play a role later in getting a blending style over the subject as a whole.

Step 6
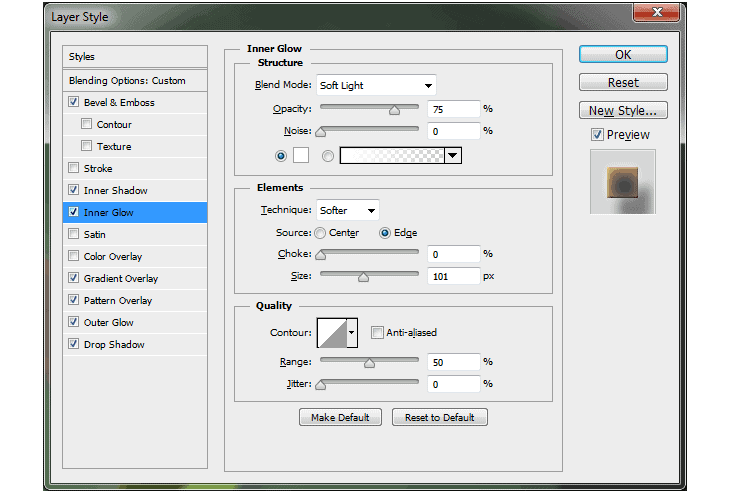
So here we find ourselves with the subject all shaped out with with each shape in its own layer. Now we can group all the layers and groups for the subject into one group, I called mine “HummingBird”. Now what we’re going to do is apply an overall style to the subject as a whole by right clicking on your main group and clicking on Blending Options. Any styles we put in here will effect the group as if it was all one object rather than individual layers, very useful for giving the whole thing a drop shadow and the orange around the edge. Below you’ll find all the settings I used, play with them a little bit and see what you can come up with!


Step 7
Now it may not look like much right now but its getting there! This next step will really pull it together and you’ll get an idea of how its coming together! We’re going to select any of the individual shape layers and apply the following settings in blending options. I usually go with the biggest shape so I can see how my settings look clearly as I apply them. When you’re happy with your results we’re going to apply it to the rest of your shape layers by right clicking on the layer you’ve applyed the style too and clicking COPY STYLE. Then we can right click on our shape layers and PASTE STYLE. Make this quicker by highlighting multipe layers at a time and pasting. (The pattern overlay here is entirely optional if your comfortable making your own patterns and bringing them into photoshop, a quick google search will show you how to do this)12 responses to “Create a Textured Bird with Smoke in Photoshop”
-

wow
-
The pictures are missing
I really want to try this
-
Fixed thanks for letting us know!
-
-
awesome.. easy learning for beginer level like me, thanks
-
It‘s cool!
-
beautiful work , but the author did not want to explain how to do it sensibly . he just wanted to show off his beautiful work
-
Estupendo trabajo. Muchas gracias
-
Thanks everyone! Another coming soon!
-
Amazing work, simple and elegant
-
Aya Ahmed Mahmood
-
Great tut! Keep ’em coming, Jacob.
-
yes its really nice work
-
Leave a Reply