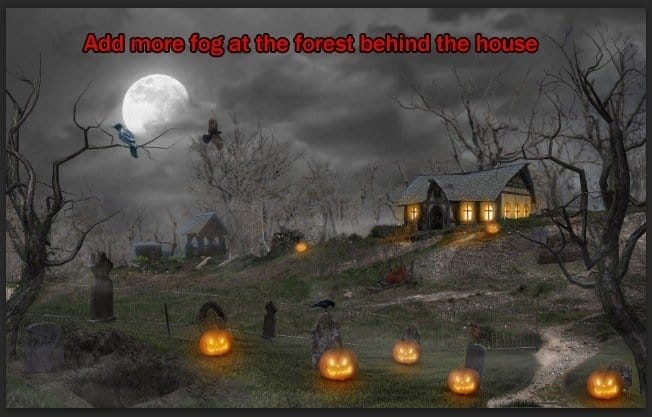
Step 28
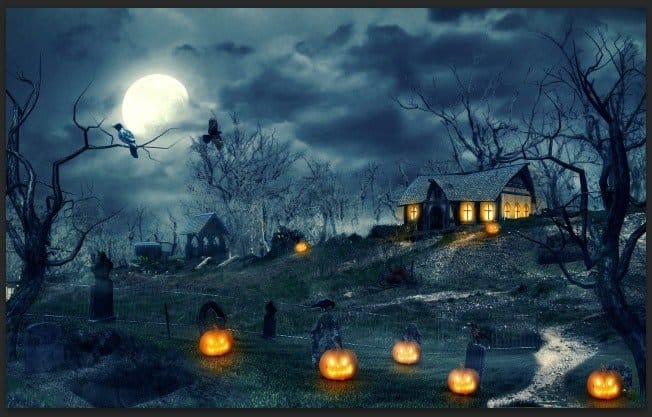
We’re almost done! Its time for some color tuning! Apply these chain of adjustment layers for the whole image.
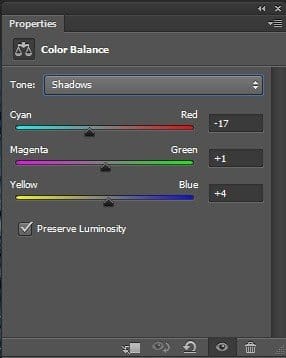
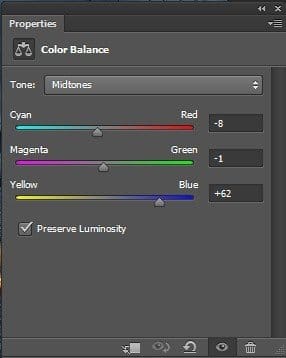
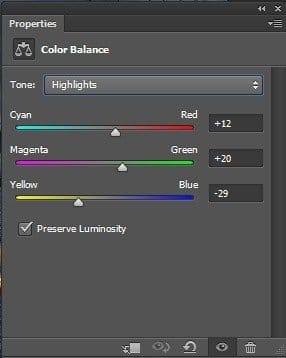
Step 29
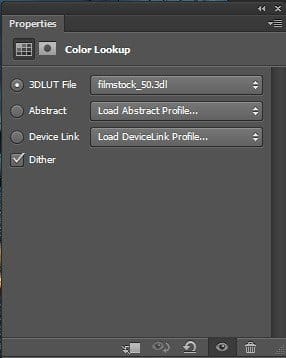
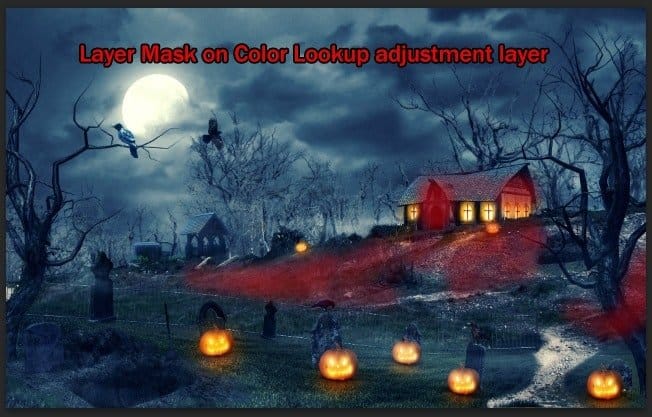
I use Color Lookup with “filmstock_50.3dl” to drastically shapern up the image. Color Lookup provides variety of color tuning effects to use in many situations. Reduce the Opacity to 60% and also apply some Layer Mask.
Step 30
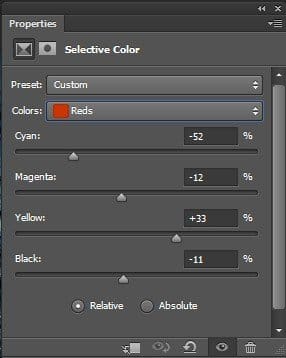
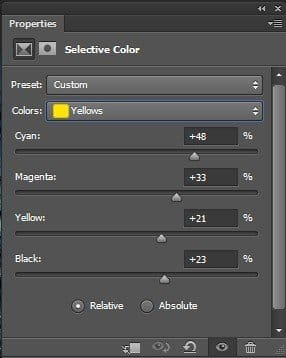
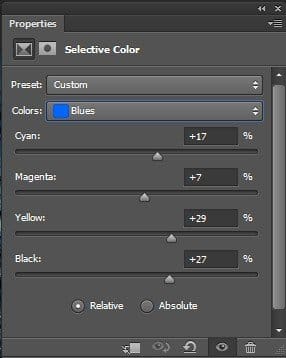
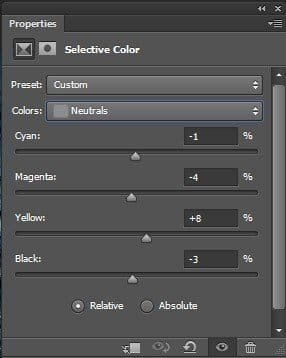
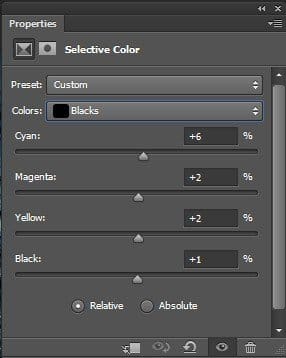
Continue tuning the color with Selective Color. Drop the Opacity down to 80%.
Step 31 – Where is the bats ?
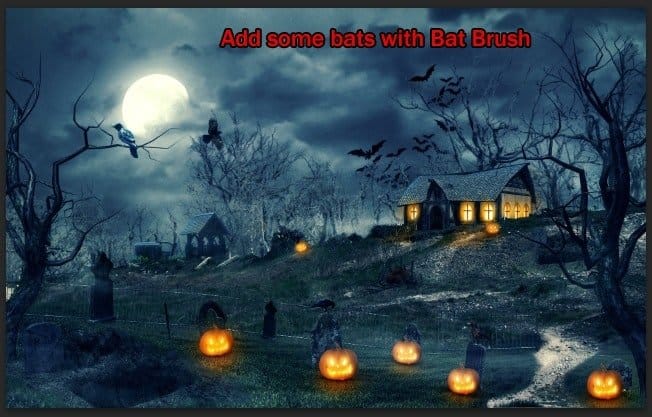
Oops we almost forget about our bats! Open the Bat Brush and paint some bat like this.
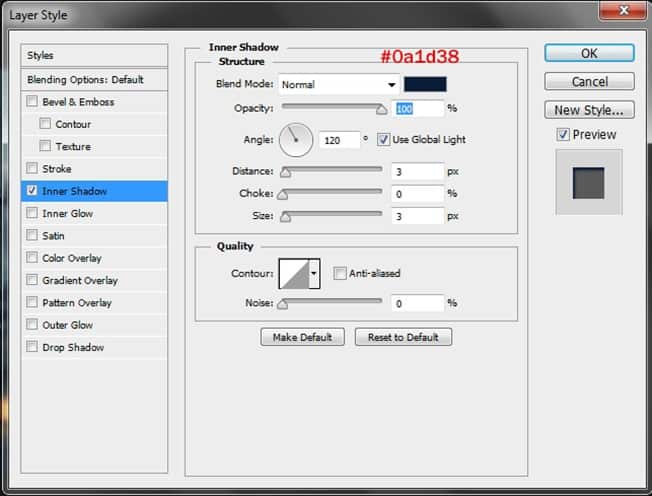
Apply a little change on Blending Option.
And the bats are in the party!

Step 32
Apply one last adjustment layer for our image : Brightness/Contrast
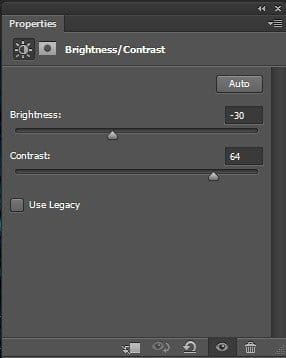
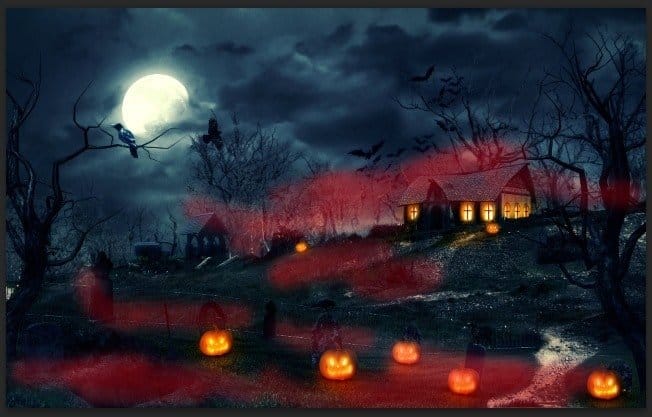
Layer Mask on the Brightness/Contrast adjustment layer.
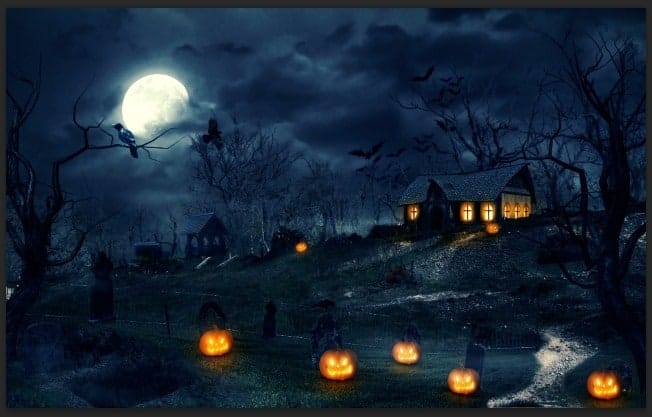
Step 33
Just a little change and we will finish this piece. I recommend you save your working file now then merge everything into one image. You can do so by right click on any layer and choose Flatten Image.
After that, duplicate the image and apply some Gaussian Blur.
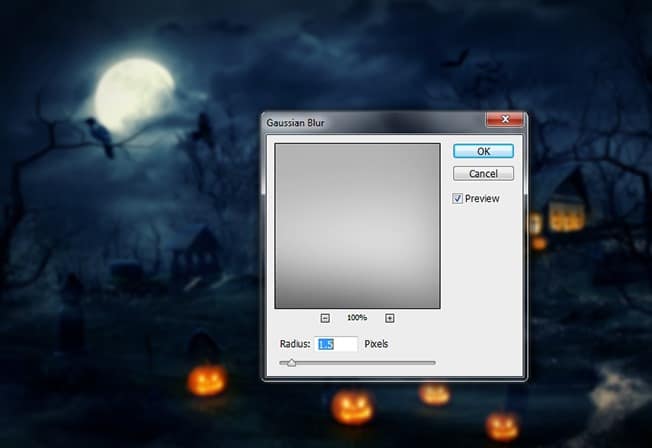
Layer Mask
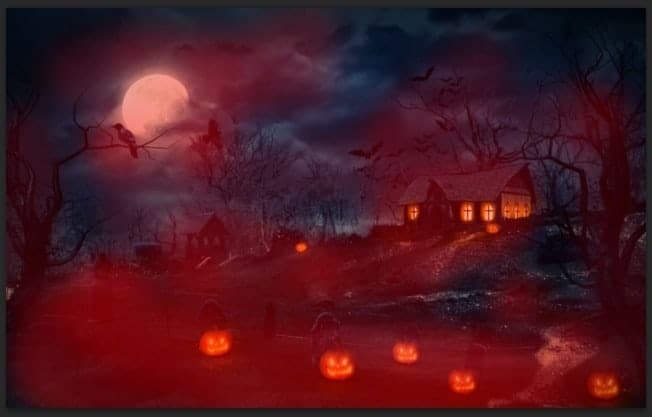
Step 34
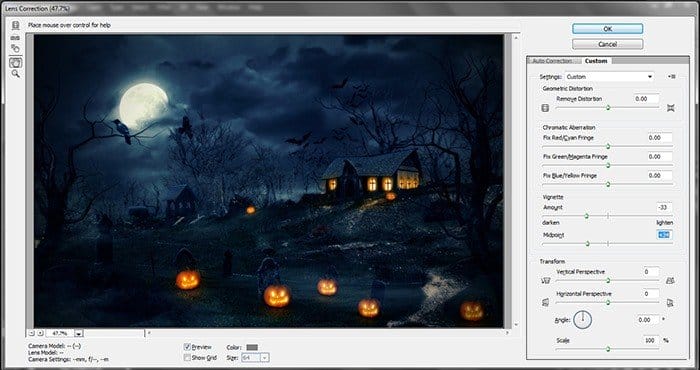
Now hit Ctrl + Shift + R to open up the Lens Correction panel, adjust the Vignette a little bit.
Final Results
![result[1] result[1]](https://cdn.photoshoptutorials.ws/wp-content/uploads/2013/10/result1.jpg?strip=all&lossy=1&webp=82&avif=82&w=1920&ssl=1)
Download the PSD
[vc_column width=”1/1″ el_position=”first last”] [vc_cta_button title=”Download” href=”https://downloads.photoshoptutorials.ws/Hallowed Night.zip” color=”btn” size=”btn-large” icon=”none” target=”_self” position=”cta_align_right” call_text=”Hallowed Night.zip | 71.8 MB” width=”1/1″ el_position=”first last”] [/vc_column]
Tutorial by Antaka Nguyen
21 responses to “Create a Halloween Photo Manipulation in Photoshop”
-
There are about 3 links that don’t seem to work for me. I can’t seem to know why for example the house. Even the link that Henk posted doesn’t work for me. Very confused and worried as I have to finish a project.
-
Thanks for sharing such informative post its help me to know deeply Photoshop work step by step.those are very useful for me! :)
-
These are beautiful designs! Typography can be so powerful.
-
Best tutorial, great skills!!! Tanx
-
Lovely ANTAKA. Thnkz fr your Tutorial. It really Impressive.
-
mais comment entre sur le prgrame :'(
-
Great tutorial!! However I need some help on Step 18. I am not familiar with using the Perspective tool and I can’t get it to conform to the landscape. Can you give us some tips on how to do this?
Thank You
-
Thank you so much Antaka.
-
I have reahed the stage of lighting the windows in the witch house, I make a new layer and use the pen tool to draw around the window but I cant replicate the yellow light that is supposed to be emmited. I follow the instrutction to the letter and have tried many times. I also dont have the red colour with the brush tool when applying masks. Please help :(
-
Hi Jules,
After you’ve finished drawing with pen, just right click on the draw path and choose Fill Path, you should be able to fill with drawing path with the color in the tutorial provided.
Also, the red color in the layer mask is just a sample for better visual view, its actually the black color you use when masking.
Let me know if there’s anything more you want to know, contact me via my email : [email protected].
Best,
Antaka
-
-
can i have a download link to the full completed photo shop of this project i need to show my class
-
LOL I think I know what class you’re talking about.
-
-
awesome photo manipulation
-
thank you for sharing!!
-
Where’s the link to the witch house?
-
Hi Steve,
Sorry for the mistake, here’s the link to the Witch House stock :
http://atknebula.deviantart.com/art/HOUSE-07-03-328360230
Thanks for pointing out!
-
Post updated. Thanks for the link!
-
Found the house.
For all who is searching for the house:
http://www.deviantart.com/art/HOUSE-07-03-328360230
Hey this is a cool tutorial whitch I am trying to do aswell.
But where can I find this witch house?
Thanks
It seems like you forgot to include the Witch House in the tutorial resources.
Thanks for all the great tutorials!
perfect~~


 Thanks for reading and following my tutorial. Hope you guys can learn something from it and I would love to see your outcome. For any question about this tutorial or just simply want to see my works please check out my
Leave a Reply