
Step 17
Open file “Circuit2”, press Ctrl+A to select all, Ctrl+C to copy than Ctrl+V to paste it into our document. Resize it so it’s the same size as “Circuit1”.Change the blending mode to Color Dodge than apply Filters > Blur > Gaussian Blur of 2.3 px.
Open file “Circuit3”, press Ctrl+A to select all, Ctrl+C to copy than Ctrl+V to paste it into our document. Resize it so it’s the same size as “Circuit2”.Change the blending mode to Soft Light and lower the opacity to 50%.
Open file “Paint Chip”, press Ctrl+A to select all, Ctrl+C to copy than Ctrl+V to paste it into our document. Change the blend mode to Overlay
Add a Hue/Saturation adjustment layer to lower the saturation and set it’s opacity to 62% and a curves adjustment layer with opacity of 67%. To each of these adjustments layer apply Filters > Render > Clouds in the layer masks.
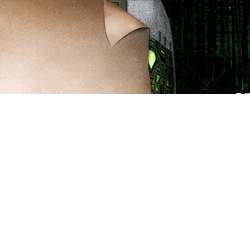
You now should have something like in the image below. Group all these background related layers and change the group blend mode to Normal.

Step 18
Time for the final adjustments.
Make a new layer and press Shift + F5 to fill it wit 50% gray. Select the Dodge tool and lower the exposure to 30% than gently brush below our android eye and above the nose. Then use the Burn tool to further darken the already dark areas. Change the layer blend mode to Overlay.
Press Ctrl+Shift+Alt+E to make a new layer from all visible than apply Filters > Blure > Gaussian Blur of 40 px. Lower the opacity to 18% and change the blend mode to Overlay. Use the Linear gradient tool in the layer mask to mask away the right part of the screen.
Add a Hue/Saturation adjustment layer and decrease the saturation than use the Linear Gradient Tool to mask away the left part of the image so the desaturation will only apply to the right part of the image, or mainly to our background , thus helping the viewer eye to focus on the android face.
Press Ctrl+Shift+Alt+E to make a new layer from all visible than apply Filters > Blure > Gaussian Blur of 40 px. Lower the opacity to 43% and change the blend mode to Overlay. Press Ctrl+U to desaturate it.
2 responses to “How to Create a High-Tech Cyborg Photo Manipulation in Photoshop”
-

Elegant, modern, very different..
-
you can always be creative in making robotic effect to an object. This Adrian’s is an example, simple effect for beginner to try. I like IA, so I made some androids from my fave actors. Hi5, Adrian! :)
Leave a Reply