

Step 16
And then apply some lighter highlight color.


Step 17
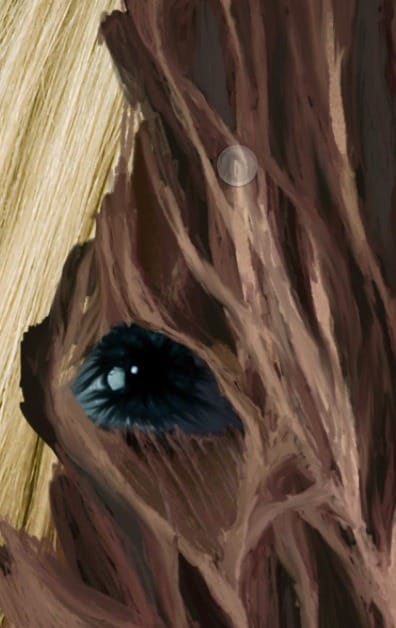
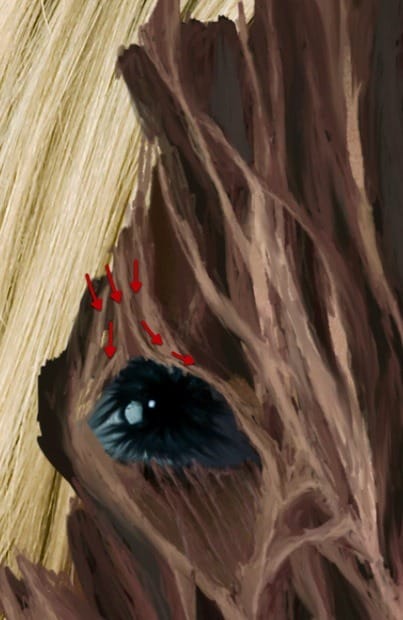
At this point I decided to rework the skin that covers the top of the eye, so just erase a bit as shown here.


Step 18
And then just sample color close by to rework that piece of flesh as indicated.


Step 19
Now select the brush tool and adjust the brush settings as shown here.


Step 20
Lets start touching up what we have around the eye, refining a bit and start getting rid of the dribbles we did on the sketch section, and that is it at this stage lets move on to the next section.

3. Increased detail painting
Step 1
Lets continue adding detail to the face by refining the edges redefining the shapes and adding color tones needed to give volume to the flesh.


Step 2
Obvious dribble stuff lets just take care of it at this point all over so we have a cleaner painting layer.


Step 3
And lets take the opportunity to extend the teeth as shown here, just sample color from one of them.


Step 4
Lets continue our process defining even more the shapes adding depth and content to the flesh.
Step 5
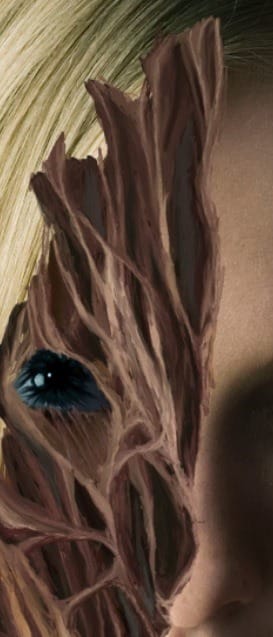
Lets now paint in some nasty eyelashes left around the eye.


Step 6
At this point lets create a shadow for the left eye since it is well covered by flesh, so create a new levels adjustment layer and adjust it as shown.


Step 7
Fill the mask for that layer with black so its all gone and just use a soft brush to apply it at the corner of the eye as shown.


Step 8
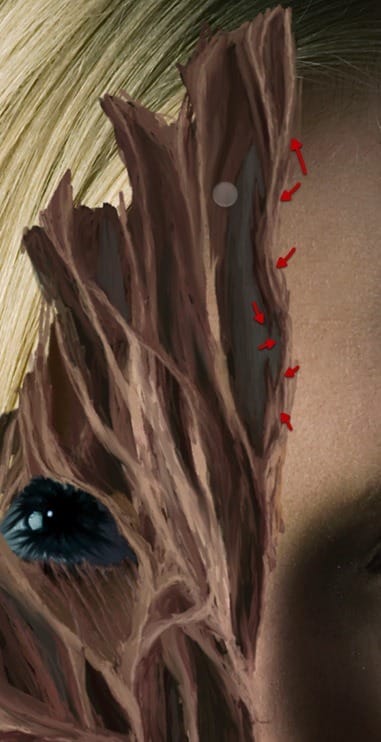
At this point we go about finding shapes that need a better way of attaching to the rest of the flesh as this one here and rework it differently.


Step 9
And also sections that need detailing further, or restructuring; now its the time to deal with those and finish up this section with a cleaner structure. Keep in mind studying the video at all stages of the tutorial.


4. Detailing part 2
Step 1
For example lets work on this section and add some detail; sample some color as shown here.


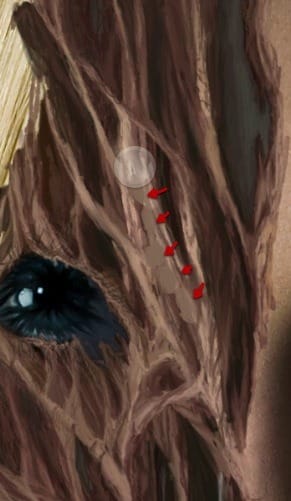
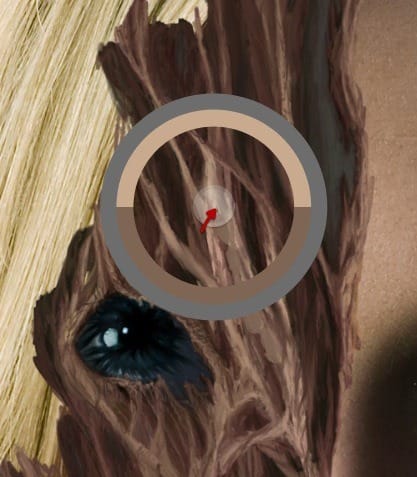
Step 2
Paint in some circular patches, then sample lighter color and add to the top of those patches.

Step 3
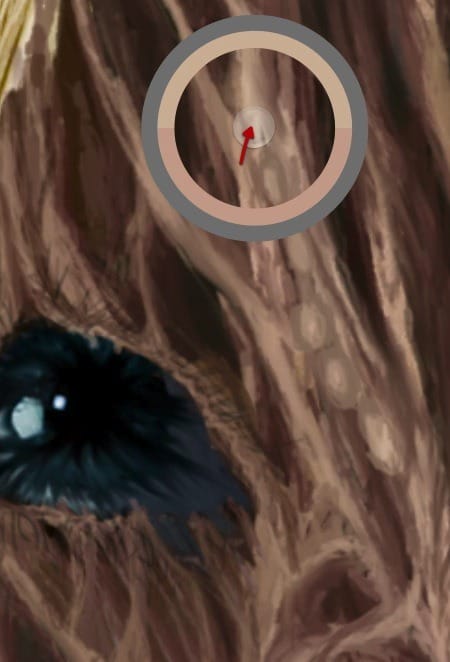
Then sample a bit lighter color and add more to the tip of those; to finish those ugly circular pieces of rotting skin.

Step 4
Keep the lighter color and add it to other sections such as this one here to bring out the shape.
18 responses to “Create a Horrific Flesh Eating Movie Poster in Photoshop CS6”
-
how can i get adobe photoshop
-
Great, thanks for all the helpful info!
-
wow,its a nice work.Thanks for sharing such informative post its help me to know deeply Photoshop work step by step.
-
v nice
-
amazing work ever !
-
Cool! I will try this one. Thank you for sharing this tutorial on how to photo manipulate.
-
i burst out laughing here:
https://www.photoshoptutorials.ws/images/stories/Pathogen_C070/ScreenFlow169.jpg
-
Its a good work I’ll try to make this effect with my own gets..
-
I cannot download the brush, anyway anyone could tell me how to set it, so it fades on both sides…
Also the other brush.
Preferebly with sreemshots….
Thank you. -
Looks easy but it is really hard. Need to start all over again.
-
it looks like it should have a hat
-
indeed
-
-
Cool beans
-
Nice tutorial but I feel that after step 17 it looks overdone. Also the zombied area of face could be more dark and reddish that would look more natural. By the way extremely well written tutorial.
-
I’m really liking the tutorials here! But did you really have to use a stock photo of frogs humping each other?
-
They are just sitting on top of each other… I want to believe!!
-
-
good
-
This is amazing! Premium quality tutorial here but the videos should be sped up. You’re not kidding when you say it’s 10 hours!


Leave a Reply