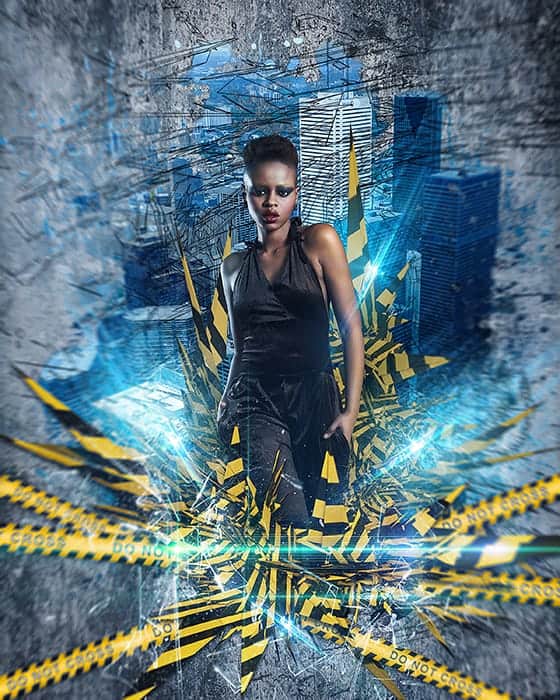
Step 39
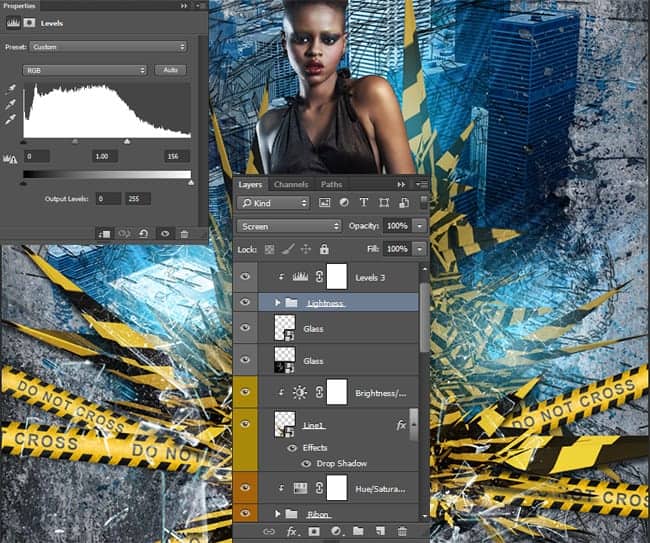
Group all lightning layers (Cmd/Ctrl + G or Layer > Group Layers…). Change group Blending Mode to “Screen” and add an adjustment layer “Levels” (Layer > New Adjustment Layer > Levels… or use icon at the bottom of Layer panel) with settings for white point 156. Make sure to clip this layer to a group. This will make more vivid lightnings.
Step 40
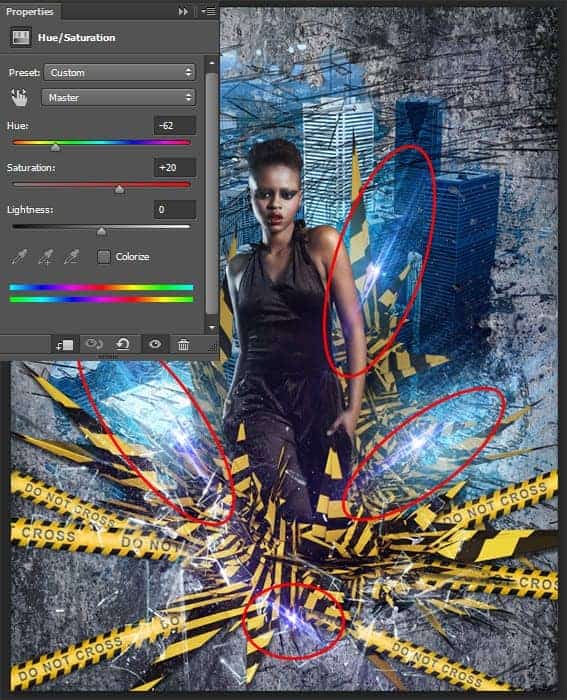
We are at the end of photo manipulation and now we add highlights to vary composition and add glamor. It is very simple as is the case with the glass. You choose desired flare, change its size and position. Then change Blending Mode to “Screen” and duplicate it several times (Cmd/Ctrl + J) and place in different parts of the picture. Very convenient to use as a basis the brightest spots in the picture. I use image “16” then group all flare layers (Cmd/Ctrl + G) and add an adjustment layer “Hue/Saturation” with Hue: -62, Saturation: +20 and clipping to flare group.
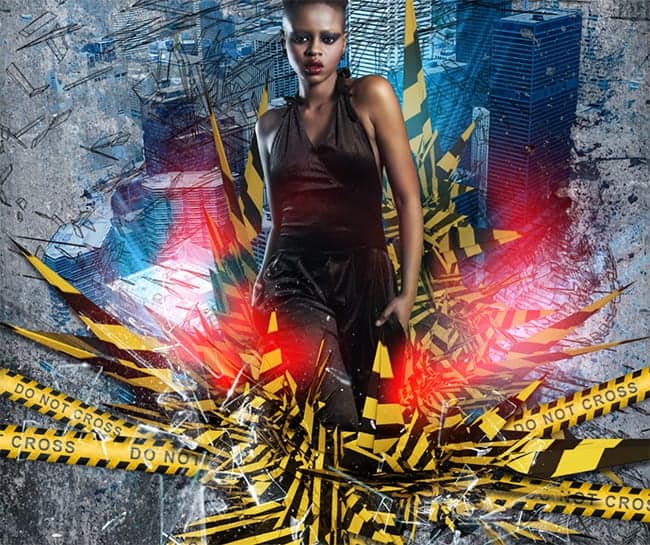
Step 41
Place another one flare “36” at the bottom of photo manipulation and group all flares (Cmd/Ctrl + G). Set group Blending Mode to “Screen”. I decided to collect all the glare in a sequence to be able to change their location and color groups. Also very interesting affects on a flares an adjustment layer “Color Balance”.
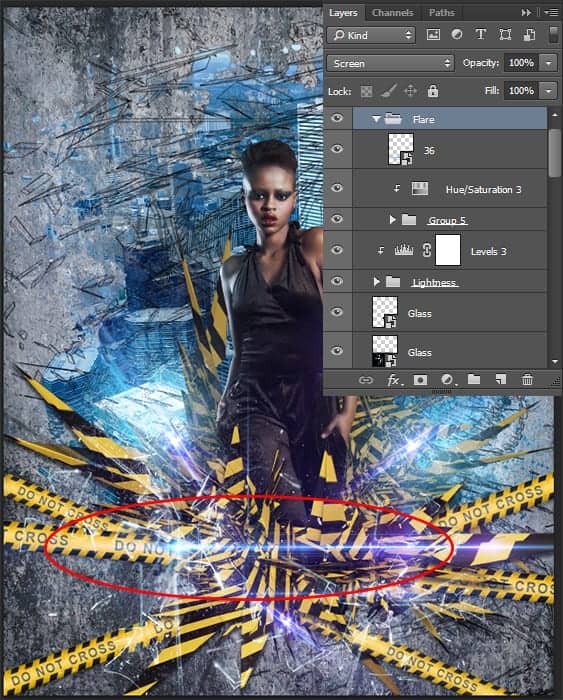
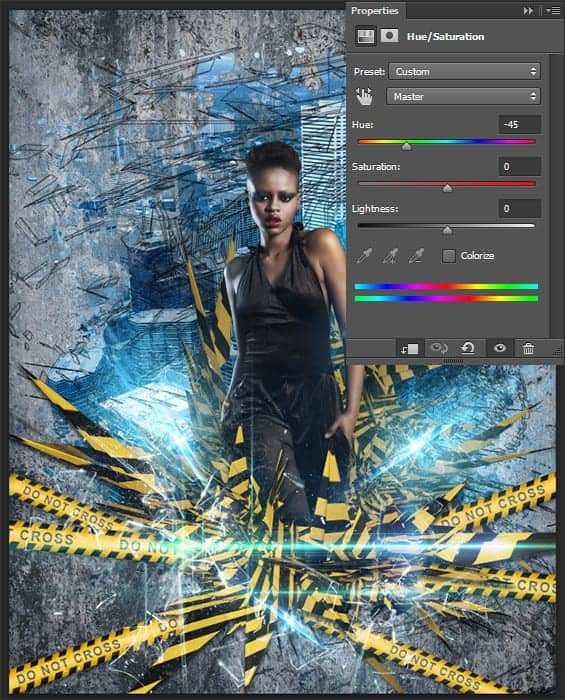
Step 42
To change color of all flares I use adjustment layer “Hue/Saturation” (Layer > New Adjustment Layer > Hue/Saturation…) with Hue: -45 and clip it to a group. You can try using other colors and location glare. In my experiments looked good flares with magenta tint. Flare a large number, so try to use the entire image with glare in the center and not to overdo it with their number.
Step 43
One of the main details of this picture is a blur. This effect creates a dynamic movement and the destruction of the space. I love to use this effect in my works. This new filter which is available only in Photoshop CC. So let’s get started! Create a merged copy of image (Cmd/Ctrl + Opt/Alt + Shift + E), Convert it to Smart Object (right click on layer > Convert to Smart Object). Go to Filter > Blur Gallery > Tilt Shift… Set Blur to 15px, Distortion to 100% (this has the effect of particle motion picture), be sure to check “Symmetric Distortion”. Rotate guides around 90 degrees and apply filter. Change layer Blending Mode to “Luminosity”. If you have another version of the program, as an alternative you can use “Radial Blur” (Filter > Blur > Radial Blur with “Zoom” method), then remove some effect on Smart filters mask.
10 responses to “Create this Poster Design with Abstract Effects in Photoshop”
-

Thanks on your marvelous posting! I genuinely enjoyed reading it, you might be a great author.I will ensure that I bookmark your blog and will eventually come back someday. I want to encourage yourself to continue your great work, have a nice holiday weekend!
-
I’m new to photoshop and mentioned in step 10 I’m supposed to look for a brush spot thumbnail, but I don’t know what or where it is.
-
In Step 37 I cannot open Filter > Filter Gallery and I wonder why
-
Go to the Image > Mode menu and check if your image is in RGB mode and 8-bits/channel color.
-
-
Love this lesson, i learnt several new techniques. Made the same and one with different photo’s
-
you can download Kaos Brush Set 2.0 here: http://www.brushking.eu/563/kaos-brush-set-20.html
-
Very nice !!!!!!!
-
Brush Kao Set can’t open :(. Please! check link again.
-
Brush Kao Set can’t open :(. Plz, test link again
-
Great tut, thanks.
But Kaos Brush Set 2.0 – Outof4mmo… the page you were looking for doesn’t exist.
Leave a Reply