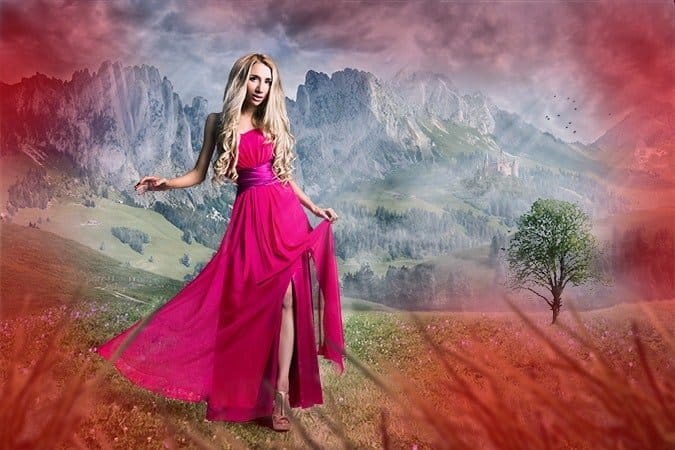
Change the Blending Mode of this layer on Soft Light and lower its Opacity on about 55%.

Add another Gradient Map adjustment layer and this time choose following colors.

Change its Blending Mode from Normal to Multiply and lower its Opacity on 80%. And last adjustment you’ll do in this step – add new adjustment layer Color Balance and set it similarly as on the following photo.

After these three adjustments your photo manipulation should look like the following picture.

Step 18 – Adding Vignette
I really like using vignette because it’s great (and very quick) way how you can focus viewer’s attention in the middle of the image. As you might already guessed you add vignette in this step :). Add new adjustment layer Levels on the top of all layers and set the Input Levels on 0; 0,6; 255.

You want to adjust only the edges of the image. To do that grab the Paint Bucket Tool (G) and pick the layer mask of this adjustment layer with solid black color.

Now grab the Brush Tool (B). Select some soft round brush and lower its Opacity on about 50%. Pick white color and make sure the layer mask is active (just click on it). Paint around the edges. You can get the idea where to paint on the following image – it’s highlighted with red color.

Step 19 – Adding More Light
In this step you’ll add more light to clouds and on the dress where light would hit. By adding light you’ll add more depth to your image. Add new empty layer on the top of all layers and name it LIGHT. Grab the Paint Bucket Tool (G) and fill the layer with mid grey color (#808080). To blend it with the rest of the image change its Blending Mode from Normal to Overlay.

Grab the Brush Tool (B), select some soft round brush and lower its Opacity on 10%. Pick white color and start painting over the areas which should be lighter. You can get the idea where to paint on the following photo. Those parts are highlighted with white color.

On the following photo you can see how the layer LIGHT looks like with the Blending Mode set on Normal.

Step 20 – Another Vignette
I think the vignette around the edges of the image could be even bit more darker. You’ll darken it in this step. Add new adjustment layer Levels on the top of all layers and set the Input Levels on 0; 0,8; 255.
12 responses to “Create This Striking Fairy Tale Photo Manipulation in Photoshop”
-
you have done a good work…….
-
Nice technique. Really useful…thanks for the post…
-
Cool! Tot luv the tutorial…
-
Super
-
thanks for the tutorial
it really helped me :) -
Thanks for this tutorial Jarka
-
Thank you for this tutorial creative well explained.
My realization:
http://www.chez-mireilled.com/article-paysage-conte-de-fee-avec-photoshop-119754637.html -
hye
-
Estupendo, me ha gustado mucho y ya he hecho una prueba. Gracias
-
nice
-
Super tut I will have to try this
-
hey
-


Leave a Reply