In this tutorial I’ll show you how to create a beautiful sunset landscape . You’ll learn how to combine different stocks into a cohesive scene using adjustment layers, masking and brush . You’ll also work with lighting, practice retouching and matte painting techniques.
What you’ll be creating
We’ll start this tutorial by setting up a natural scene from the landscape, sky, mountain and rock images. Then we’ll add the balcony, model and trees. Later we’ll enhance the scene color and contrast with various adjustment layers. Finally we’ll use a few layers to create lighting effect.

Tutorial Resources
Step 1
Create a new document in Photoshop with the given settings:

Step 2
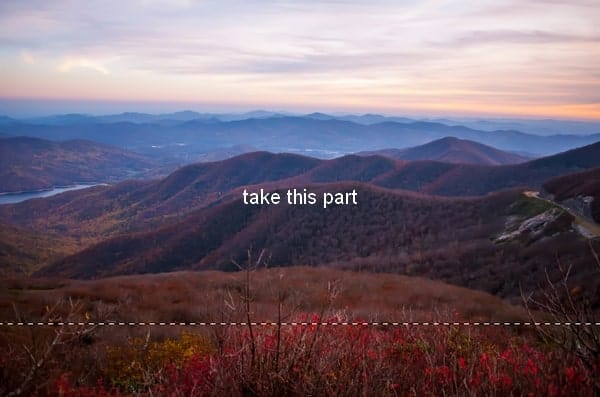
Open the landscape image. Use the Retangular Marquee Tool (M) to choose the upper part of the landscape as shown below:
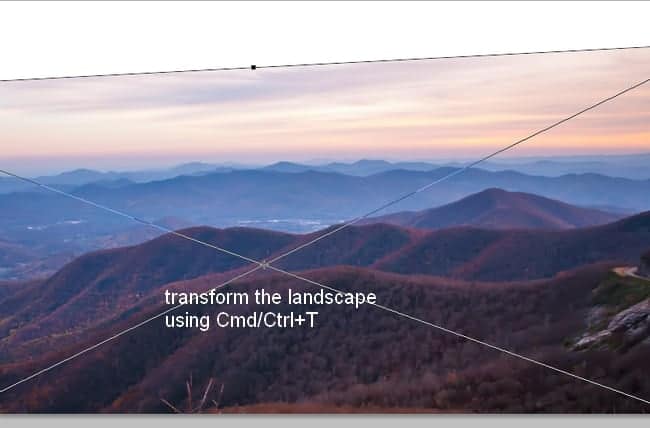
Drag the selected part into our document and transform it using the Cmd/Ctrl+T key:
Click the second button at the bottom of the Layers Panel to add a mask to this layer. Use a basic, soft brush with black color to remove the hard edges of the sky:

Step 3
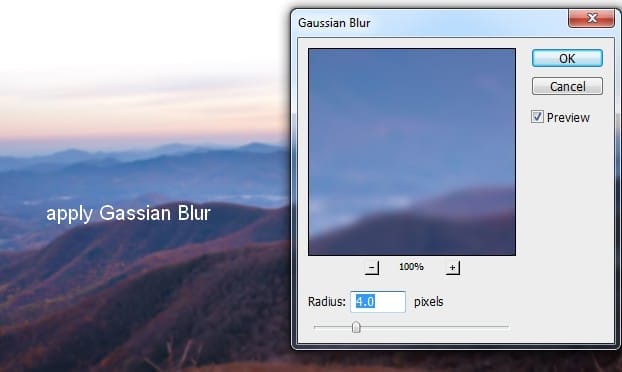
On the landscape layer, go to Filter > Blur > Gaussian Blur and set the radius to 4 px:
Step 4
To darken the landscape I used an adjustment layer. Go to Layer > New Adjustment Layer > Curves:

On this layer mask use a soft black brush to erase the top right of the scene:

Step 5
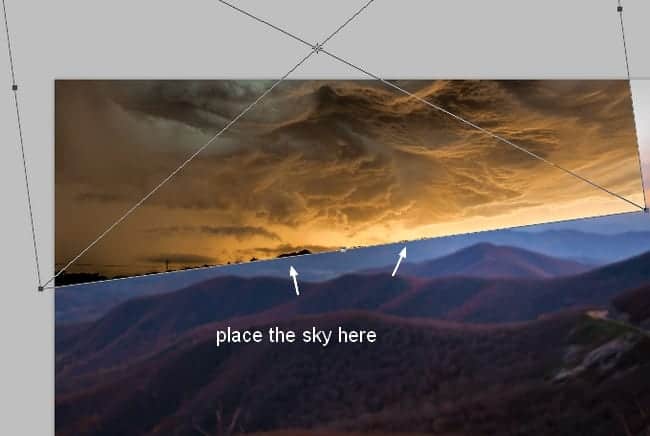
Place the sky above the landscape and rotate it using Cmd/Ctrl+T as shown below:
Add a mask to this layer and remove the rough edges of the sky with a soft black brush:

Step 6
Apply Gaussian Blur with 2 px to this sky part:

Step 7
I used a Curves adjustment layer with Clipping Mask to brighten the sky a bit:

On this layer mask use a soft black brush with a very low opacity (10-15%) to reduce the lightness on the left side of the sky:

Step 8
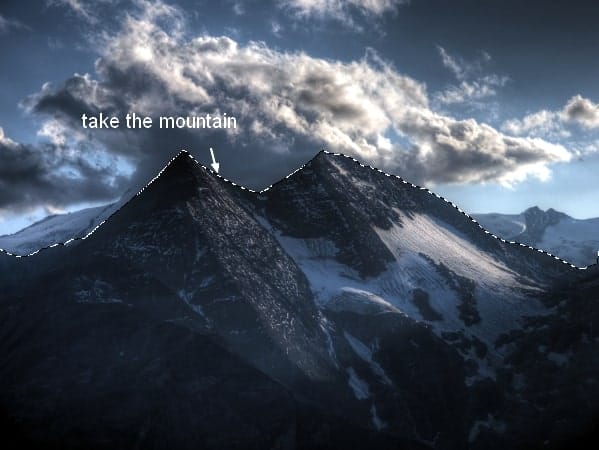
Open the mountain stock. Extract the mountain and place it in the left of the picture:

Step 9
I used a Curves adjustment layer (Clipping Mask) to brighten this mountain:

On this layer mask use a soft black brush to erase the edges of the mountain where are hidden from the light:

Step 10
I used a Color Fill layer to darken the edges a little. Go to Layer > New Fill Layer > Solid Color:
9 responses to “Create a Sunset Landscape Photo Manipulation in Photoshop”
-

Thank you
-
Thank you for the lesson . he’s just adorable. The game of colors and delicate taste It’s my pichttp://j-p-g.net/if/2015/12/05/0996727001449341248.jpg
-
Hi, It ‘s very beautiful , You are a professional designer
-
would u mind sending me the pictures u used in the manipulation ?
sorry i can’t download some of them :( -
I really enjoyed reading this tutorial. I always thought images like this were hard work, but when you break it down into steps like this, it seems so simple! (Although I’m sure this is not for the beginner in Photoshop.)
-
Nice Tutorial
-
plz post psd plz
-
Sorry I missed this step. I used Color Balance:
Midtones: -57,0,100
Highlights : -2,0,78 -
How did the sky layer turn blue ?? What Setting you used ???
Leave a Reply