

Step 49
We are done with color adjustments for this moment. Now, I’ll show You, how you can use here “Topaz filter”. Select whole image (Select > All). Then go to Edit > Copy Merged (Shitf+Ctrl+C). Then, paste copied image.

Step 50
Go to Filter > Topaz Labs > Topaz Clean 3. Set it as is shown. Choose Curly smooth preset and set Strenght to 1.

Step 51
You can leave picture as is now, or add some color changes, to make effect more smoother – if You want, in your color picker set colors: #fff and #46264b colors, add Gradient map adjustment layer (go to Layer > New adjustment layer > Gradient map or use marked shortcut).

Change blending mode to Lighter color and decrease opacity to 39%.

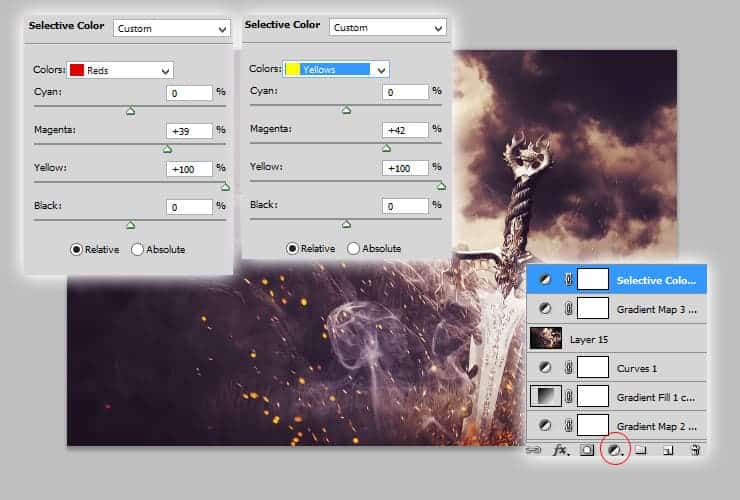
Fix yellows and reds, by using Selective color adjustment layer. Go to Layer > New adjustment layer > Selective Color or use shortcut.
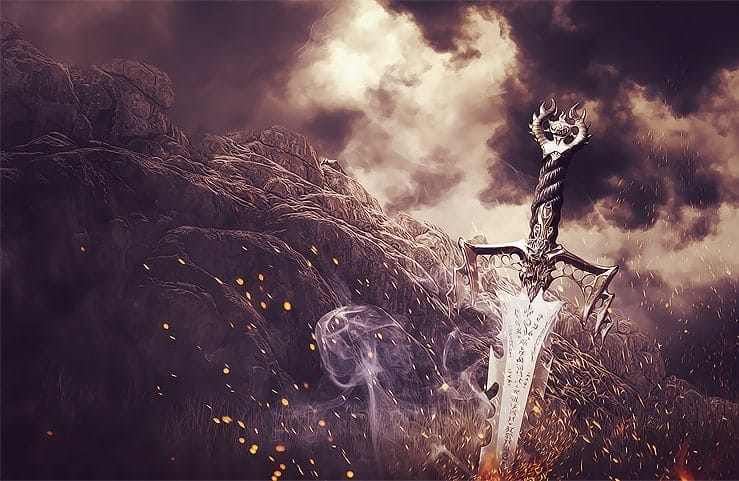
Final Results
Download the PSD
[vc_column width=”1/1″ el_position=”first last”] [vc_cta_button title=”Download” href=”https://downloads.photoshoptutorials.ws/Medieval Battlefield.zip” color=”btn” size=”btn-large” icon=”none” target=”_self” position=”cta_align_right” call_text=”Medieval Battlefield.zip | 107 MB” width=”1/1″ el_position=”first last”] [/vc_column]
Tutorial by msRiotte

Thank you for following this tutorial! If you want to see more of my proffesional works go tomsriotte.pl. If you like my manips – here is the showcase: art.msriotte.pl.
– msRiotte.
11 responses to “Create This Surreal and Medieval Style of a Battlefield in Photoshop”
-

I can only see step 45 and below. Any help please?
-
battlefield’s missing
-
Can’t see
-
This is an *excellent* tutorial. I’m experienced in Photoshop, but a novice (at best) when it comes to photo manipulation at this level. The steps to this tutorial were baby-easy to follow, and my resulting work was nearly identical to the tutorial’s. Even at individual steps, my canvas matched the photos. Not once did I have to start doing additional work to reach the same point as the tutorial. That’s so rare!
This is really the only in-depth tutorial I’ve followed that doesn’t assume fore-knowledge, shows all the necessary elements, doesn’t skip details, and thoroughly explains steps and processes without over-elaborating. And all that without asking me to pay for stock! Fantastic!
Thank you for such a detailed and well-built tutorial, I’m on my way to see what else you’ve got.
-
Supab
-
Thank you so much! Just a great lesson!
-
Step 50 – rubbish!!
-
Step 48 – Channel mixer – Green – green – -58) Thanks for tutorial, awesome =)
-
nice
-
The link to the Battleground Skies doesn’t work – states it’s invalid.
-
Great!
Leave a Reply