
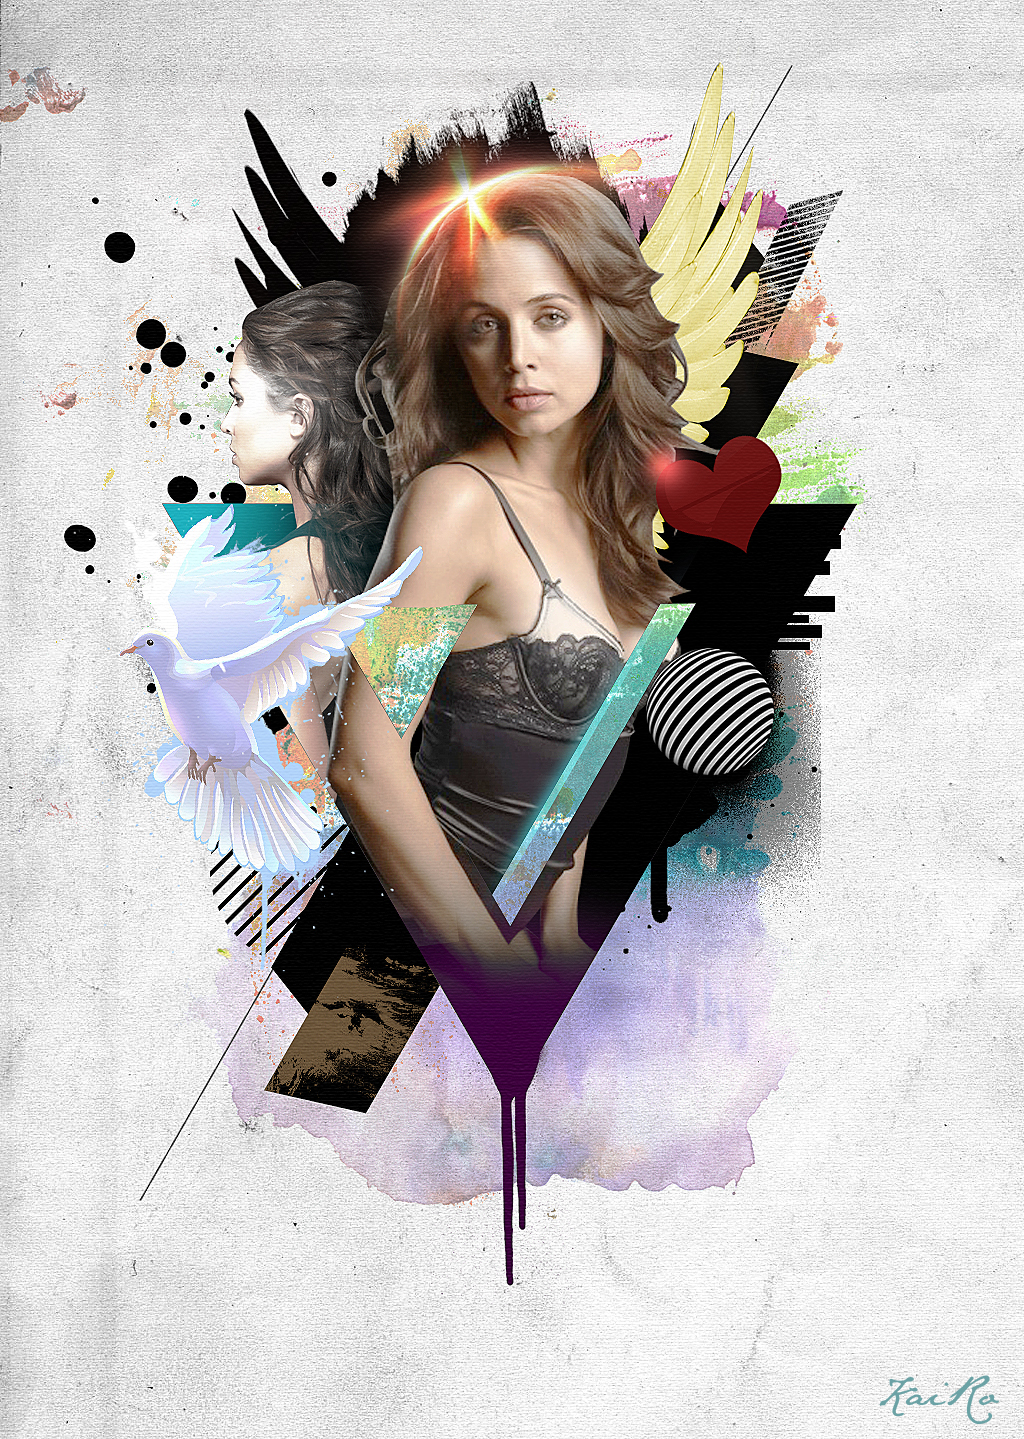
")
Step 60
You can still see some holes i.e., transparent areas in the feather. Select the using the Lasso Tool. Fill the area with black.
")
Step 61
Bring the feather into the main file. Place it below the model layers.
")
Step 62
Here I am going to create something from scratch in Photoshop. To do it, create a new document. Take the Pen Tool, Select the Paths mode on the options bar. Draw a curvy shape. Hit Ctrl + Enter to convert it into a selection. Fill the selection with a solid color. You may like to create a shape layer instead of creating a path and turning it into a selection. Anyway, get the shape created.
")
We are going to rotate this shape several times. To do that, duplicate the layer and press Ctrl + T, set the registration point to the bottom left corner and rotate it. Press enter to confirm the transformation.
")
Step 63
Duplicate the second layer and go to Edit > Transform > Again. This will rotate the current layer with the previous transformation settings.
")
Step 64
Repeat the process until you have something like this.
")
Step 65
Once you done, select all the layers and press Ctrl + E to merge down all the layers together.
")
Step 66
Now convert it into a smart object.
")
Step 67
Finally make the way into Photoshop.
")
Step 68
Apply Color Overlay using the Layer Styles box.
")
Step 69
Add a balloon from the pack.
")
Step 70
Now switch back to Illustrator. Well don’t get turned off! Photoshop and Illustrator are really meant to work together. You can get more productive incorporating Illustrator into your design flow. We can use Illustrator to produce custom graphic elements like line drawings, shapes, blends and many different vector elements for our designs. Then we can combine them with our Photoshop compositions. It doesn’t take much time once get used to it.
Here we are trying to create a cloud using the Illustrator’s Ellipse Tool. Draw some ovals and circles. Select them all and combine them using the Pathfinder palette (Window > Pathfinder)
")
Step 71
Add swirls using the Swirl Tool. Click anywhere on the document. This will present a dialog box. Enter the below values. Finally draw some swirls. Align the swirls to the outline we created in the previous step. Rotate, resize according to the need. But make the edges meet perfectly with the outline shape.
29 responses to “Create This Stylistic Mixed-Media Artwork in Photoshop”
-

Very nice tutorial. I kind of cheated and screen captured some of the things to save time, but it came out good. Thanks
-
hello
its realy amezing tutorial ill try this -
step 28?? where is the button “Thumbnail”?
-
Looks so festive……Excellent post. Thanks for sharing……….
-
i was totally confused at steps 12&13.can you plz explain how did you obtained those steps?
-
i’m totally confused at steps 12&13.can u plz explain how did you obtained that?
-
Downed, thanks a lot for your sharing
-
thanks guys i’ve learn a lot
-
Thanks so much for sharing! Really liked this!
-
GOOD TUTORIAL!!
-
Incredible tutorial! I’ve been using Photoshop for years, and I still learned a ton of stuff going through this.
Thanks!
-
sooooo fun lol
-
The shoofly stock images are no longer available. *sadness
:( -
awesome creation…… i learn it
-
Thanks, Very nice tutorial.
Here is my version – http://i.imgbox.com/acdvYlY6.jpg -
nice soumaya keep trying …
-
I not doing it no more because if I follow these steps I will like mess up or something so I am not doing it so BYE :)
-
-
This is my copy :))
https://www.box.com/s/tpkaboqgp5za2j8b7kt5-
good work :)
-
-
Thank you, i fixed it by myself :)
-
Actually I am facing problem with step 28 :(
-
Thank you, i fixed by myself
-
i have problem on that step too. how to fill the selection? i cant unhide it. please tell me what did you do?
-
-
Awesome tutorial!!! Thanks
-
This is great!
-
heheheheheheheheh thnx vazomama
-
OMG this is awesomeeeee! She is HAWT TOO I wanna
-
I think it,s the easy way to learn.thank you.
-
Thanks for sharing this :)
Leave a Reply