
Step 13
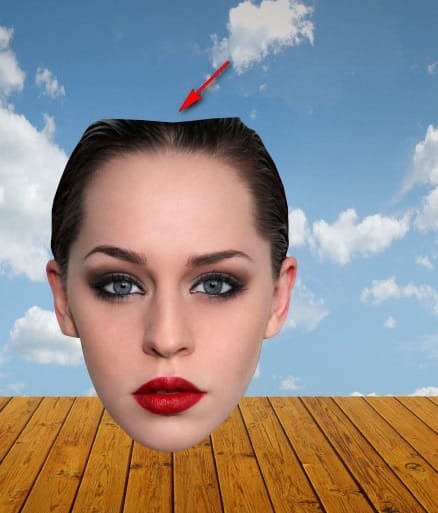
Now, activate the Transform tool (Ctrl/Cmd + T), resize the head and reposition it as shown below:

Step 14
Next, we will “open up” the woman’s head to see what’s inside her mind. Let’s start by “cutting it” – activate the Polygonal Lasso Tool (L) and create a selection area as shown below:

Step 15
Once that area has been deleted, it should look like this:
Step 16
Next, we will create the “insides” of her head. To start, create a new layer (Ctrl/Cmd + Shift + N) and input “Clone Stamped area”. Put this layer below the “head” layer so that the result would come up at the back of the “head” layer. Now, once it has been created, activate the Clone Stamp tool by pressing S on your keyboard.
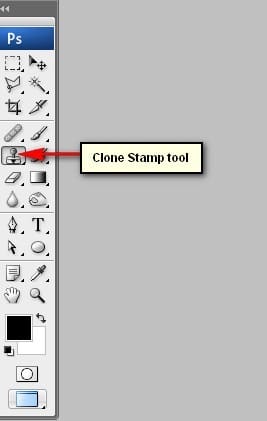
Then input the following for the Clone Stamp tool:
- Brush size: 90px
- Hardness: 0%
- Opacity: 100%
- Flow: 100%
- Let’s now start cloning:
To start, first make sure that you Alt + Left click on the “head” layer (alt + Left click on her forehead as shown below):

Next, left-click on the “Clone Stamped area” layer and then brush-in the area using the left mouse button shown below:

The result of that should be similar to this:
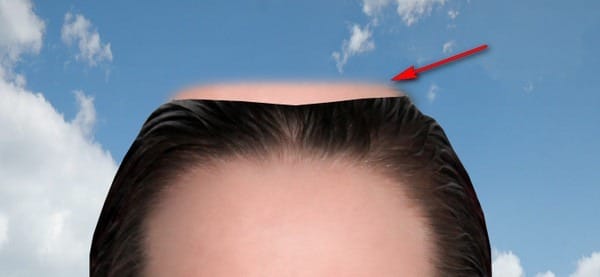
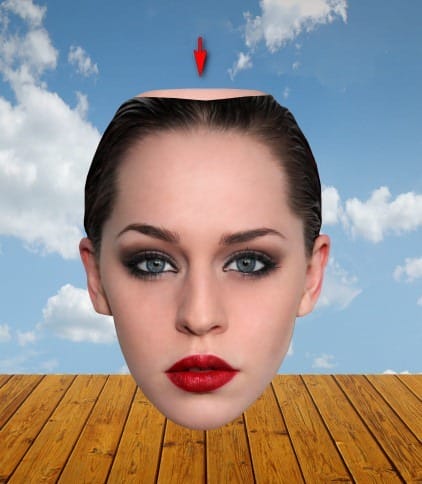
Now, if you’d notice the area created by the Clone Stamp tool is blurred on the edges so we’d need to make it look more realistic. For that to happen, activate the Polygonal Lasso tool (L) and create a selection area as shown below and then Delete the excess blurred area.

The result of that should be similar to this:
Step 17
Next, to make the “insides” look even more realistic, we would need to fix the lighting on it. Create a new layer (Ctrl/Cmd + Shift + N) and then name it “darken Clone Stamped Area”, once done, right click on this newly created layer and choose “Create Clipping Mask” from the contextual menu. Make sure to put this layer above the “Clone Stamped Area” layer.
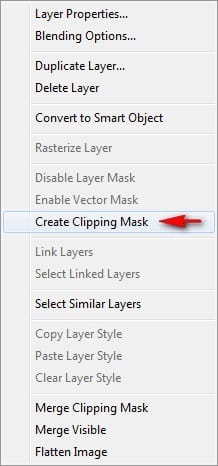
The Clipping Mask allows the user to paint only on the clipped layer.
Now, activate the Brush tool (B) and input the following:
- Brush size: 200px
- Hardness: 0%
- Opacity: 25%
- Flow: 100%
- #: 000000
Let’s paint!

The result of that should be similar to this:

Step 18
Next, let’s adjust the lighting on the “head” layer. Click on the “head” layer and then activate the Burn tool (O).
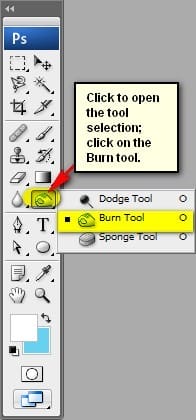
Once the Burn tool has been activated input the following values for it:
2 responses to “Create This Surreal Representation of the Mind Artwork in Photoshop”
-
Where are the remaining steps?
-
These were pretty awesome. A few made me laugh. Thanks for sharing.


Leave a Reply