
- #: 00021f

Step 37
Now, change the Blending mode and Opacity to the following:
- Blending mode: Exclusion
- Opacity: 60%

Step 38
Next, create another Solid Color adjustment layer through the Create New Fill/Adjustment layer button and input the following:
- #: 614d2a

Step 39
Use the following:
- Blending mode: Soft Light
- Opacity: 70%

Step 40
Next, let’s create an Exposure adjustment layer, still through the Create New Fill/Adjustment layer button.

Once the Exposure box is open, input the following:
- Exposure: 0.30
- Offset: 0.0
- Gamma Correction: 1.00
 S
S
Step 41
Next, let’s create a Photo Filter adjustment layer, still through the Create New Fill/Adjustment layer button.

When it opens, choose the following filter:

Step 41
Next, let’s create a Brightness/Contrast adjustment layer.

Input the following when the box opens:

Step 42
Next, let’s create another Photo filter adjustment layer; choose the following filter:

Adjust this layer’s opacity to the following:

Step 43
Finally, let’s create a Levels adjustment layer.

Once it opens, input the following:
- Channel: Red
- 15, 1.00, 255
- Chennl: Blue
- 15, 1.00, 255


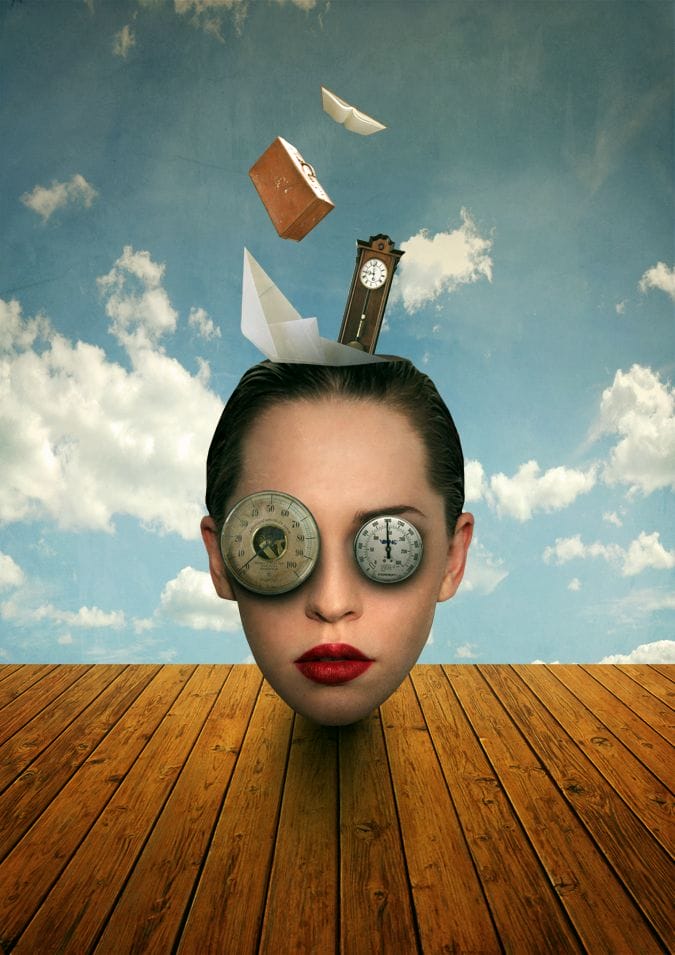
Final Results
Download the PSD
How to Create a Surreal Representation of the Mind in Photoshop PSD.zip | 209.01 MB
Download from Website
Authors Comment
 Thank you for visiting this page and using my tutorial, if you want to see more of my art works, give me a shout at my website: https://www.wix.com/theflickerees/michaelVmanalo
– Michael Vincent Manalo
2 responses to “Create This Surreal Representation of the Mind Artwork in Photoshop”
-

Where are the remaining steps?
-
These were pretty awesome. A few made me laugh. Thanks for sharing.
Leave a Reply