![31[4]](https://cdn.photoshoptutorials.ws/images/stories/FashionShot_695/314.jpg?strip=all&lossy=1&webp=82&avif=82&w=1920&ssl=1)
![32[4]](https://cdn.photoshoptutorials.ws/images/stories/FashionShot_695/324.jpg?strip=all&lossy=1&webp=82&avif=82&w=1920&ssl=1)
![33[4]](https://cdn.photoshoptutorials.ws/images/stories/FashionShot_695/334.jpg?strip=all&lossy=1&webp=82&avif=82&w=1920&ssl=1)
![34[4]](https://cdn.photoshoptutorials.ws/images/stories/FashionShot_695/344.jpg?strip=all&lossy=1&webp=82&avif=82&w=1920&ssl=1)
Step 23
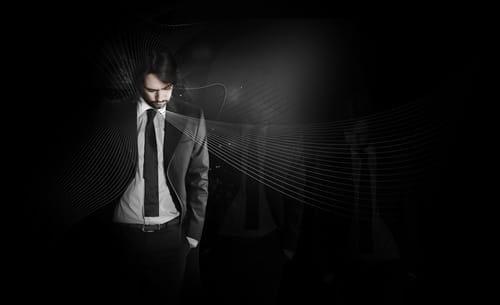
Here I’ve added more lines, still below the man, using exactly the same technique as we did before. Here are the ones I added:
![35[4]](https://cdn.photoshoptutorials.ws/images/stories/FashionShot_695/354.jpg?strip=all&lossy=1&webp=82&avif=82&w=1920&ssl=1)
![36[4]](https://cdn.photoshoptutorials.ws/images/stories/FashionShot_695/364.jpg?strip=all&lossy=1&webp=82&avif=82&w=1920&ssl=1)
Conclusion
I’ve kept this tutorial reasonably flexible so you should be able to adapt it to fit any subject or color scheme by just changing small parts. I hope here you have learned how to use layer masks effectively as I think they were used in almost every step. So just have fun with techniques I have shown you here and I hope you find something useful to do with them.

Click on image to enlarge.
7 responses to “Fashion Shot”
-
nice
-
ببخشید شما فارسی نوشتین ! فارسی می خواین ؟؟
-
I have got blending clarification from this tutorial.
-
سلام
میشه فارسی هم بگذارید -
سلام
فارسی نداریم-
Ma Farsi Me Daram! :D Ma Farsi Astam!
-
-
من فارسیشو میخوام


Leave a Reply