

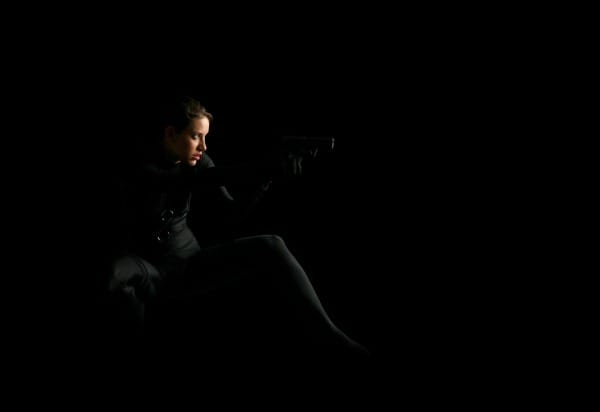
Step 4
Now depending on what version of Photoshop you have will dictate what you do in this step, If you have CS3 or above then just right click on the girl’s layer and select Convert to smart object. Any other version below CS3; then select the girls layer then create a new layer then hit Ctrl+E and when the dialog box comes up select apply. Now I scaled this layer slightly and move it a bit too then added another layer mask and used the same technique as in the last step to blend the model into the background, this is optional and only do it if you think your image needs to be blended more. If you got stuck at all then just go and download the PSD file I mentioned in step 2.
Step 5
Duplicate the girl’s layer (Ctrl+J) then scale it up a bit then in the layers panel move this layer below the original layer. Now change the opacity of this new layer to about 10%.

Step 6
Create a new layer then change the foreground color to white then select the brush tool. Change to a 2px, 0% hardness, 100% opacity round brush. Now select the pen tool and draw a curvy path that kind of wraps around the girl. Then right click on the document and select Stroke path and make sure simulate pressure is unchecked.
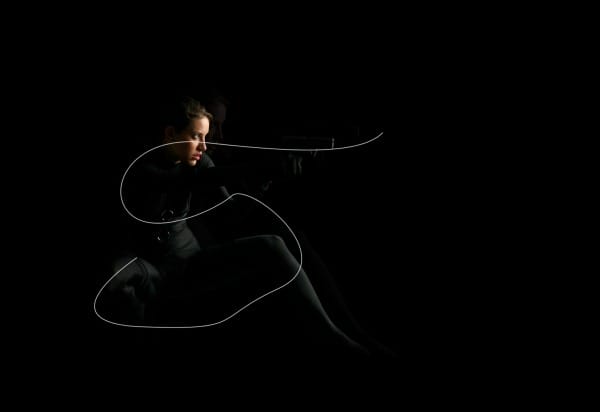
Step 7
Now pay attention to the next two steps as we will be doing the same thing a few times from now on. First Ctrl+click on the original girl’s layer then select the layer with the curvy line in it then Alt+click on the layer mask button at the bottom of the layers panel (cirircle within a rectangle button). You’ll see that the line now goes behind the girl. Now hit Ctrl+D to deselect.

Step 8
Now we want the line to go over and under the girl layer. So select a a hard round white brush about 50px diameter and 100% opacity. Select the layer mask on the line layer then paint on the parts that you want to appear above the girl, I painted on the parts that I’ve circled in red. Next we want to fade out parts of the line, mainly the ends and the parts that we want to appear far away. So change the hardness of the brush to 0% and the opacity to about 20%, also change the foreground color to black then just brush over the parts you want to hide a few times.
12 responses to “Futuristic Collage”
-

I am stuck at number 7. When I select original and path layer the option of creating a mask is blocked. What am I doing wrong ?..
-
Hello, first of all, thanks for the tutorial. I have few questions if someone can help, please.
After step 6, I select both main layer and empty later with the pen stroke (Btw, is it freestyle pen?) and when I select these two, the mask option greys out.
-
I can’t download the render file. could you upload another reference?
-
WOW! It’s really nice…..
-
where is the remaining steps…?
-
Click on Next Page or visit here: https://www.photoshoptutorials.ws/photoshop-tutorials/photo-manipulation/futuristic-collage/?singlepage=1 :)
-
-
Nice … :D
-
Such a great Tutorials But i am confuse in 4th Step can you please explain 4th step :) thanks
-
Cool idea tutorial!!!! Nice Work for a new learner.You’re so cool. Thank you so much.
-
i always stuck at step 7 . i don’t understand . please help me .
-
I have the same problem….
-
-
Nice tutorial. Its is help every learner about Photoshop. Thanks for share this post.
Leave a Reply