

Step 16
Now repeat the last step twice more, using a different brush and picking a different color. Remember to put it in a new layer and to mask it in the same way.
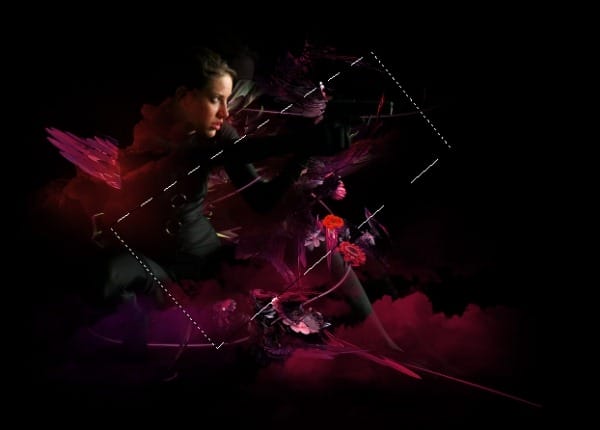
Step 17
Now we’re going to add a kind of glassy effect that we’ve been seeing a lot recently in this type of art. First create a new layer then select the polygonal lasso tool then draw a four sided shape similar to the one below.
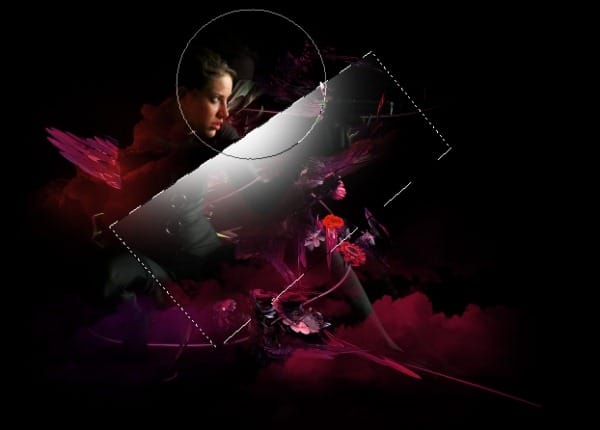
Step 18
Next select the brush tool and choose a 400px round brush, 0% hardness, 100% opacity then change the foreground color to white. Now just brush along, just outside the edge of the box to get this effect, you may need to try a few times to get it right. Now hit Ctrl+D to deselect then you can move or rotate this layer.
Step 19
Now do these two steps twice again, but make the rectangle selection at a different angle or size, so you have three of these glassy things like in the image below.
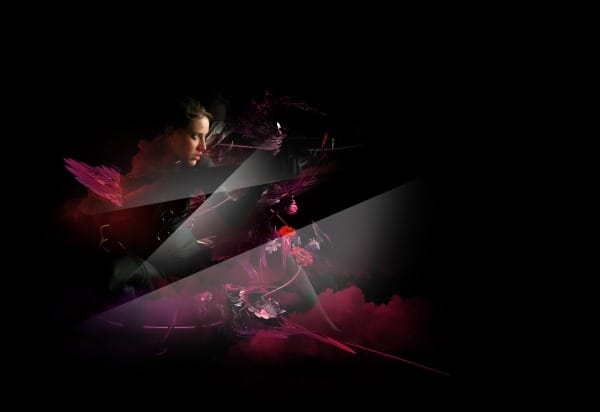
Step 20
Now alter the opacities of these three layer to something between about 20% and 35%, just until they look right and don’t do them all the same opacity, make them different and it will add some depth.

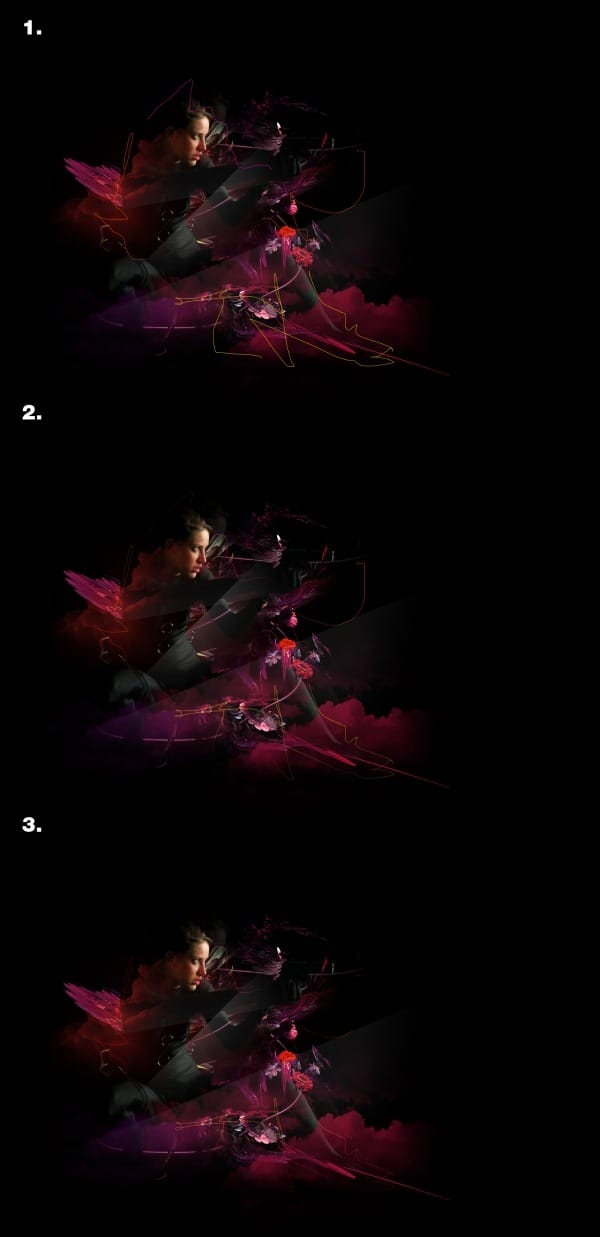
Step 21
In this step we’re going to put in some random wee lines, this is quite subtle but it still adds to the overall image. First select a 1px round brush then choose a bright color, either yellow, orange or pink then brush some randowm lines in then do the same with a different color. Take a look at stage number one. Next add a layer mask by clicking the layer mask button at the bottom of the layers panel and use the second part of masking technique that I mentioned, where you blend the ends of the lines. don’t worry about making these lines go behind the girl. You can see this in stage 2. Then just change the blend mode of this layer to color dodge, You can see what mine looked like in the bottom image, stage 3.
Step 22
The next thing I did was to add some small dots, they aren’t really visible in the image below but they do add to the image. Create a new layer then select the brush tool and choose a 1px soft round brush with full opacity. Make sure the foreground color is white then just put some dots on the page, try also doing some with a 2px brush as well.
12 responses to “Futuristic Collage”
-

I am stuck at number 7. When I select original and path layer the option of creating a mask is blocked. What am I doing wrong ?..
-
Hello, first of all, thanks for the tutorial. I have few questions if someone can help, please.
After step 6, I select both main layer and empty later with the pen stroke (Btw, is it freestyle pen?) and when I select these two, the mask option greys out.
-
I can’t download the render file. could you upload another reference?
-
WOW! It’s really nice…..
-
where is the remaining steps…?
-
Click on Next Page or visit here: https://www.photoshoptutorials.ws/photoshop-tutorials/photo-manipulation/futuristic-collage/?singlepage=1 :)
-
-
Nice … :D
-
Such a great Tutorials But i am confuse in 4th Step can you please explain 4th step :) thanks
-
Cool idea tutorial!!!! Nice Work for a new learner.You’re so cool. Thank you so much.
-
i always stuck at step 7 . i don’t understand . please help me .
-
I have the same problem….
-
-
Nice tutorial. Its is help every learner about Photoshop. Thanks for share this post.
Leave a Reply