
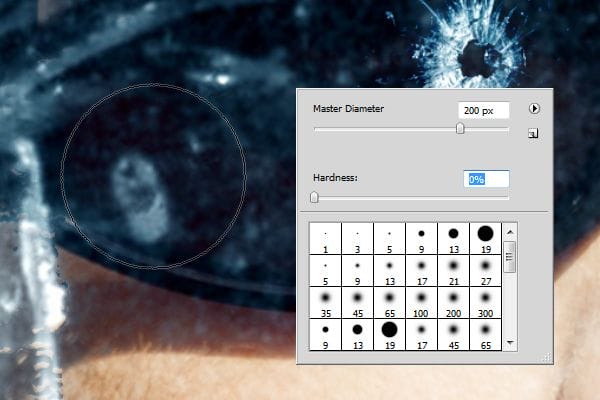
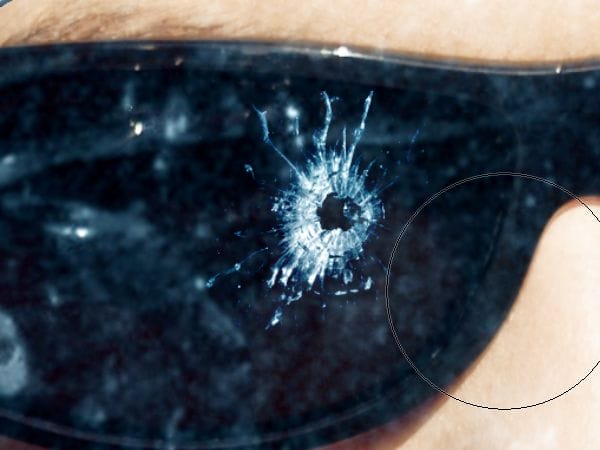
Erase around the bullet hole so that only the cracks from the bullet hole are showing.
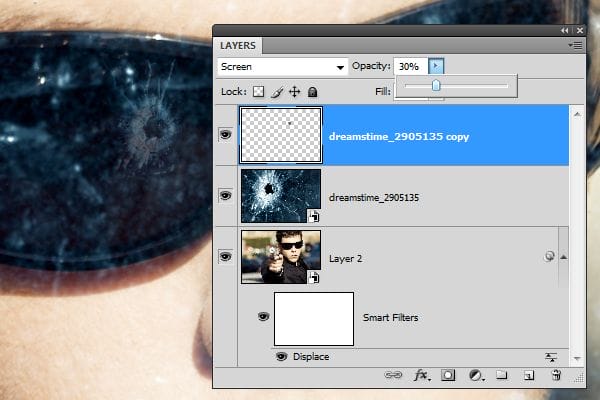
To complete the reflection, reduce the opacity to about 30%.
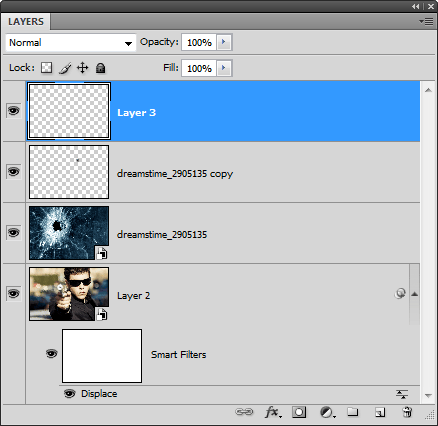
Step 13 – Prepare a new layer for a vignette
Add a new layer (Layer > New Layer) then position it as the top layer.
Fill the layer with white. To do this, choose Edit > Fill, apply the settings shown below, then click OK.

Your layer should now be a blank white layer.

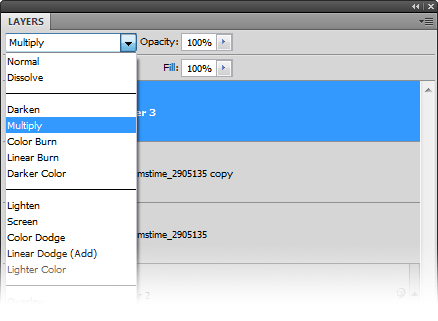
Change the blending mode of the layer to Multiply.
Step 14 – Add a vignette
Instructions for Photoshop CS2 or newer
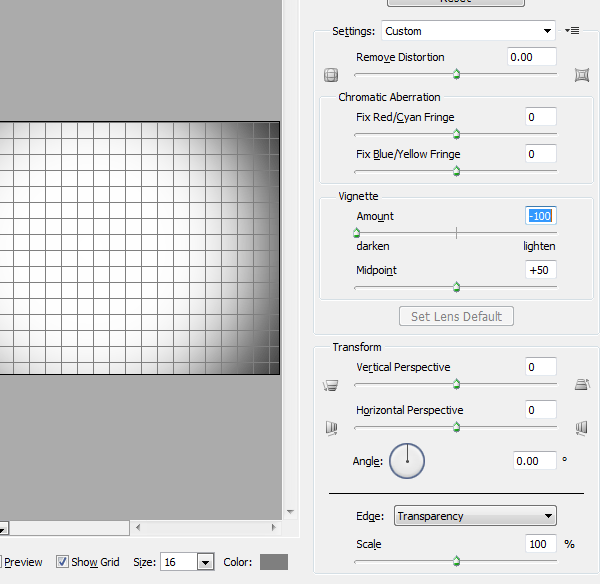
If you are using Photoshop CS2 or newer, you can easily apply a vignette by using the lens distortion filter. Choose Filter > Distort > Lens Distortion. Adjust the two vignette settings (amount and midpoint) to your likings then click OK. If you don’t get the effect that you like, you can undo and use the lens distortion filter again with different settings.
Instructions for Photoshop CS or older
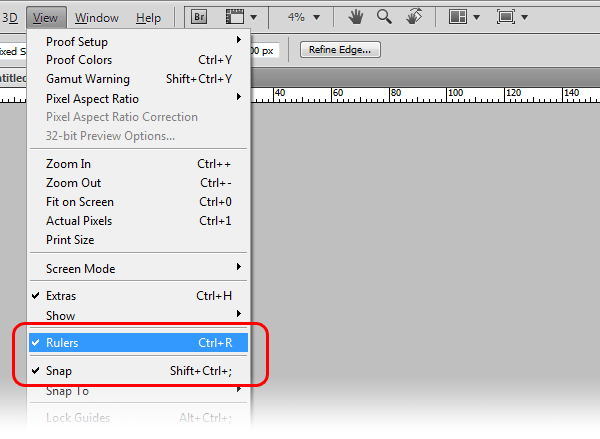
First, make sure that you have snapping and rulers enabled. Open the view menu then ensure that the snap and ruler features are enabled.
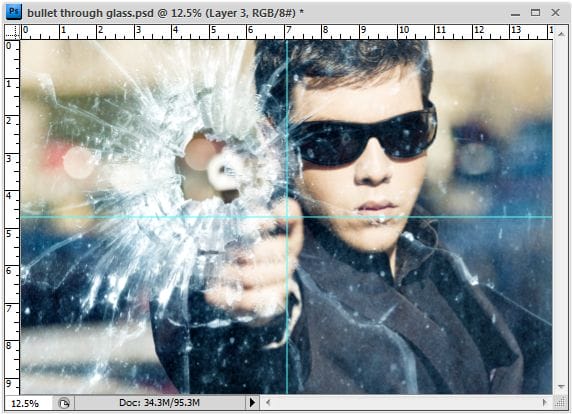
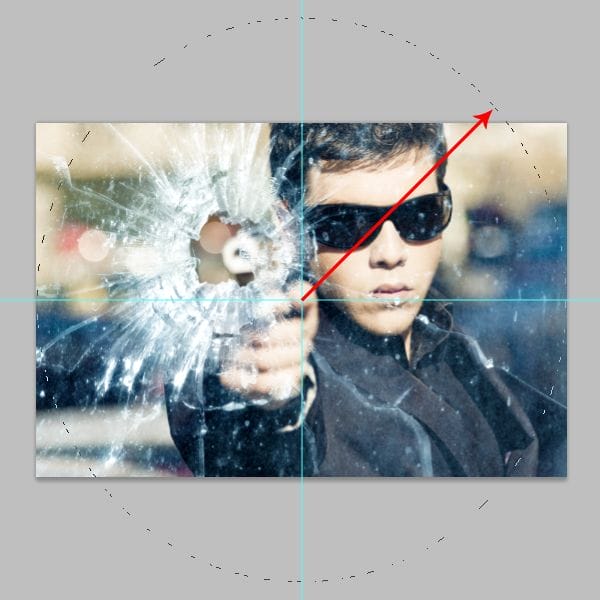
Click and hold on the left ruler then drag your mouse towards the center. A cyan guide will appear. Drag the guide near the center and it should snap into the center. Drag a second guide from the top ruler towards the center to create a crosshair like the image below.
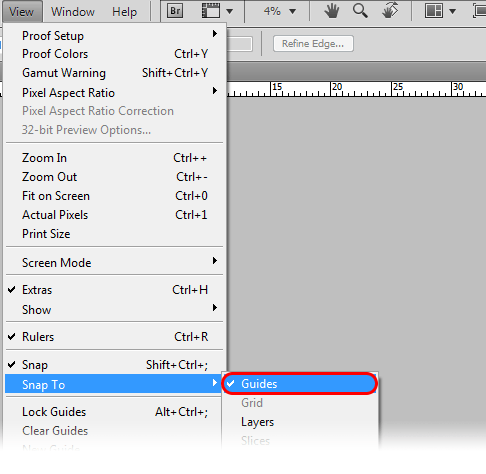
Choose View > Snap To and ensure that the guides option is enabled.
Zoom out so that you can see the entire image. Select the circular marquee tool. While holding the alt and shift keys, click and drag from the center where the guides intersect then drag out until your circular marquee is the length of your image.
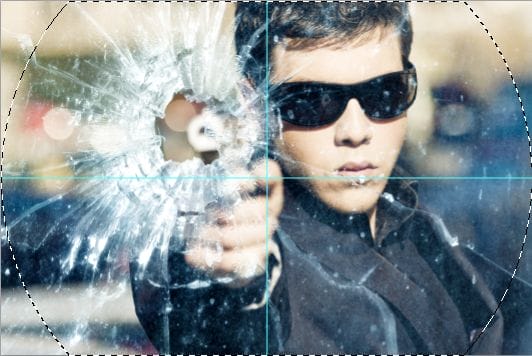
You should now have a selection like the image below.
Choose Select > Inverse to inverse the selection.
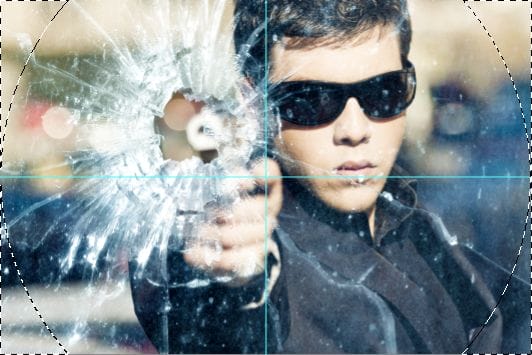
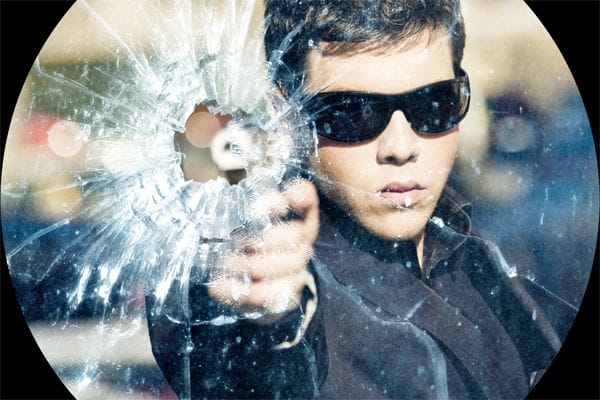
Choose Edit > Fill and fill the area with black. Now choose Select > Deselect to deselect the selection. Your vignette should look like the image below.
We’re done using the guides. You can remove them by selecting the move tool and dragging the guides back to the ruler. Choose Filter > Blur > Gaussian Blur to blur the edges. If you are working with a high resolution document and the gaussian blur filter isn’t strong enough, you can apply the filter again until you get the results that you like.
8 responses to “Gunshot Through a Glass”
-

can u share psd this link is not working
-
a very very very very thnx to u!!! most awsum tutorials!! so easy to go thru!! results : http://i.imgur.com/pFq4yjj.jpg
-
Great tutorial,with cool effects.thanks
-
nice
-
<3.<3
-
nice and easy tutorial for new photoshop user
-
Thank you! I just made it. :)
-
Thanks…
Leave a Reply