
Here is what my vignette looks like after applying gaussian blur filter with a radius of 250 pixels two times.

Step 15 – Position the vignette layer below the glass layer
If you like your vignette to be softer, you can reduce the opacity of the layer with the vignette or you can position the layer below the layer with the bullet hole for a unique effect.

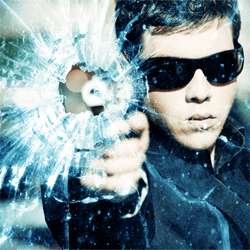
Here’s what the image looks like so far.

Step 16 – Cool the image with a photo filter
Select the top layer then choose Layer > New Adjustment Layer > Photo Filter. Set the filter to cyan and density to 100%.

Change the blending mode to soft light. If you find that the photo filter is too strong, you can reduce the opacity of the photo filter adjustment layer.

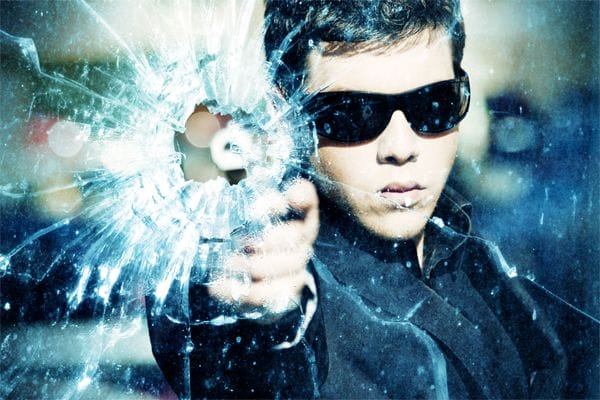
Final results and PSD
Rollover the image below to see the before and after effect. It may take a few seconds for the image to load when you first rollover the image.
8 responses to “Gunshot Through a Glass”
-

can u share psd this link is not working
-
a very very very very thnx to u!!! most awsum tutorials!! so easy to go thru!! results : http://i.imgur.com/pFq4yjj.jpg
-
Great tutorial,with cool effects.thanks
-
nice
-
<3.<3
-
nice and easy tutorial for new photoshop user
-
Thank you! I just made it. :)
-
Thanks…
Leave a Reply