- Brightness: 40
- Contrast: -18
- Use Legacy: check
The result should be similar to this:

Group this layer (Ctrl/Cmd + G) and rename the group to “Witch”.
Step 5: Create the Whale
In this step, we would be adding a whale swimming in the sky. To start, open “sperm whale 2” by donstock. Once open, activate the Move tool (V) and drag the whole whale image to our canvas, put it on top of the “Witch” group.
Once on the canvas, rename this layer to “whale”. Now to clear out that white part of its image, we would need some magic. Yes, we will need the Magic Wand tool (W). Simply click on the white part of the image using the Magic Wand tool (W) and then click on Delete. See image below:
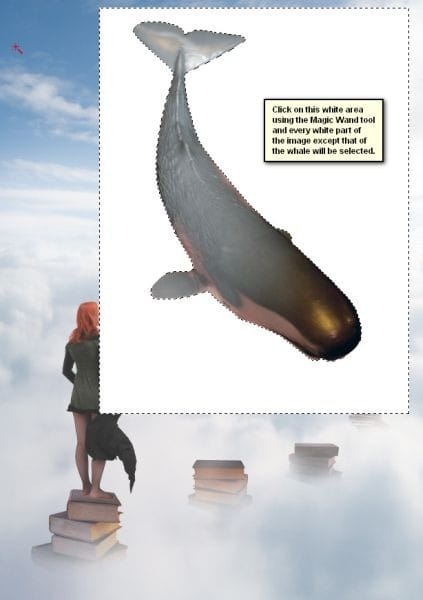
After deleting that area, the result will be:

Next, we would need to resize the whale. Resize it to the size shown below:
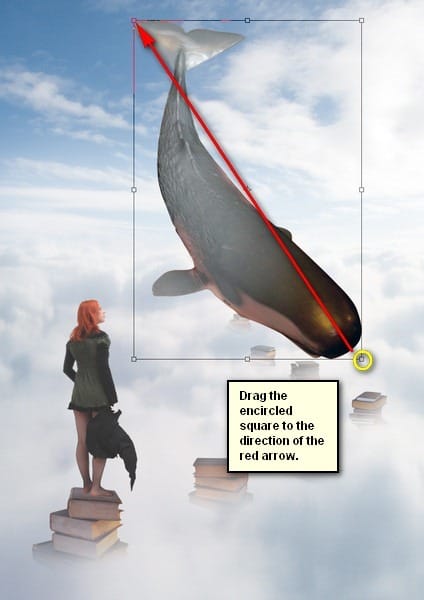
The result:

Next, let’s rotate the whale as shown on the image below:

The result:

Now, move this whale to the area shown below:

Next, let’s activate the Eraser tool (E) and input the following:
- Brush size: 300px
- Hardness: 0%
- Opacity: 100%
- Flow: 100%
We will need to erase the head and body of the whale.
Now, let’s get to it!
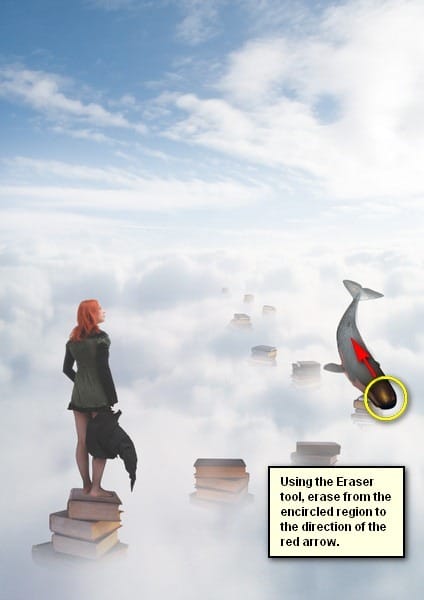
The result should be similar to the following:

Group this layer and rename this group to “Whale”.
Step 6: Create the Windmill
In this step, we will be adding the windmill. Let’s start by opening shoofly-stock’s “windmill 4”.
Once opened, activate the Move tool (V) and then drag this whole image to our canvas, put this layer on top of the “whale” group. This is a PNG file, and its background is transparent, that means it has no background – just the windmill. So after moving it to our canvas, you’d only see the windmill. Rename this layer to “windmill”.
Activate the Transform tool (Ctrl/Cmd + T) and resize the windmill layer as shown below:

Next, activate the Transform tool (Ctrl/Cmd + T) once again and right click on the canvas to bring out the contextual menu. Once the menu shows, click on “Flip Horizontal”.
The result:
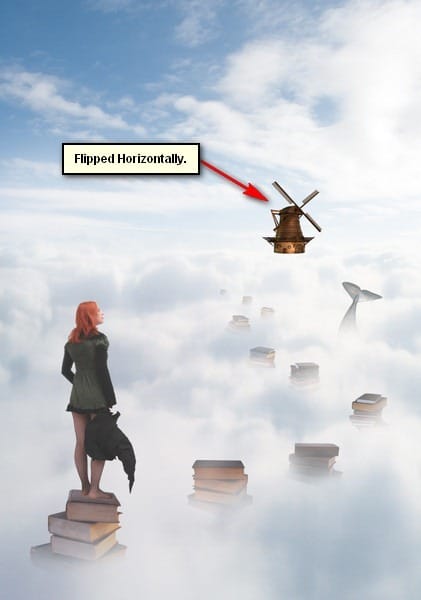
Next, drag the “windmill” to the position shown below:
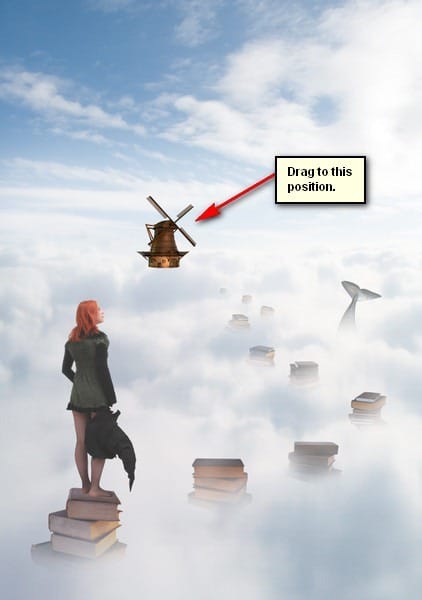
Next, activate the Eraser tool (E) because we’re going to make this “windmill” blend with the rest of the images. Now, input the following:
- Brush size: 300px
- Hardness: 0%
- Opacity: 100%
- Flow: 100%

After that, change the Opacity and Fill of the “windmill” layer to the following:


Leave a Reply