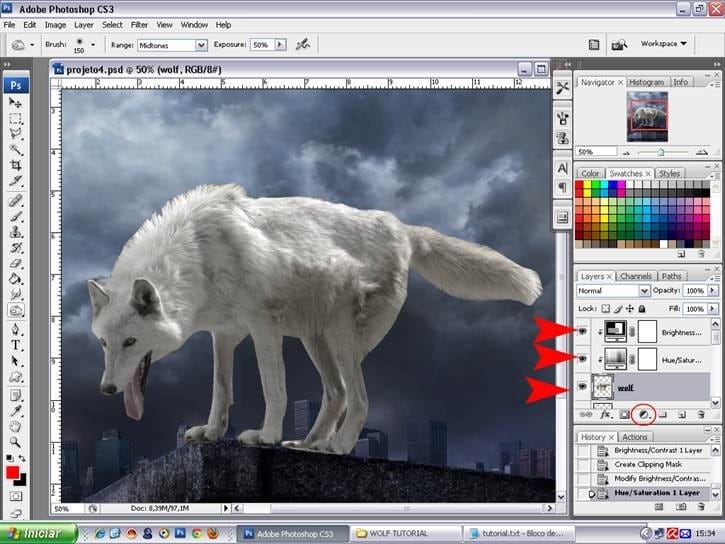
- Brightness -50
- Contrast -8.

Step 16
Right click on the layer and create clipping mask. Can see that the layer is connected to the layer below with a small arrow. This feature allows you to change effects.
Step 17
Now for most time consuming part, we work with some effects in the hair of the wolf.
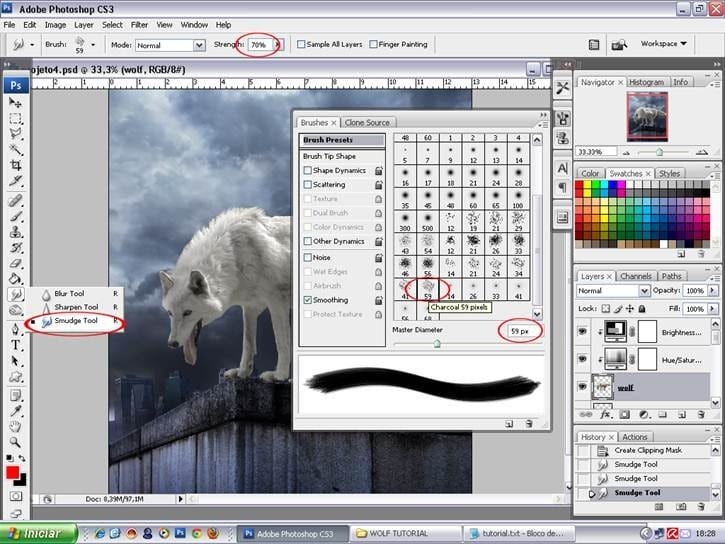
On the layer of the wolf, let’s start making the hair. On the side toolbar, we choose the Smudge Tool. On the keyboard “F5” to open a window with brushes, we choose the Charcoal 59 pixels, it comes in Photoshop itself, 70% strength.
Step 18
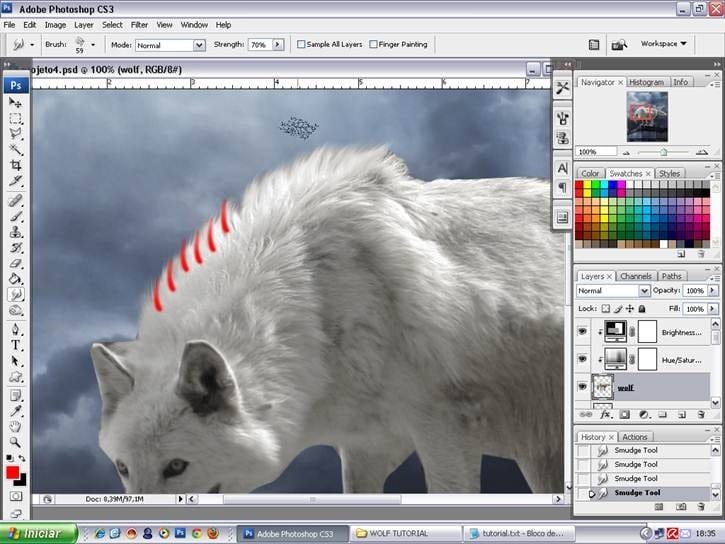
Let’s brush the hair of the wolf from the inside out, only at the edges.
See the picture where the strokes start. So, go all around the wolf, looking always follow the direction of the hair, and when necessary to reduce or increase the diameter of the brush, so you can control from the keyboard, with keys ] to increase, and [ to decrease. Be careful not to blur important parts around the face. Work with patience, until the hair looks natural.
Step 19
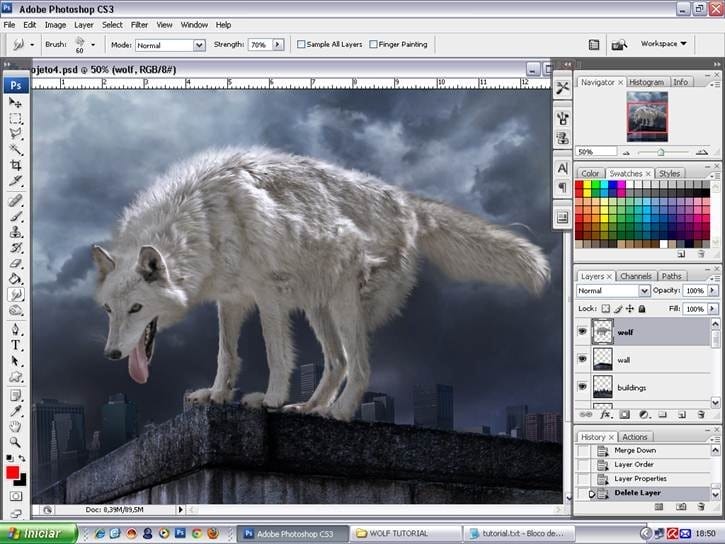
When finished, you can join the layers of effects, giving a Ctrl + E in each of them. Her wolf should look like this:
Step 20
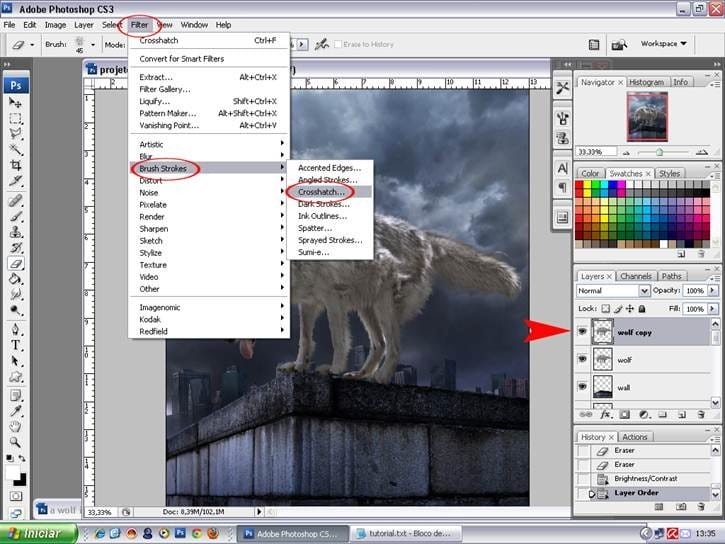
Duplicate the layer of the wolf, go to Filter> Brush Strokes> Crosshatch.
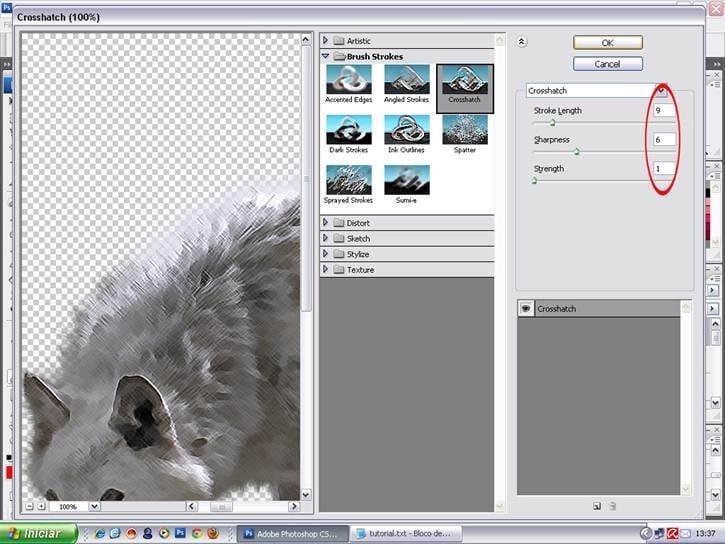
- Stroke Length> 9
- Sharpness> 6
- Strength> 1
Step 21
Allow the layer to 40% opacity, Ctrl + E to put together.
I applied this effect to give the appearance of dirty and wet.
Ctrl + J to duplicate layer.
Let’s start taking care of the colors, shadows and lights of the wolf.
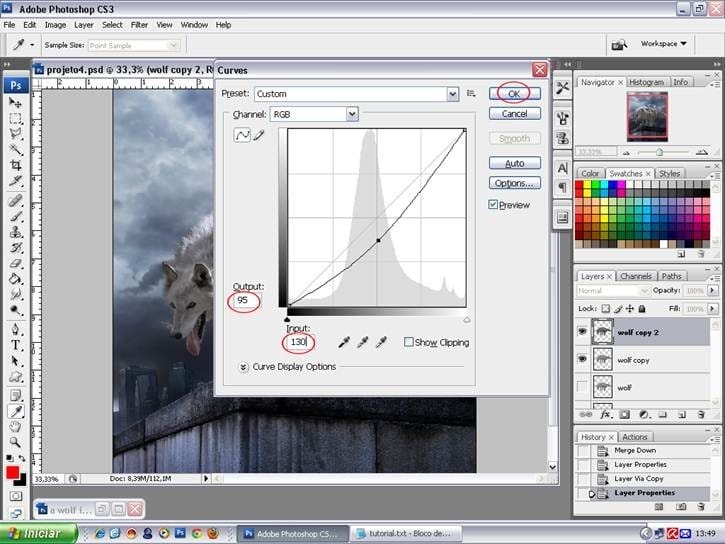
In the layer “wolf copy 2”, Ctrl + M to open Curves box.
In RGB Channel,
- Outup: 95
- Input: 130
OK.
Step 22
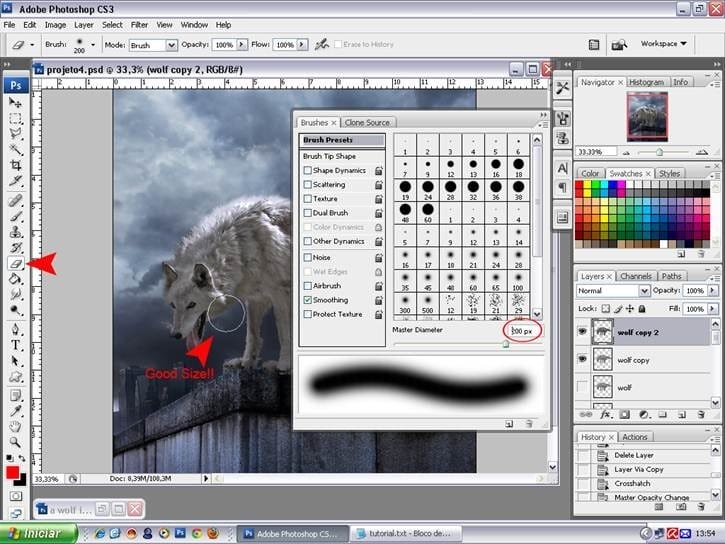
On the keyboard type E to open the Eraser Tool, type F5 to open the window of brushes and choose a smooth brush. I choose 200 px, because I found a good size to erase the parts that do not want.
F5 to close the window.
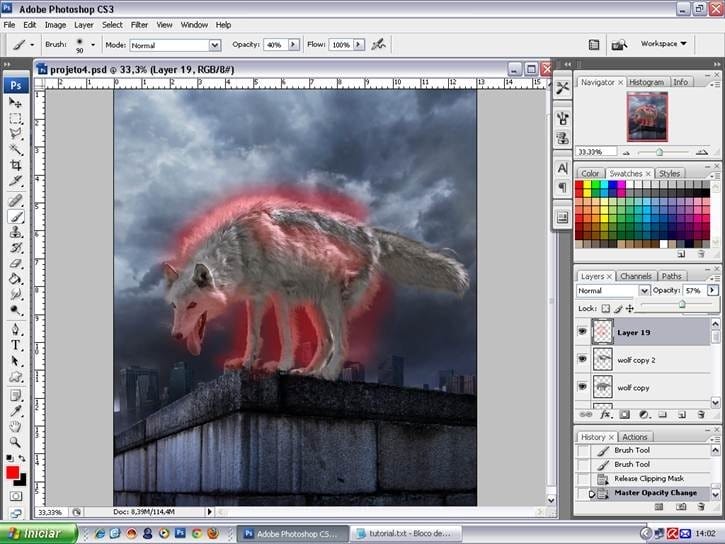
Step 23
With the Eraser Tool in 100% will erase some parts we do not want it dark. The red part in the figure where we show erase.
Ctrl + E to put together.
Duplicate the layer again.
Step 24
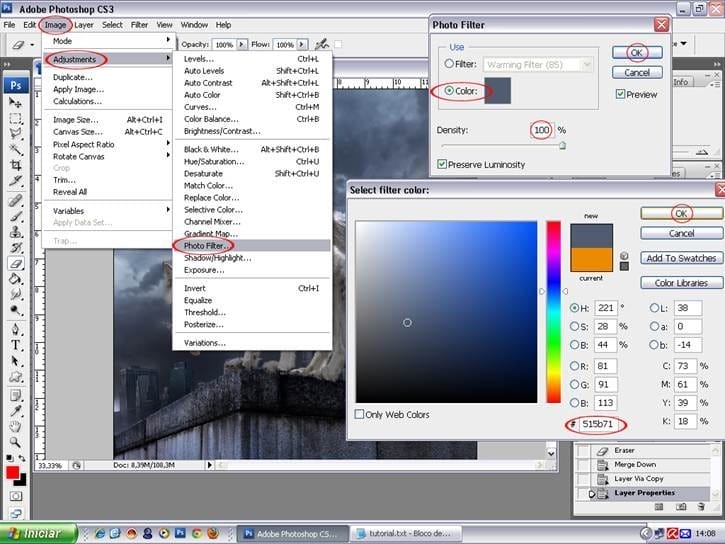
Let’s go to Image > Adjustments> Photo Filter.
Select Color 100%. Click the color square and open the color graph, enter this code: 515b71 press OK in all.
Step 25
Duplicate the layer, change the blend mode to Overlay 50% .
5 responses to “How to Create a Photo Manipulation of a Wolf in Stormy Weather”
-
please i need step by step PDF Photoshop manipulation design tutorials
-
The Cloud Pic Cant Be Downloaded
-
refresh link with clouds
-
it was nice exprenice
-
The Cloud Pic Cant Be Downloaded


Leave a Reply