Ctrl + E to put together.
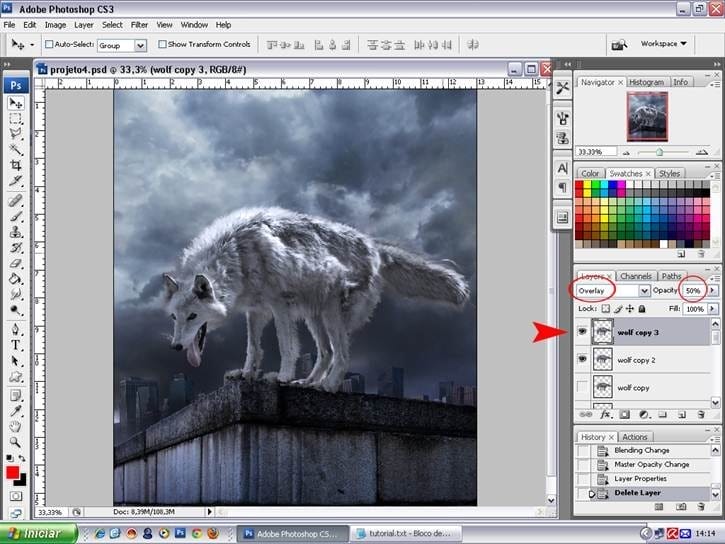
Step 26
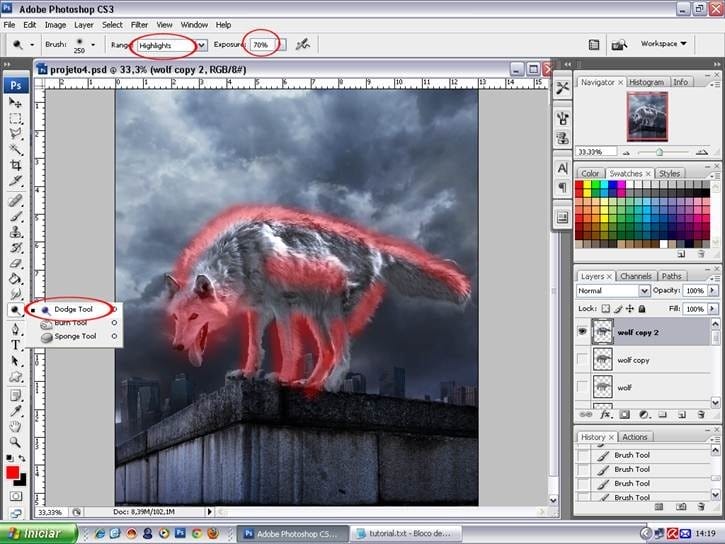
Ctrl + O to go to the Burn/Dodge tools, chose Dodge Tool > Highlights in 70% to clarify some parts of the wolf.
The painting in red shows the locations that we should apply more light.
We now choose the Burn Tool >Mildtone in 30% to darken some parts of the wolf. In yellow you can see the parts.
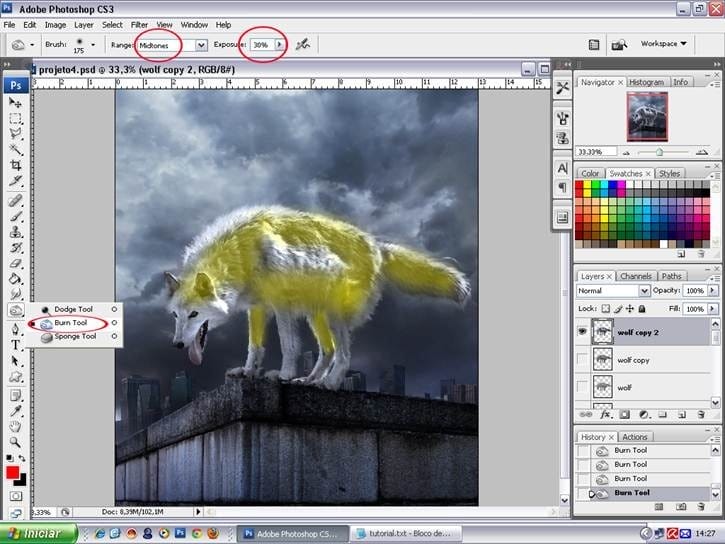
Step 27
In a wall layer, use the Burn/Dodge tools again, Dodge > Highlights in 70%, we will apply lights in some parts. In the figure, the parts in red indicate where to apply the light, and in the right side the result of this step.
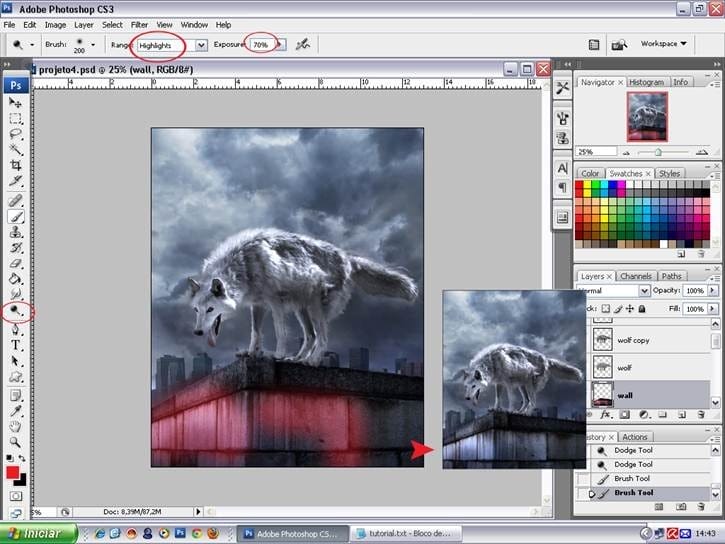
Step 28
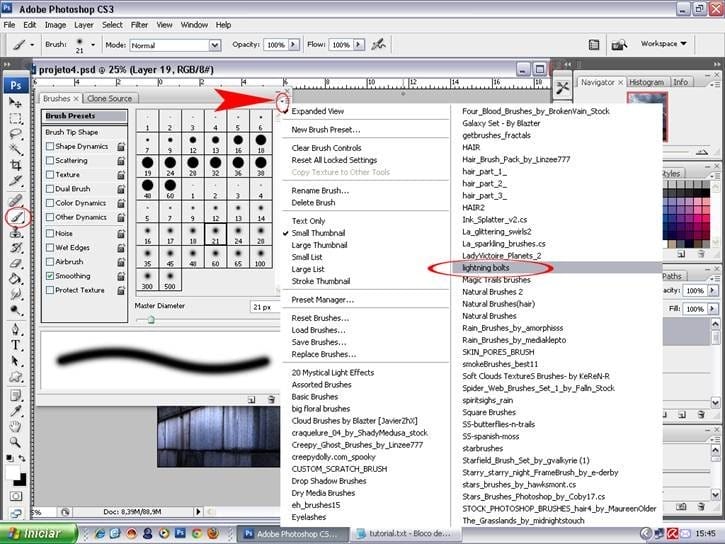
Go on top of all layers: Shift + Ctrl + N to open up a new layer, name the layer “lightning.” Now we get the list of brushes to chose “lightning bolts”.
Step 29
Ctrl + B to go in “Brush Tool”.
We look at the list for set “lightning bolts”
F5 to open the window of brushes, we choose one, and the size of 700px. The color should be white, to do, give a “D” on your keyboard to reset the colors and then an “X” to flip them. With the brush in white, let’s create a lightning bolt as shown in the image.

Step 30
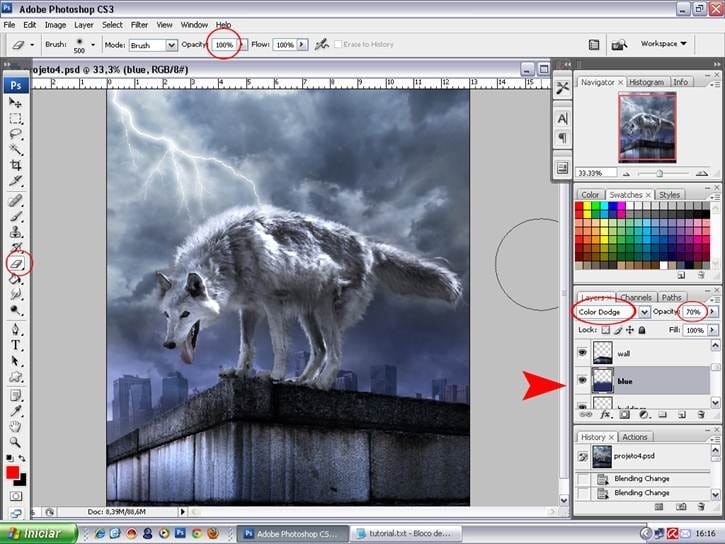
Below the layer of the wall, create a new layer: Ctrl + Shift + N.
On the tool side, in “Set Foreground Color”, give a click to open the chart of colors and the value of 272e65.Ok.
Give a “G” on your keyboard to go to the “Paint Bucket Tool” and paint our new layer with blue.
The layer name: “blue.”

Step 31
We changed the blend to Color Dodge 70%.
Give an E to select the Eraser Tool to erase the top of this layer leaving the blue color only the level of the buildings.
Step 32
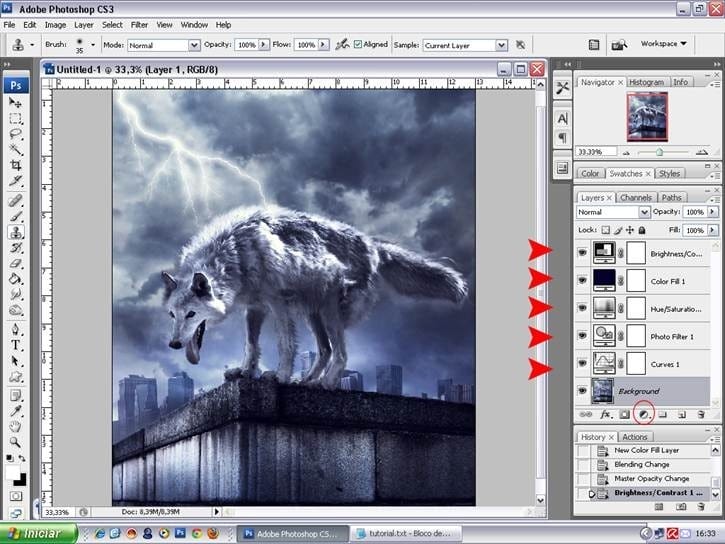
After saving your work in psd, flatten image.
Right click in one of the layers and go to Flatten Image.
At the top, let’s apply some Adjustaments Layers effects. Again, clic on the symbol represented by a circle half white half black.
- Curves > Output >108/ Input >126
- Photo Filter > Blue > 25%
- Hue/Saturation > Saturation -35
- Color Fill > 02002a / Change blend to Excusion in 50%.
- Brightness/Contrast > +5 / +40
Step 33
Go to Background and duplicate it. Attach all layers effects to this duplicated layer with Ctrl + E.
Let’s make the rain:
Shift + Ctrl + N To create a new layer on top.
On the keyboard “D” to reset colors.
Go to Filter> Render> Clouds
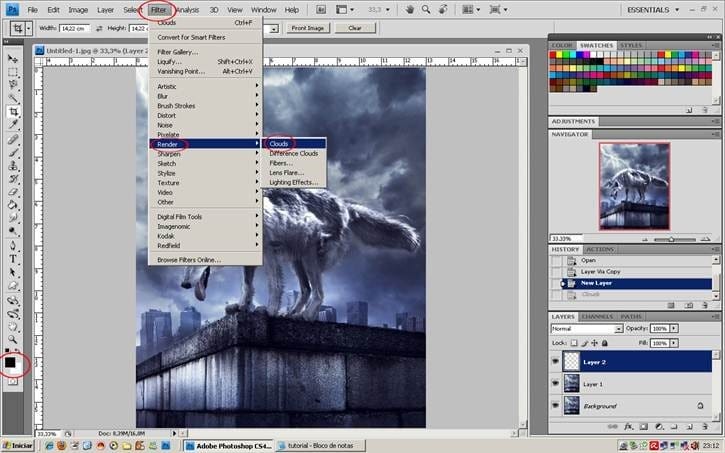
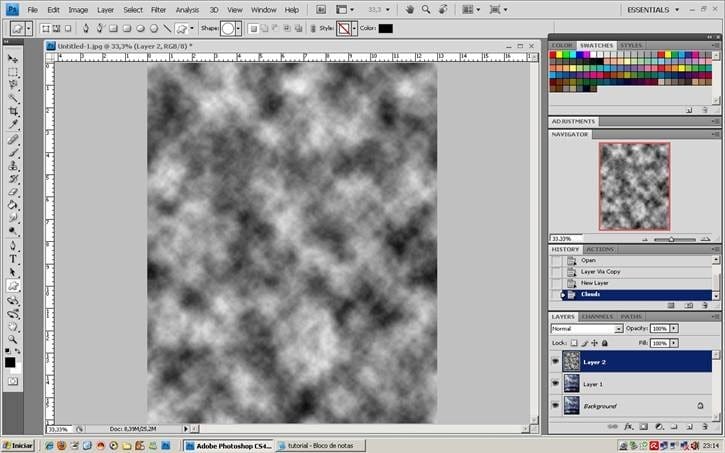
In the same layer go to Filter> Noise> Add Noise
5 responses to “How to Create a Photo Manipulation of a Wolf in Stormy Weather”
-
please i need step by step PDF Photoshop manipulation design tutorials
-
The Cloud Pic Cant Be Downloaded
-
refresh link with clouds
-
it was nice exprenice
-
The Cloud Pic Cant Be Downloaded


Leave a Reply