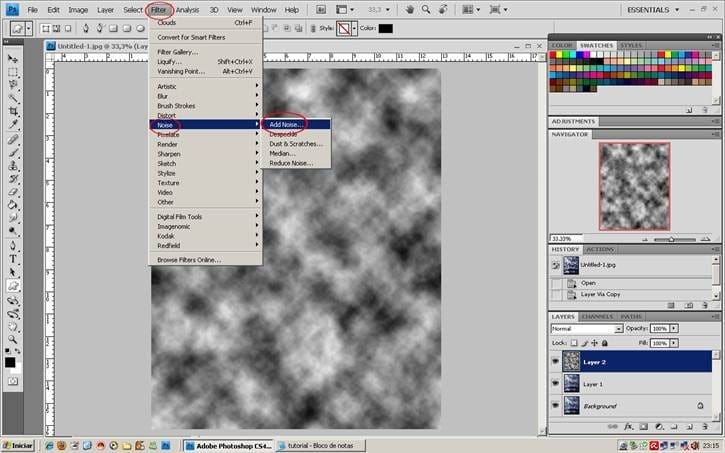
- Amount 300
- Gaussian
- Monochromatic
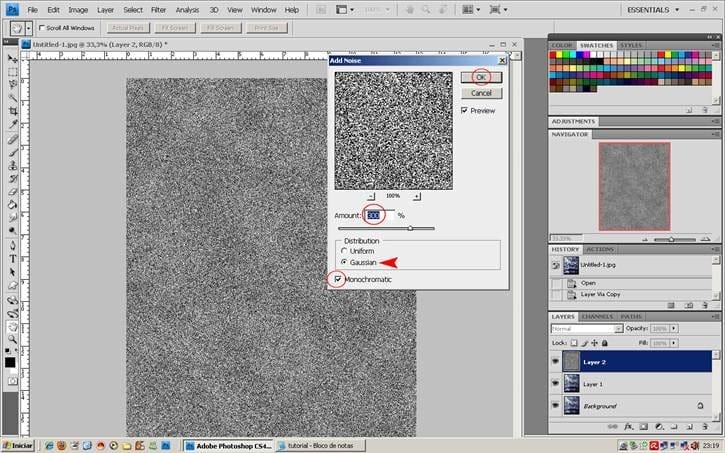
Step 34
Filter again, Blur> Motion Blur
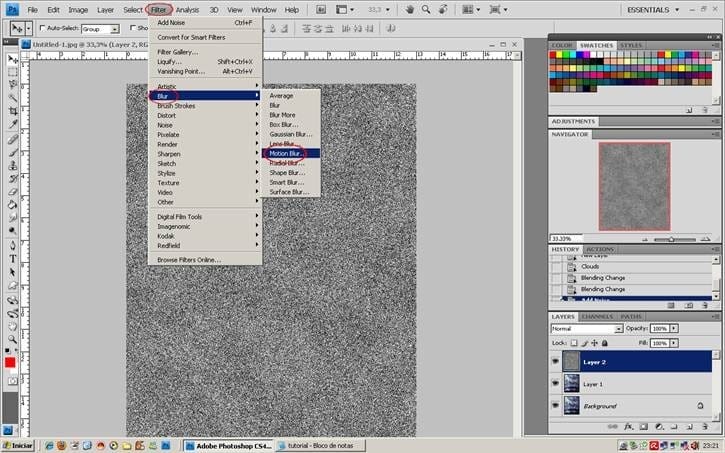
- Angle 62
- Distance 30
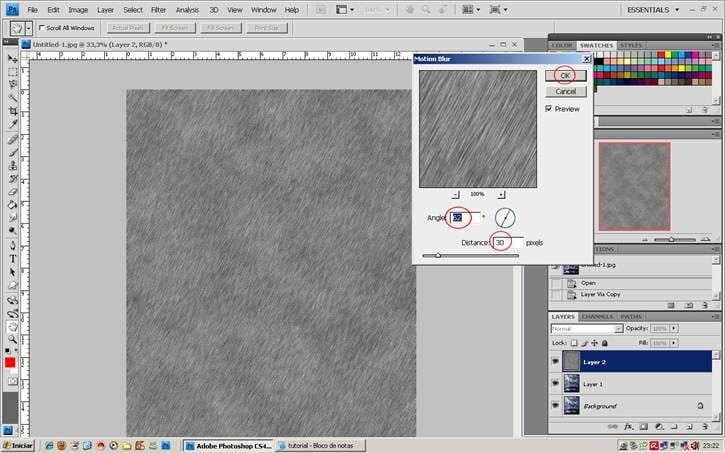
Step 35
Then change the blend to Soft Light.
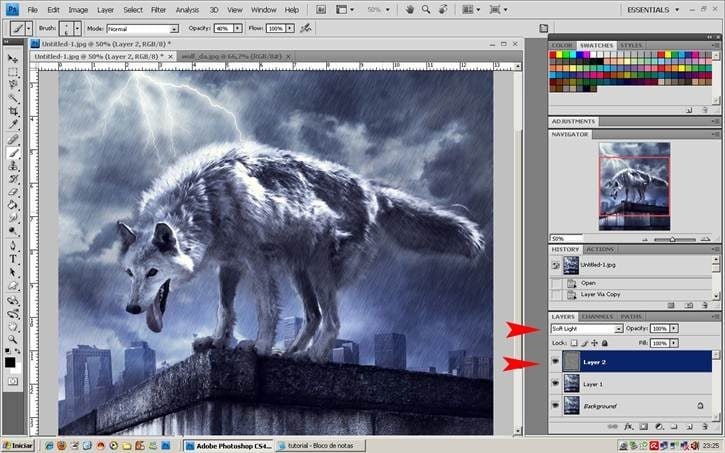
Step 36
Reverse the direction of the rain. Go to Edit> Transform> Flip Horizontal
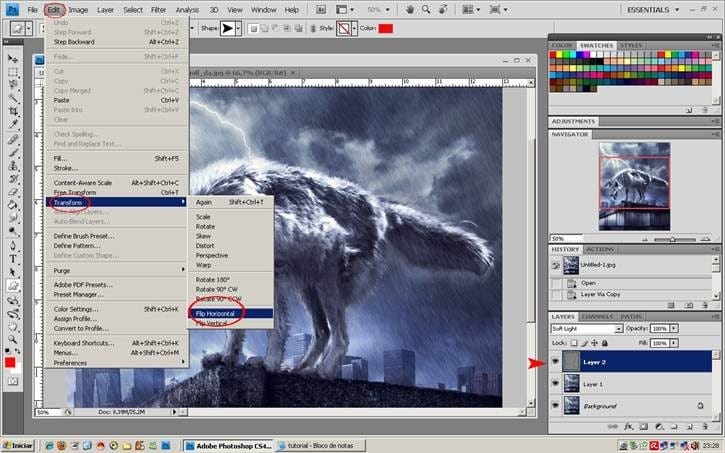
Step 37
In the rain layer, Ctrl + L to open Levels, let’s darken a little, move the middle pointer through to 0,75 or write the value. Ctrl + E to unite the rain layer to the wolf’s layer.
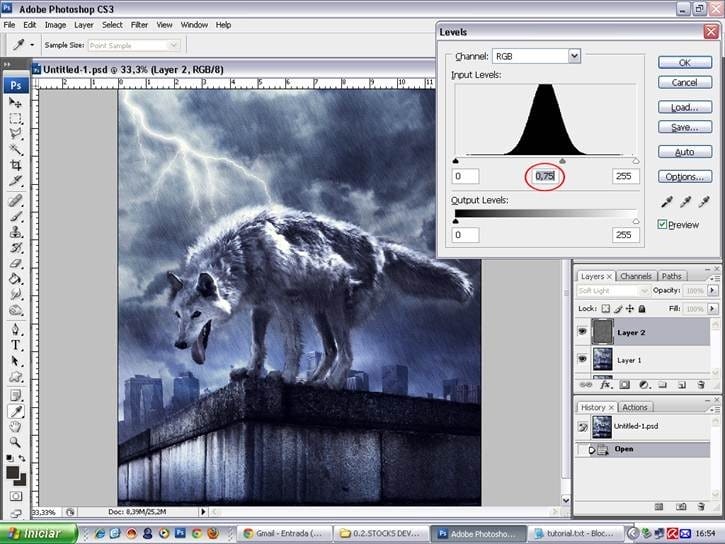
Step 38
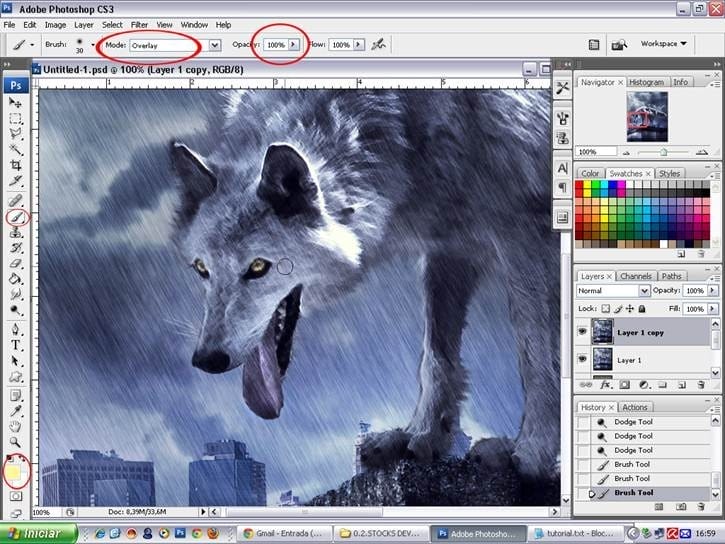
Ctrl + B to go in Brushes, choose the size of a wolf’s eye, and with a clear yellow color in Overlay Mode, opacity 100% , paint the eyes.
We will do the same with the tongue, but switched to a darker shade of red and leave the opacity at 15%.
Step 39
Let’s get some more details, our work is coming to an end.
Create a new layer, Ctrl + Shift + N, with a soft white brush, let’s do a few drops of water falling from the mouth. Well, the moment I do not brush drops, we’ll improvise.
Start painting the tongue just as in the figure.
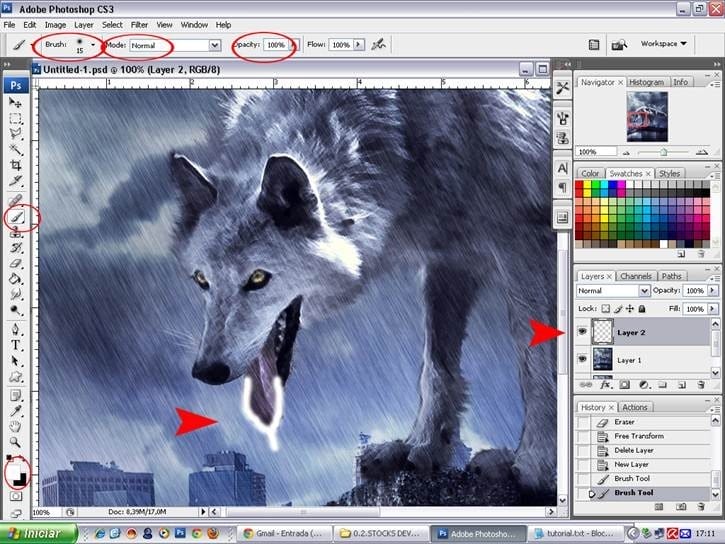
Step 40
Then go to Layer Style, is the symbol “fx” in the Layers palette. When you open go to “Blending Options: Custom,” stir in the following configurations.
- Fill Opacity: 0
You will see that the painting “disappears”, but I’ll fix it …
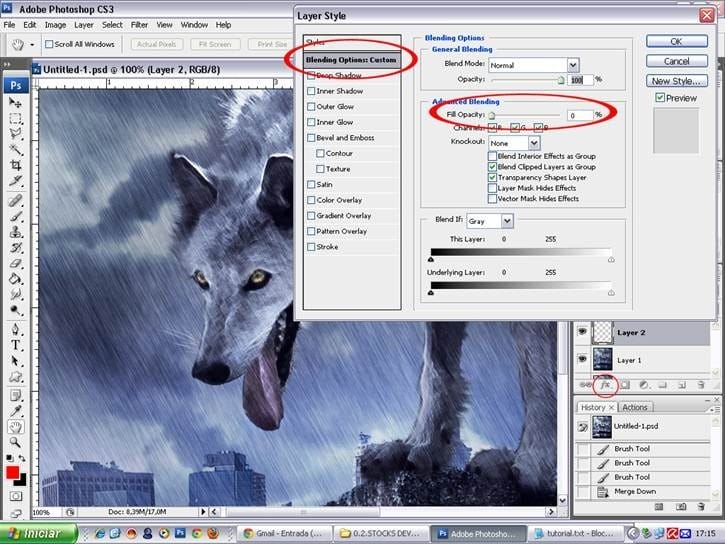
Step 41
Check the box Bevel and Emboss and “Gloss Contour”, select the “Rolling Slope – Descending” as in figure. Already you can see the result in the tongue. The more experienced who wish to modify, feel free. Ctrl + E to merge layers.
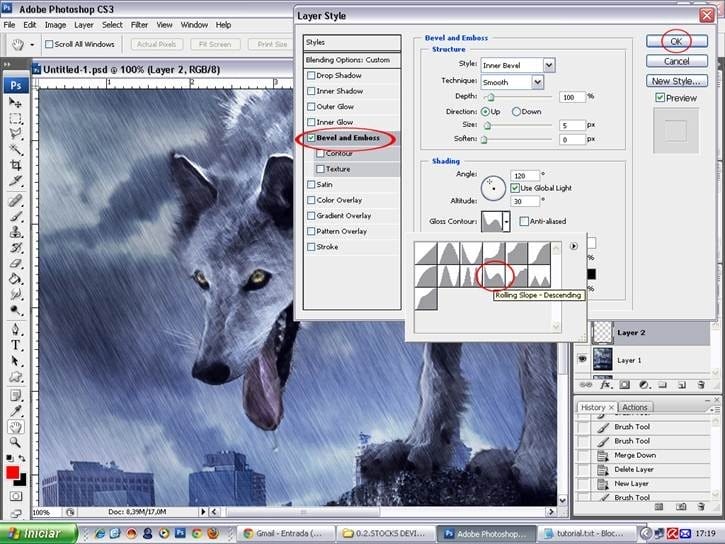
Step 42
And finally, Ctrl + U to open Hue / Saturation.
- Saturation – 15
And at the top, go back Layers Adjustments,
- Solid Color> 4a5365
- Change blend to Color 30%.
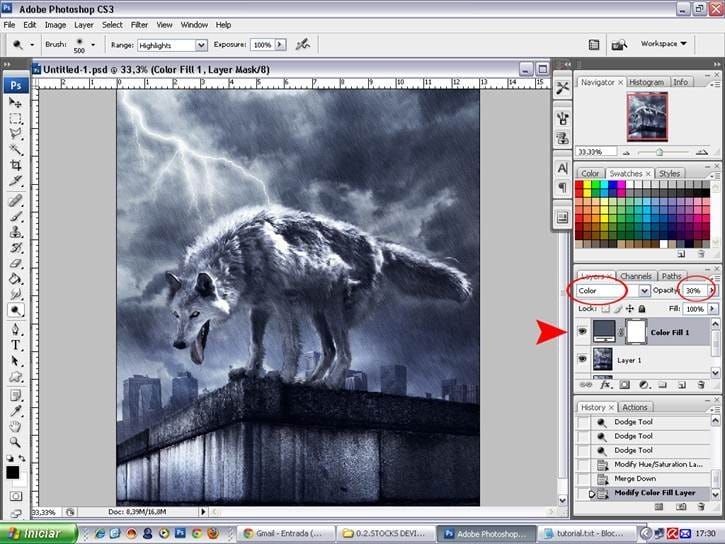
Final Results
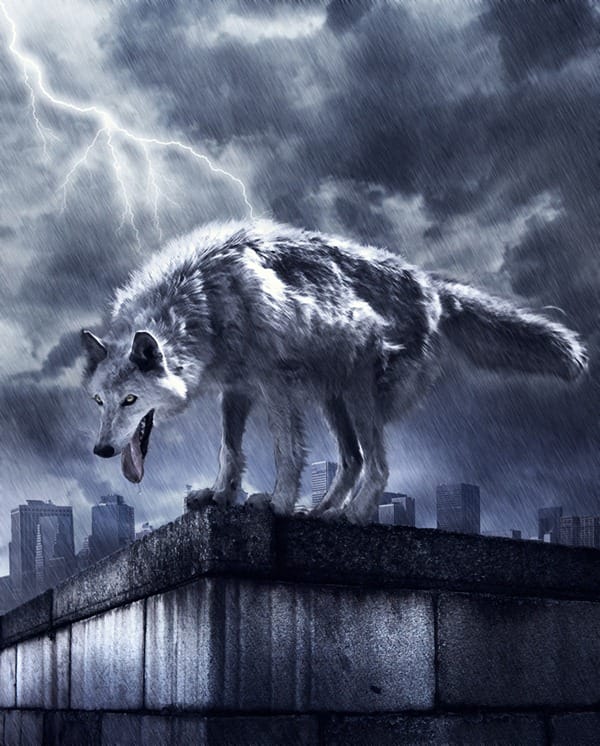
Hope you enjoy the tutorial and get a good result.
5 responses to “How to Create a Photo Manipulation of a Wolf in Stormy Weather”
-
please i need step by step PDF Photoshop manipulation design tutorials
-
The Cloud Pic Cant Be Downloaded
-
refresh link with clouds
-
it was nice exprenice
-
The Cloud Pic Cant Be Downloaded


Leave a Reply