Learn how to create this fantasy photo manipulation of Red Riding Hood. This tutorial will show you how to work with the Pen tool, create an illusion of depth, lighting, and more!
Preview of Final Results

Red Riding Hood Photoshop Tutorial
Tutorial Resources
- Model – Lady-Moriendistock
- Field – compot-stock
- Field – sugary-stock
- Forest – banana-workshop
- Wolf – figg-manbearpigs
- Branches – midnightstouch
Step 1
Extract the model from the original image; I used the Quick selection tool to make this, because there’s a lot of contrast between the model and the background. So this will make it easier.
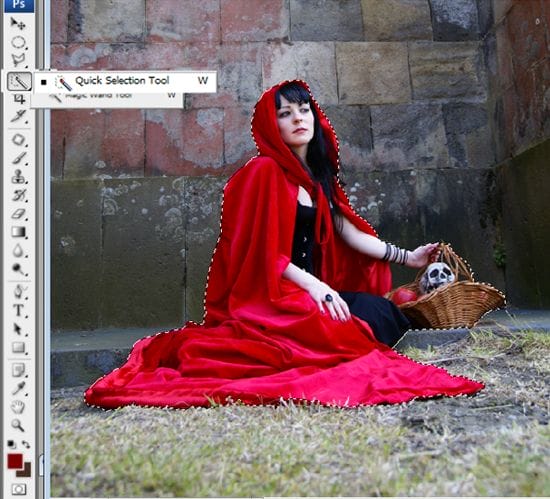
Step 2
After your selection is done. Press CTRL + J to duplicate the selection, and you will have something like this:
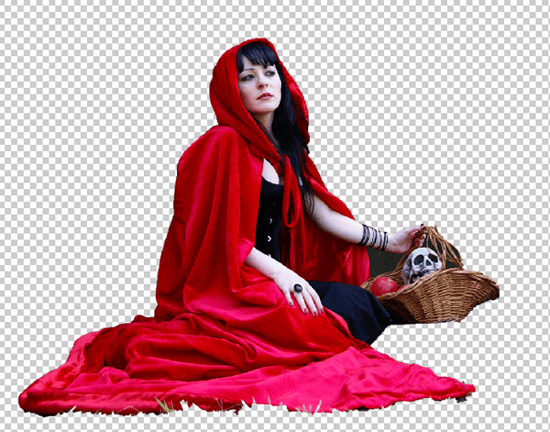
Step 3
Then you can fix little details from the basket with the polygonal lasso tool.
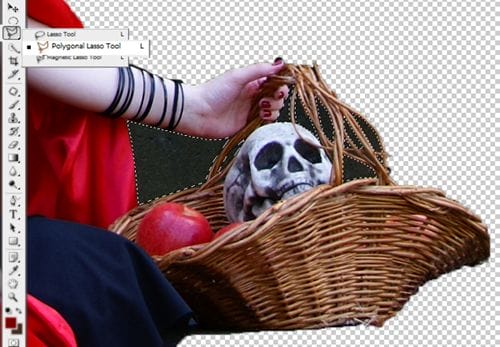
Press delete to erase the selection.
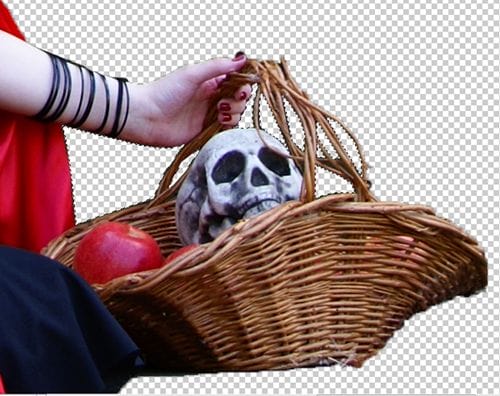
Step 4
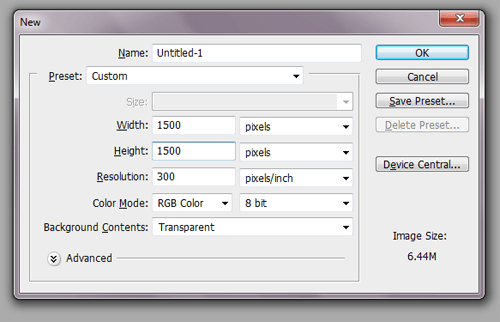
Press CTRL + N to open a new file with 1500 x 1500 pixels.
Step 5
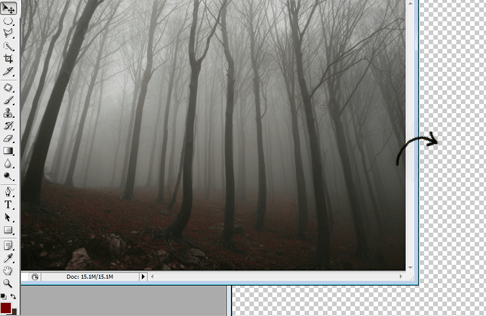
Open the forest stock and with the move tool put it in the new file you opened before.
Step 6
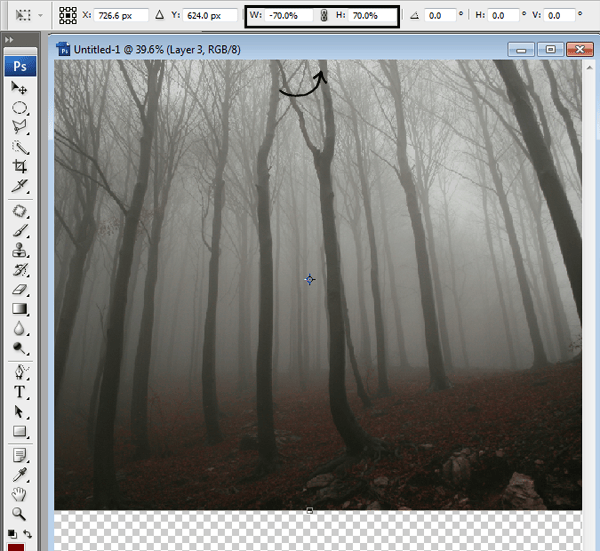
Change the size of the forest pressing CTRL + T then in the options you find in the upper side of the image put W: -70 and H: 70. That will reduce the image to a 70% of the original side. Press Enter to apply the changes.
Step 7
To make the field, I used this image.

Step 8
Erase a part of the field with the eraser tool.
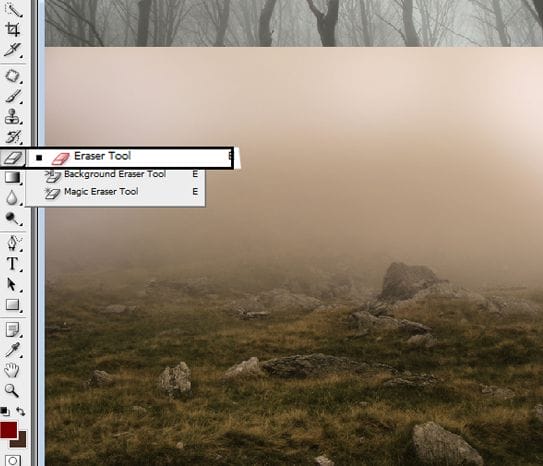
You’ll get something like this:
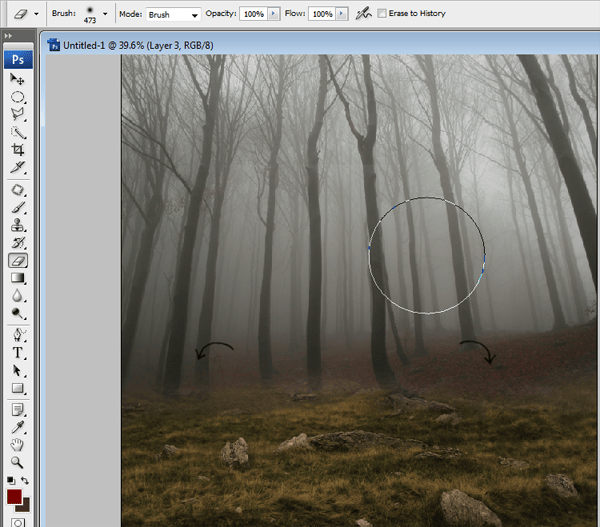
Step 9
Then you have to change this layer color. To do it press CTRL + U, and click the option colorize.

Now we are going to put the option Hue at 13, the option saturation at 28 and the lightness in -15.

Step 10
Now we are going to add the flowers layer.
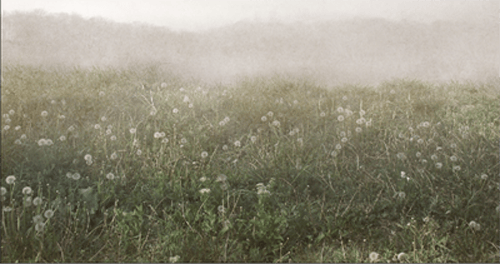
Step 11
After adding the new layer, you have to change the size once again pressing CTRL + T. Until you get the desired result. In this case I reduce the size to a 60%.
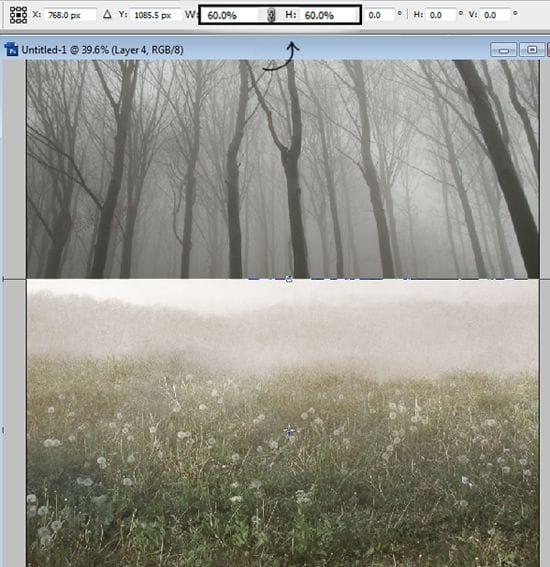
Step 12
Let’s change the color again to get that brownish tones. Press CTRL+ U and click in colorize. I used Hue: 16 Saturation: 25 and Lightness: -5.
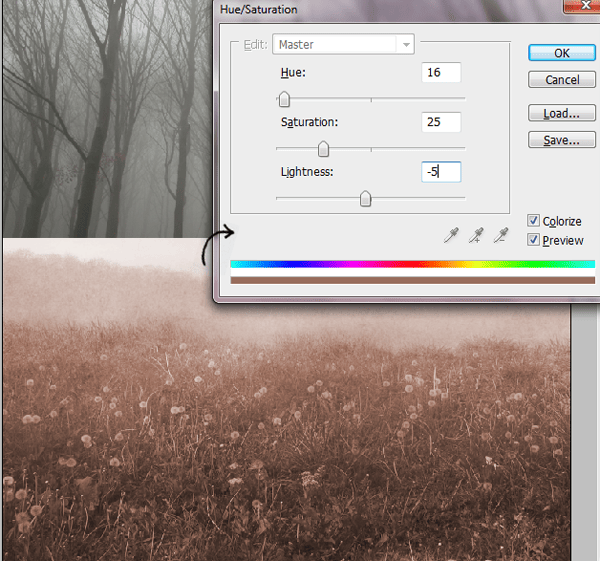
Step 13
Put the layer in soft light mode light this:
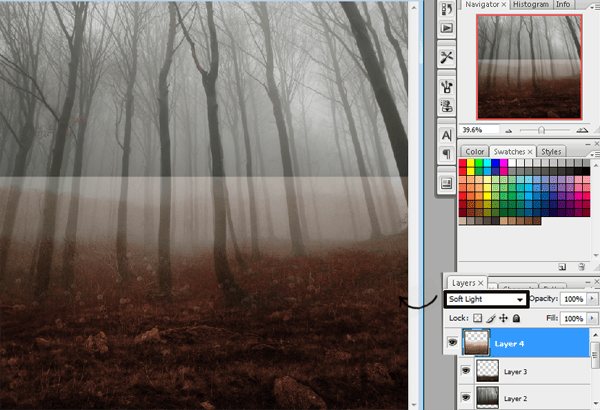
Step 14
Press CTRL + T to rotate a little bit the layer.
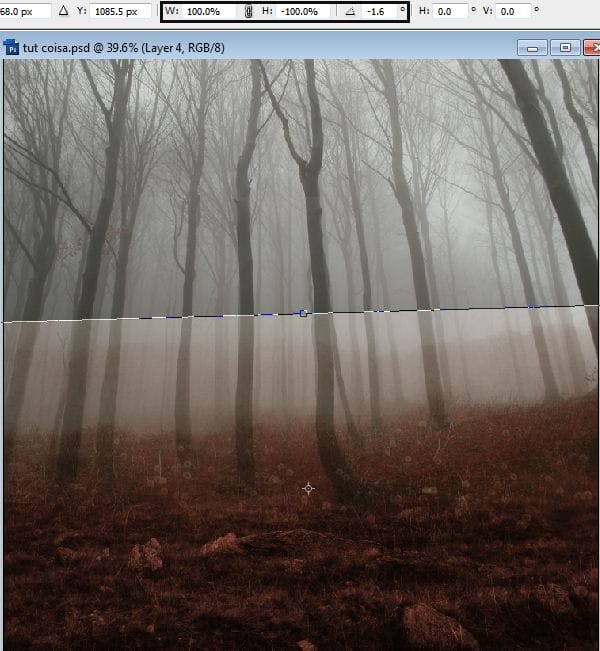
Step 15
Pass the eraser in the areas you don’t want this layer to be visible. I used a soft brush to achieve this result.
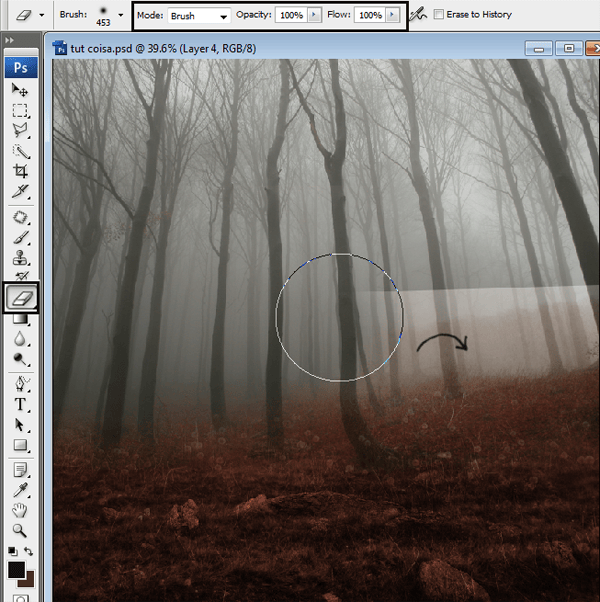
Step 16
Now create a new group. Press the folder that is in lower part of the screen.
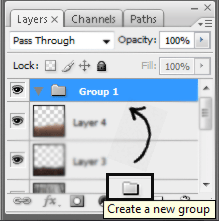
Put the background layers in this new group. Just grab the layers and put then over the folder.

Step 17
When you have all the layers in the folder, you can convert it into a smart objet. To do that: give a right click in the folder and press the option smart object.
33 responses to “How to Create a Red Riding Hood Artwork in Photoshop”
-
nice tutorial :)
-
loved it
-
Was forced to do this but still good work on the tutorial
-
Elegant, modern, very different..
-
Awesome…!!!
-
nice
-
As a beginner ,i appreciate it.thank you
-
i lkie artes!
-
-
try hard…
-
Love the tutorial thank you, heres a link to my final product http://1artpro.deviantart.com/art/Red-Ridinghood-350746058?ga_submit_new=10%253A1359240729
-
-
boas , mais um excelente tutorial e uma belo ensinamento… muito obrigado
-
@jorgemiranda de nada Jorge, fico feliz que achasse interessante :)
-
-
Thanks for making Photoshop easy to learn…
Just sharing:-
@Julia Garner thank you Julia I’m glad you found it useful
-
-
This is an awesome picture.
I like the color and the blur circle in the last part. make it more mysterious.-
@Ayaron thank you :)
-
-
thank you… great tutorial… hope there more excited tutor that I could try…
-
@macarip thanks, I hope to see your result!
-
-
Great tutorial, congratulations, best regards
-
Awesome Tutorial.. Love it..
-
reywen, rock under the skull basket.
-
my teacher forced us to do this. I hate it!!
-
-
where is rock picture?
-
Did you find it? I cant find it as well.
-
-
superb
-
thanks for tutorial its useful for me as beginner
-
nice use of photoshop ..
to create a red ridding hood artwork n photoshop..
thanks for sharing.. -
really nice post and it will be useful ..thanks to share.
-
nice tutorial…!!!
-
Hola andrea hermoso tutorial gracias por compartir tus conocimientos
graciela -
Thanks for this tutorial. I really enjoyed it. :)
-
shut up george
-


Leave a Reply to ajitCancel reply