Don’t worry too much about the details because they will be really small in our final image. Here’s how I extracted them.
Fish 1:

Fish 2:

Fish 3:
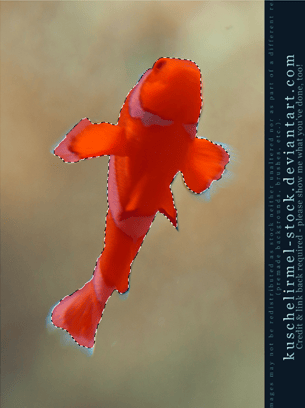
Let’s start with fish number 3. Copy and paste it into our project and use the Free Transform Tool (Ctrl/Cmd+T) while holding the Shift key to resize it.

Now go to fish number 1, copy and paste it two times into our project and resize them using the Free Transform Tool (Ctrl/Cmd+T). Remember to hold Shift while resizing.
Flip one of them horizontally the same way we did before, go to Edit > Transform > Flip Horizontal.

Copy and paste fish number 2 into our project two times. Resize them using the Free Transform Tool (while holding the Shift key) and flip one of them horizontally like we did with fish number 1 (Edit > Transform > Flip Horizontal).

After all the fishes have been placed, select them and merge them (Ctrl/Cmd+E) in a new layer called Fishes.
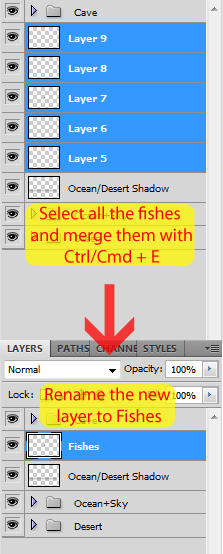
To take off some of the redness of the fishes, create a new Curves Adjustment Layer like we did before (click in ‘Create a New Filter or Adjustment Layer’ and select ‘Curves’). Change the Blue and Red curves and clip this adjustment to the fishes layer by clicking in the button next to the little eye (you just have to click once to clip it).

To finish the fishes, select their layer and lower the opacity to around 30%.
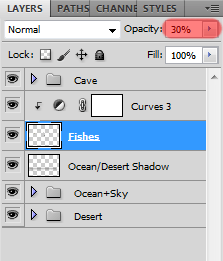
Here is how your image should look like with the fishes added:

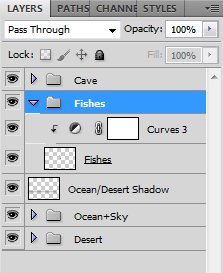
To clean our workspace, select the Fishes and the Curves adjustment layer and add them to a new group called Fishes (Ctrl/Cmd+G).
Step 9: Add some light effects to the background
Create a new layer by hitting Ctrl/Cmd + Shift + N. In the New Layer window that appeared, change the name of the new layer to ‘Lighting’, the mode to Overlay and check the button to fill the layer with 50% gray.
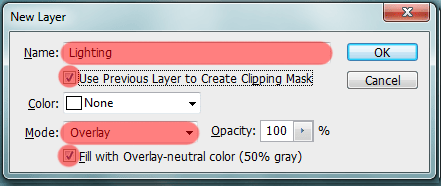
Place the new layer right below the Cave group (it will affect all the layers below it).

Select the Dodge Tool (Shortcut: O), set Range to Midtones, the Exposure to 30% and start painting this layer.

This is an important and complicated step so here are some tips on how to use the Dodge/Burn Tool:
10 responses to “How to Create a Surreal Scene with an Invisible Man Inside a Mystic Cave”
-
Some of these tutorials are extremely good, magazine like. Thanks for sharing!
-
Excellent tutorial. Easy to follow and very, very informative. Thanks for the knowledge.
-
I did thank you. It took a while but after a while I got the hang of it.
-
excellent work
-
buen trabajo amigo
-
good work
-
nice
-
Cool tutorial…got to learn a lot of things… Thanks a lot… :)
-
thanks, glad you like it =D
-


Leave a Reply