
Make skin look perfect in one-click with these AI-powered Photoshop actions.
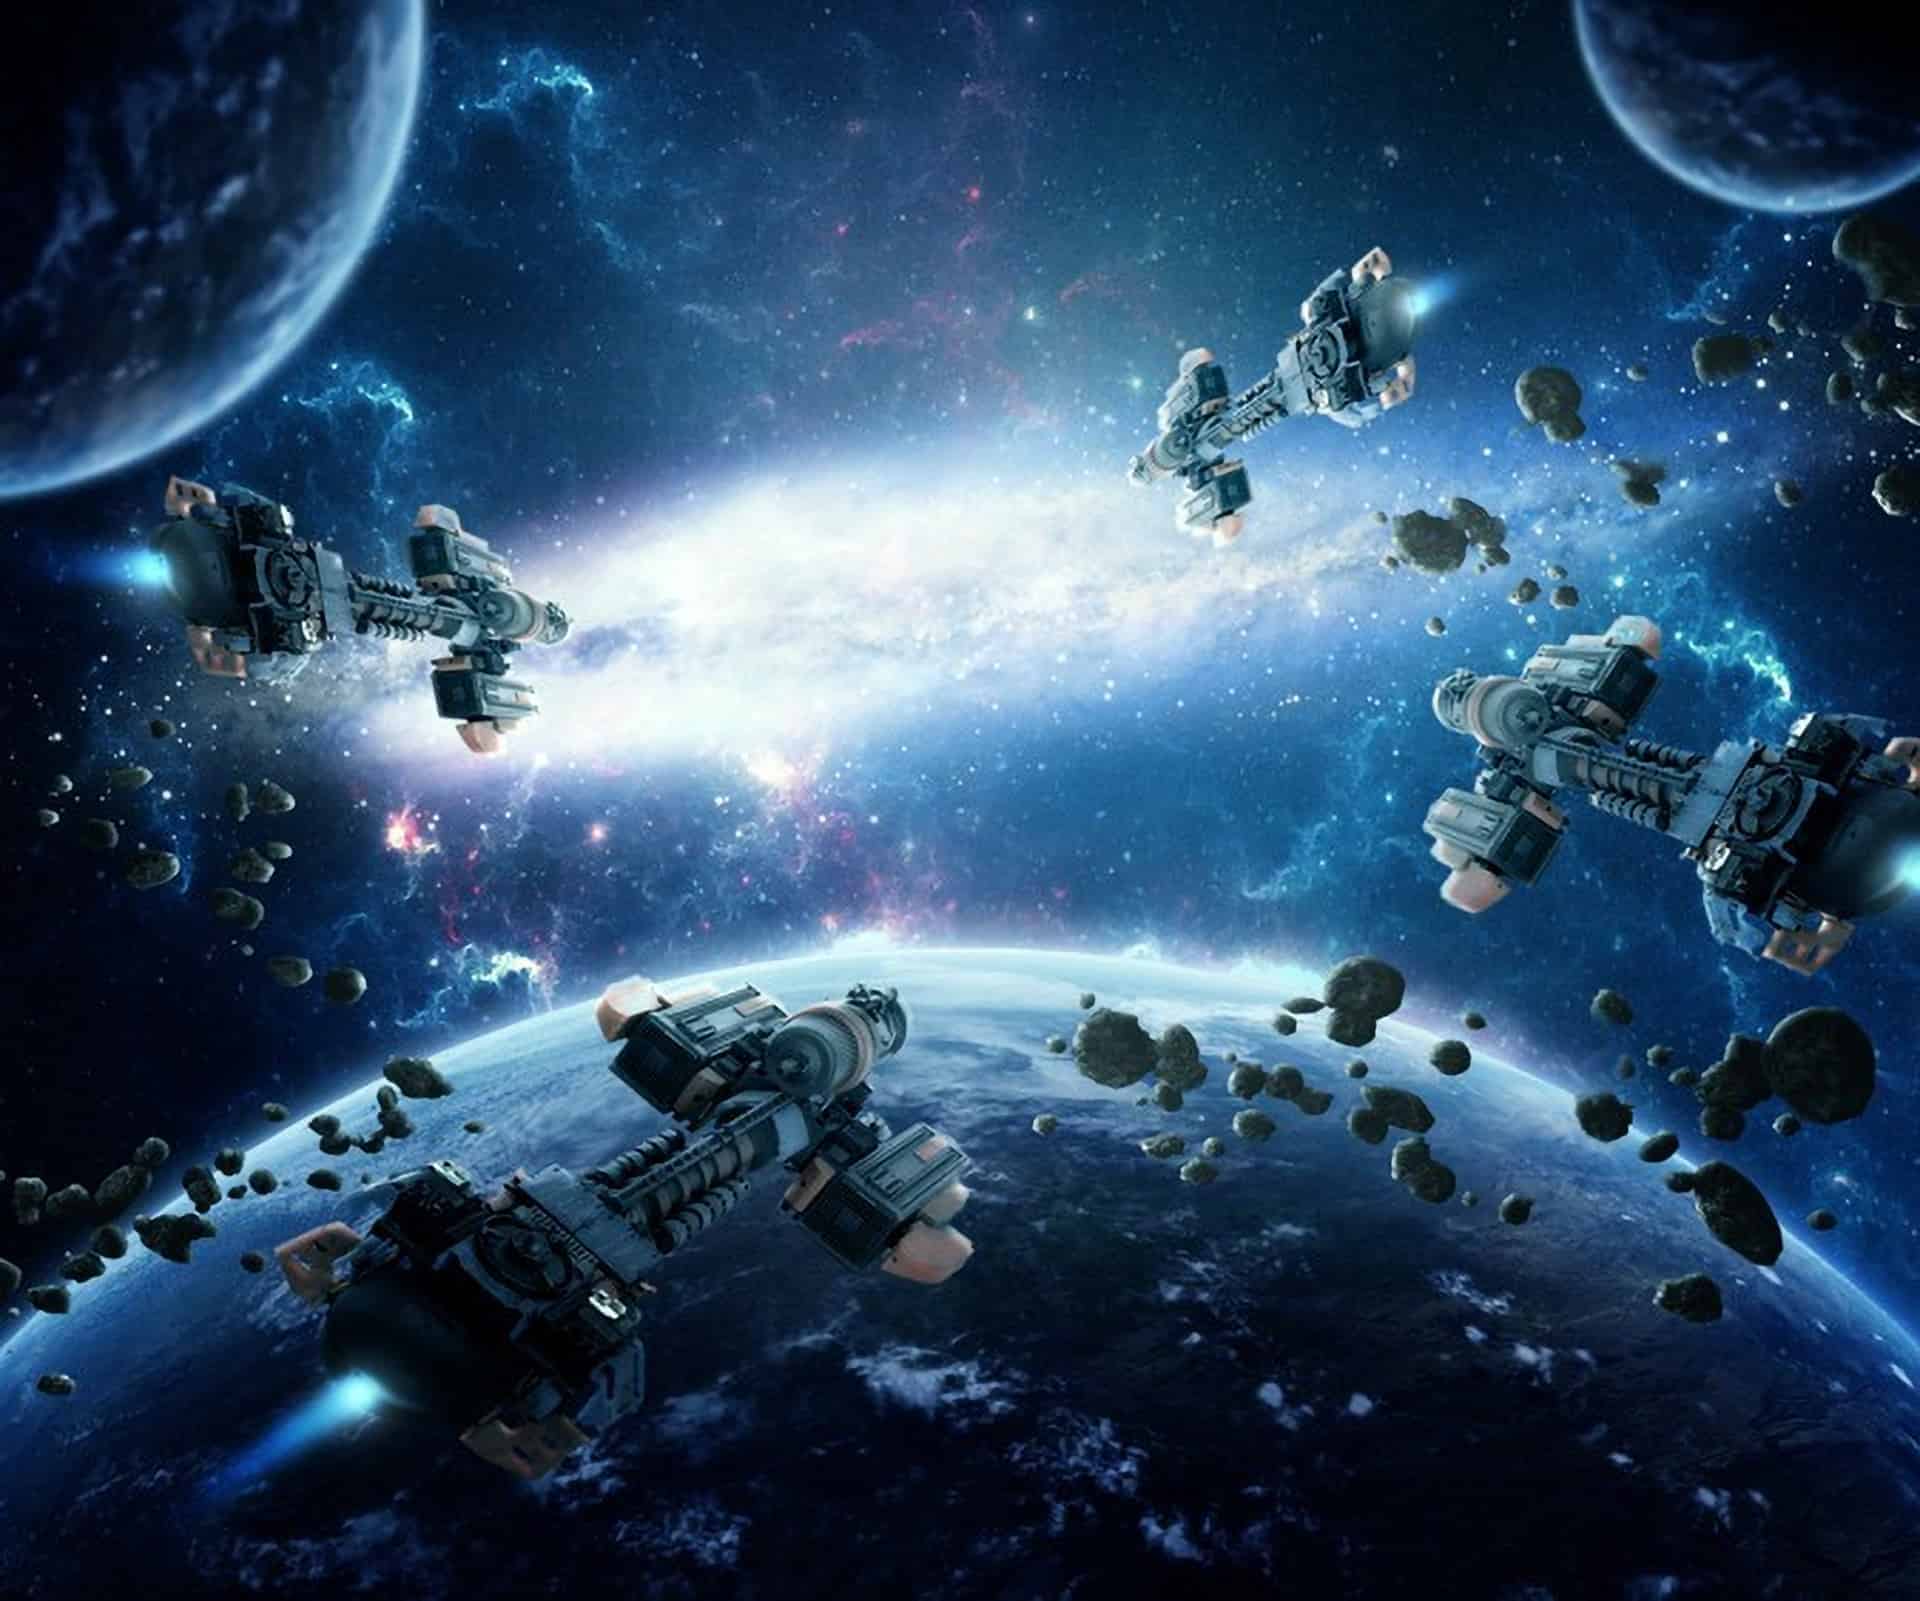
In this tutorial, I'll show you how to create a sci-fi artwork with spaceship, planets and galaxy. You'll learn how to compose and manipulate some space elements together as well as blend them correctly and effectively. You can also learn to create some different kinds of lighting, work with groups, use brushes, masking and more.
Preview of Final Results

Tutorial Resources
- Starry sky - nighthawk101stock
- Planet - dadrian
- Spaceship - inadesign-stock
- Asteroid - mototsume
- Space brushes - redheadstock
- Nebula - sxc.hu
- Galaxy - Photoxpress
Step 1
Create a new document and fill it with white. I make the width is a bit larger than the height. Make a new layer and press G to active Gradient Tool. I choose Radiant Gradient with color #000a18 and # 53657d:

Step 2
Open planet stock. Hide the black background and press Cmd/Ctrl+Shift+Alt/Option+E to merge all transparent layers. We will have result:

Use Move Tool ( V key to active it) and drag planet into our document, place it at the picture bottom:

Duplicate this planet twice, resize and transform it to be smaller ( use Cmd/Ctrl+T to do it) and position them at the two edges of picture:

Call big planet as "planet 1" and smaller ones as "planet 2", "planet 3". On planet 2 layer, go to Filter-Blur-Gassian Blur and set radius as 2 px:

Choose planet 3 layer, press Cmd/Ctrl+F to repeat this filter ( Gassian Blur) with it:

Step 3
Make group for all planet layers ( make them selected then press Cmd/Ctrl+G) as I want to edit them together. Change the mode of this group from Pass Through ( default mode group) to Normal 100%:

Now I use an adjustment layers to change color of these planets. On planet 1 layer, go to Layer-New Adjustment Layer-Color Balance:

Because the mode of group changed to Normal 100% so this Color Balance layer only affects the layers inside this group ( planet ones).

I want to increase a bit of contrast of planet 1 so I make a new layer above this one with Clipping Mask and use Linear Gradient with default color ( black and white):


Change the mode to Soft Light 100% and add layer mask for this layer. Use soft black brush to remove and reduce dark contrast on some parts we've just painted on. Look at the layer mask to see how I masked it:

Step 4
Open nebula stock. Drag it into our canvas and place it under planet group. I only take a part of this stock:
34 comments on “How to Create an Amazing Space Battle Scene in Photoshop”
I tried to open the links for the Photoshop tutorial but none of them are opening Can anyone help
This is honestly such a bad tutorial. It leaves so much out and is very hard to understand.
This tutorial is absolutely terrible! It does not explain how to do most of it and just assumes that you know how to.
best mmo super fan
This is Amazing, may I post my work of this? of course ill leave the link aswell
I have learned many advanced technique . Thanks for share .
Really very informative tutorial i have learned many thing from this tutorial .
The Galaxy link seems to not be working.
I like the idea of this tutorial, it’s very creative and the result looks great.thanks for sharing.
awesome tut cant wait to try it out on my own, how ever the galaxy image is broken link :-(
the galaxy link is broken! please fix it.
I don't think the link is broken, it looks like the picture has been removed from that site :(
Wow! Very impressive Photoshop tutorial easy to follow thanks!
hey, the galaxy link is broken, can you update it or something i have no idea how to get it
The galaxy stock link is broken.
the galaxy link is broken! please fix it
The Galaxy (last link) is broken... please fix it :(
hellp video photoshop
I have problems with step 2... "merge all transparent layers." I can not do that!...How to remove black background photo of the planet? I mean, the planet without the black background
looks awesome
What should a beginner work on?
Why i can't see whole tutorial ?
i can't see more that step 6.
I can't see ships, asteroids, and high light at middle.
Help me. :P
I found it. I need glasses for correction. ;D
hi
thank you.
Where is the rest? Awesome so far...but the tutorial seems to end 1/3 of the way through. Am I crazy?
Nevermind, total fail on my part.
Amazing
Amazing, espectacular el producto final...
yeah, I'm stuck at Step 2, how do you hide the black background. The source file I get is a .jpg file, not .psd file.
the end result was awesome but the stary sky was different from yours.
Very nice image but starry sky stock broken link =(
Thanks Strong! We've updated the link with the correct one: http://nighthawk101stock.deviantart.com/art/Starry-Night-199305408
This is very good experience to me learn about the photo shop very good.