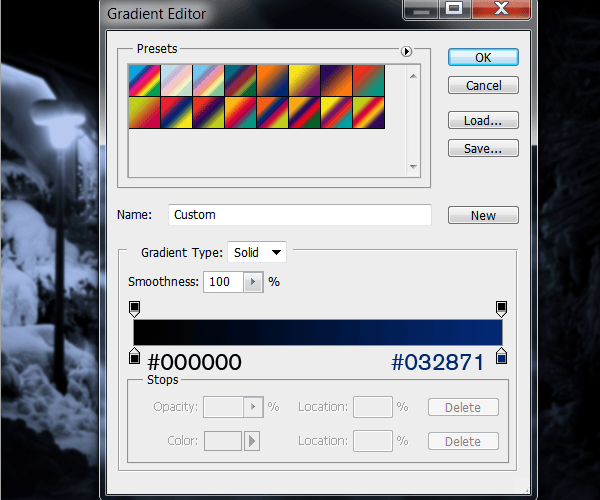
Step 8
Set the blending mode of this layer to Color then lower the opacity to around 73%.
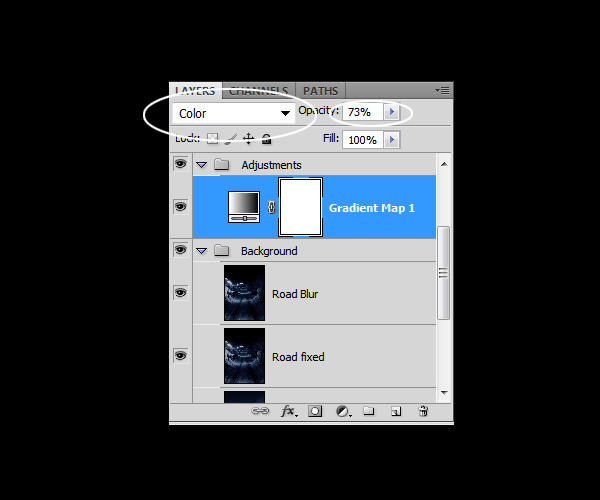
Step 9
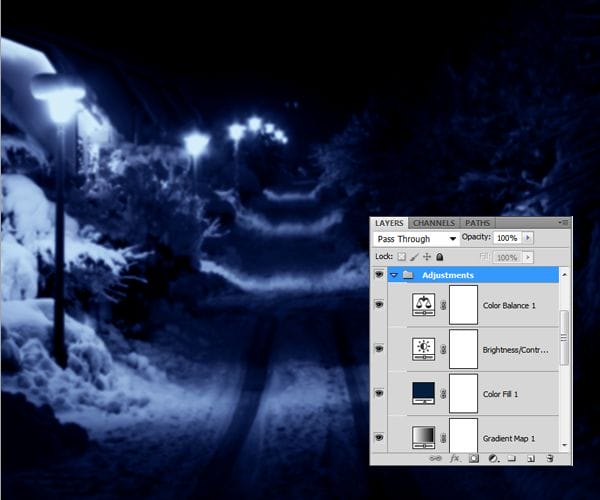
Create a new Solid Color fill layer (Layer > New FIll Layer > Solid Color) on top of the Gradient Map adjustment layer. Set the color of this fill layer to #031E40.
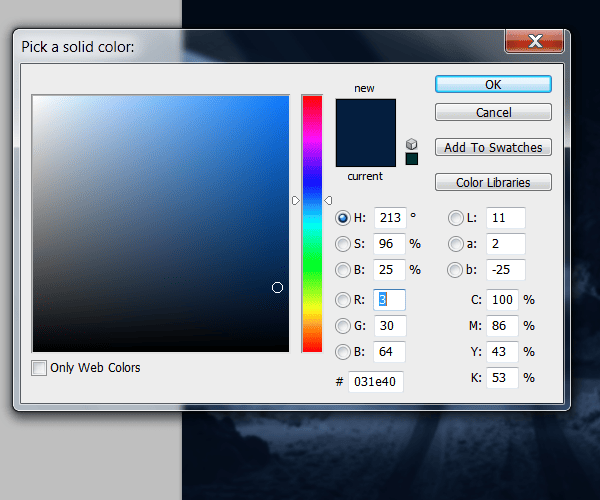
Step 10
Change the blending mode of the Color Fill layer to Color and lower its opacity to around 37%.
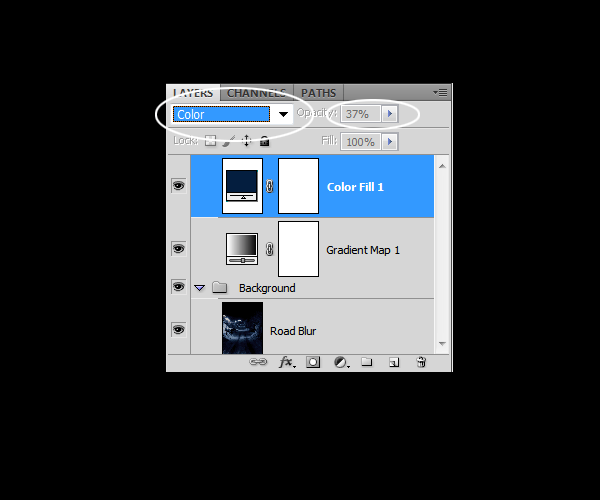
Step 11
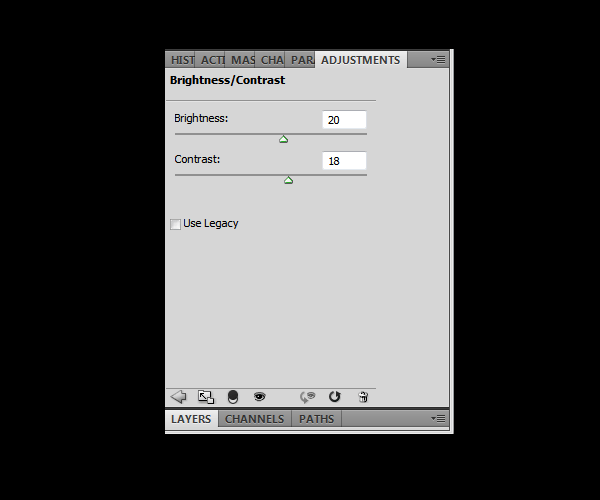
Add a new Brightness/Contrast adjustment layer (Layer > New Adjustment Layer > Brightness/Contrast) and position it as the top layer. Apply the settings shown in the image below.
Step 12
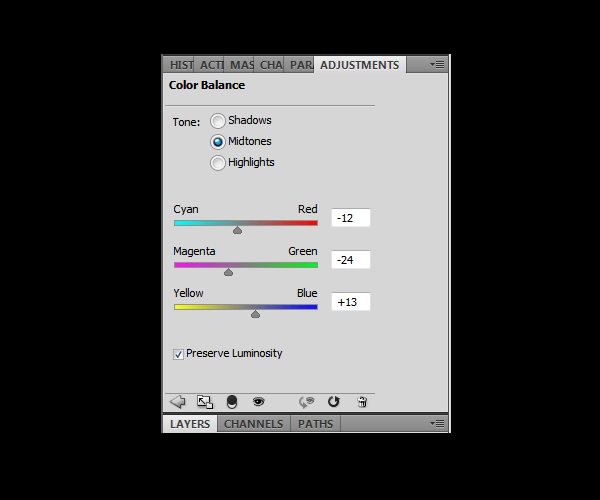
Add a new Color Balance adjustment layer (Layer > New Adjustment Layer > Color Balance) and set it as the top layer. Set the tone to Midtones then apply the settings shown in the image below.
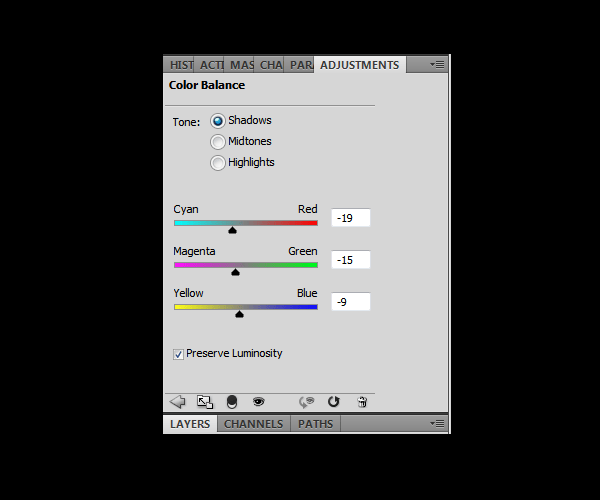
Set the Tone to Shadows then apply the settings shown below.
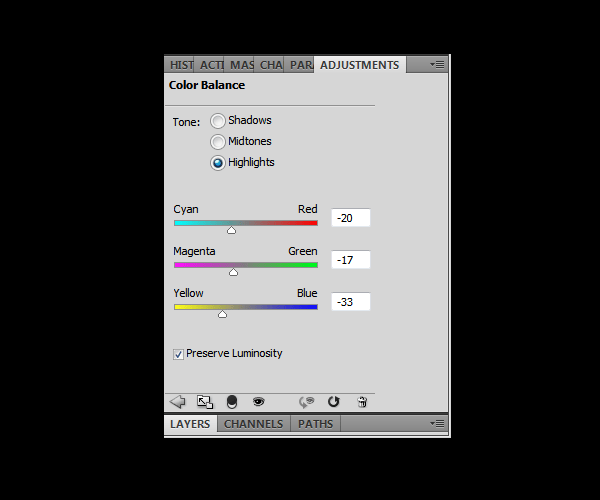
Set the tone to Highlights then apply the settings shown in the image below.
This is how your Layers palette should look right now.
Step 13
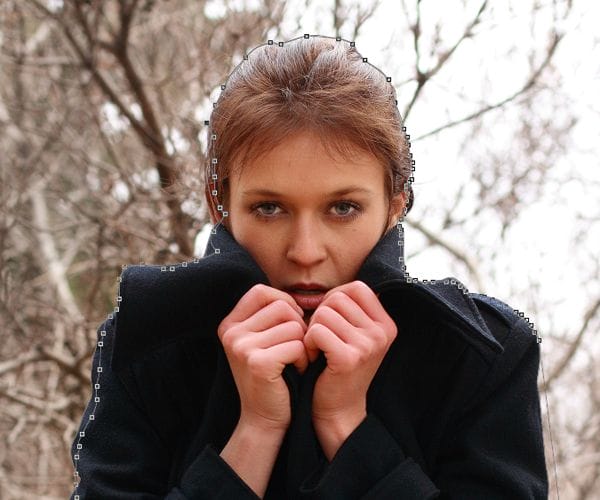
Open the image of the model then use the Pen tool (P) to draw a path along the edge of the girl trying to keep as much detail as you can so you can make a clean extraction from the background.
Step 14
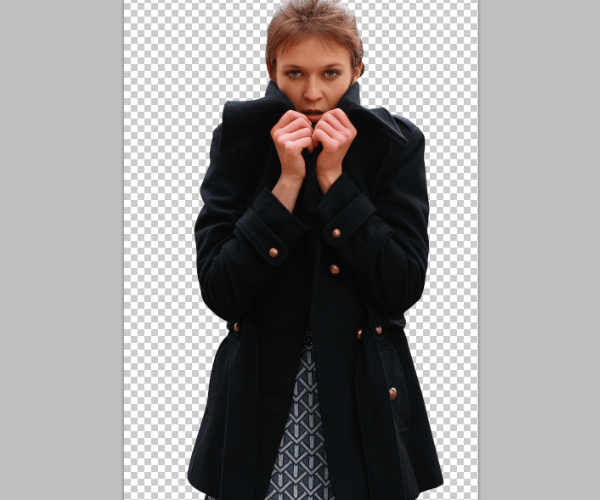
Once you’ve closed the path, right-click on the path then select “Make Selection”. Copy and paste it into the other document. You can close this image of the model.
Step 15
After pasting your model into your original document, position this new layer under the “Adjustments” group. Resize it slightly so that it covers a bigger area of the canvas. You can resize layers with the Free Transform tool (Ctrl+T or Edit > Free Transform).
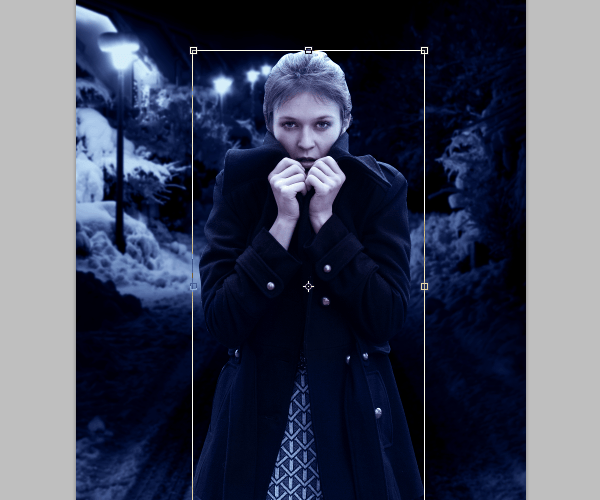
Next, sharpen (Filter > Sharpen > Sharpen) the model to enhance the quality of the image (You can repeat this filter by pressing Ctrl/Cmd+F). You can also place this layer into a new group (Ctrl/Cmd+G) called “Model” to keep things organized.
Step 16
Select the Burn tool (O) then set your brush size to a small round brush around 30 pixels with a hardness of 0%. Lower the exposure to 12% then set the range type to Shadows. Gently brush along the darker areas of the skin to darken the shadows and give it a slight HDR look. We’re going to do this directly on the models face so be careful to not overdo it.
One response to “How to Create This Freezing Cold Portrait Photo Manipulation in Photoshop”
-
Great, thanks for all the helpful info!


Leave a Reply