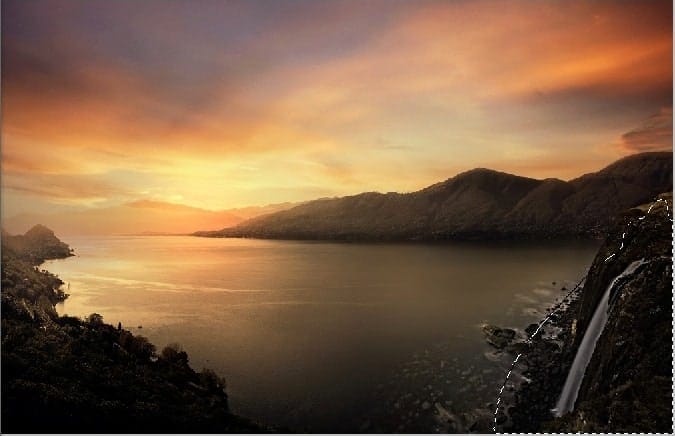
Hide the effect of Photo Filter adjustment layer on selected parts of waterfall that will only effect the water parts of waterfall.

Step 18
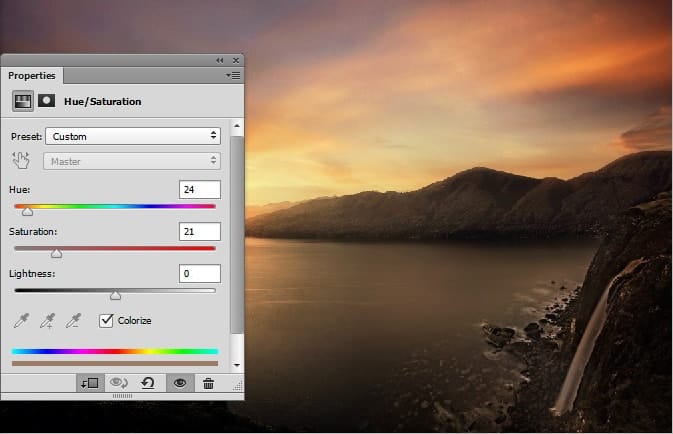
Add the Hue/Saturation adjustment layer to the waterfall. Set the setting as shown in the image below and also hide the effect in selected parts of waterfall or leave it.

Step 19
Reduce the brightness and increase the contrast of waterfall by adding a Brightness/Contrast adjustment layer. Reduce the opacity of Brightness/Contrast adjustment layer to 70% and also hide the selected effects as shown in the image below.

Step 20
I want add fog to the waterfall because as the water falls from the waterfall it creates a fog or kind of white smokes. To add it, create a new layer and name it ‘Fog’ then activate the brush tool and set the opacity and flow of brush to 30%. Now change your foreground color to #494745 then start painting some fog like shown in the image below.

Step 21
Add a layer mask to the fog layer and then apply Cloud filter on the layer mask of fog layer by selecting Filter > Render > Clouds. That will properly turn it into the fog. Here are the results.

Step 22
Add a Hue/Saturation adjustment layer to the fog layer. Set the setting as shown in the image below.

Step 23
Extract the fisherman and place it to the main document. Also hide the water parts of fisherman as shown in the image below.

Step 24
Add a Photo Filter adjustment layer to the fisherman to blend it properly to the entire scene. Set the setting a shown in the image below.

Step 25
Add a Brightness/Contrast adjustment layer to the fisherman. Set the setting as shown in the image below. Hide the selected effect of Brightness/Contrast adjustment layer by painting with soft round black on the layer mask of Brightness/Contrast adjustment layer. Also reduce the opacity of Brightness/Contrast to 80%.

Here are the results so far.

Step 26
Load the birds brushes in Photoshop then paint some birds as shown in the image below.

Step 27
In this step we’ll be enhancing the light effect more precisely. Create new layer then name it ‘light’ and paint some light as shown in the image below with color #532b03 using soft round brush tool.
15 responses to “How to Manipulate a Beautiful Sunset Matte Painting in Photoshop”
-
Good we can learn step by step how to create matte painting
-
Very nice -I follow – see the result in – =)
http://imageshack.com/a/img907/8533/WnYZf8.jpg
and
http://imageshack.com/a/img905/3796/QeEjCs.jpg -
ممنون دوست عزیز
-
wow nice tute i dont know that ps6 is capable of doing those
-
such great comments everyone :p
-
I agree :/
-
Oh good
-
I would say: ‘Is every adjustment layer necessary? I don’t think so. But it was all fun to do your tutorial en I have learned a lot. Thanks again, Hans K.
-
thx..,,,keep helping the bigners..,,
-
Thật tuyệt vời. Cám ơn sự chia sẻ của bạn. Thanks you very much!!!
-
очень красивый урок!!!!!!!!!!!!!
-
Nice tutorial
-
As always, you exceed yourself Bunty. Great job!! Like!
-
Wow! Amazing. I’ll work follow of this tut
-
Awesome ?


Leave a Reply