Create another layer and name it “wave9” and pick the brush as shown in the image below:

Use its default brush size which is 2500px and apply it to the image like how it is shown in the image below:

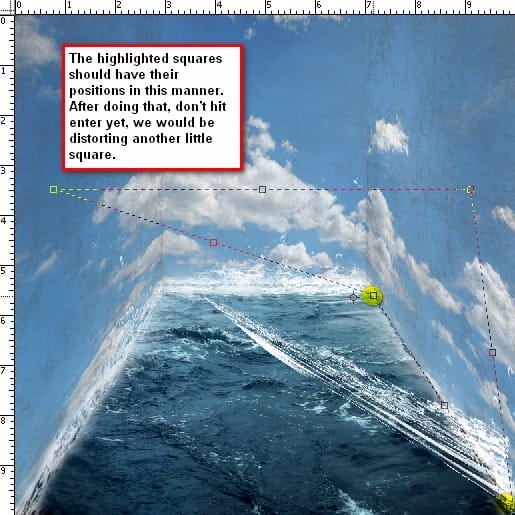
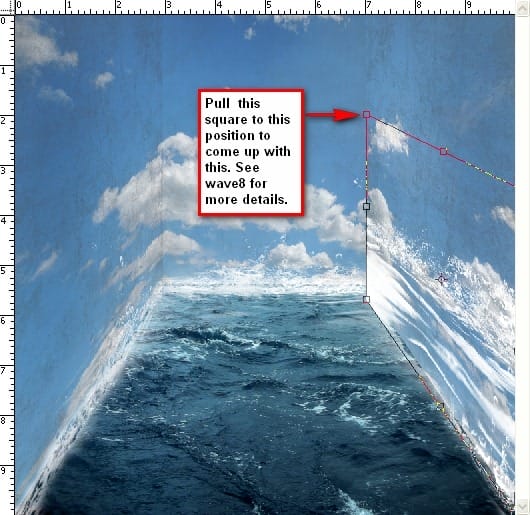
Hit the Ctrl+T key (transform tool) and click on Distort. We will be doing the same distort technique we used in “wave8.” See reference below:


Let us erase the excess waves to come up with an image similar to this:

Create a layer and name it “wave10.” The brush that we will use is shown in the image below:

Apply the brush on the center of the image without changing the brush size, and then activate the Transform tool and click Rotate 90’CW. Resize it and move it to the right wall – to where “wave 9” is located. After you’ve done that, transform the image by using the Distort Tool so it would be aligned to the right wall. Scale it to the size of “wave9.” See image below for instructions:

Duplicate “wave10”, activate the Transform tool and click on Flip Horizontal. Move the duplicated layer using the Move Tool to the spot shown in the image below:

Step 7 – Inserting the boat and the clock
Now that the background is complete, let’s add the subjects. Open Clock by Mind IllusionZ Stock. We’ll be using the Polygonal Lasso Tool to separate the clock from its background. Now, activate the Polygonal Lasso Tool (L). You’ll find it in the Tools Window just below the Marquee Tool. See reference below:

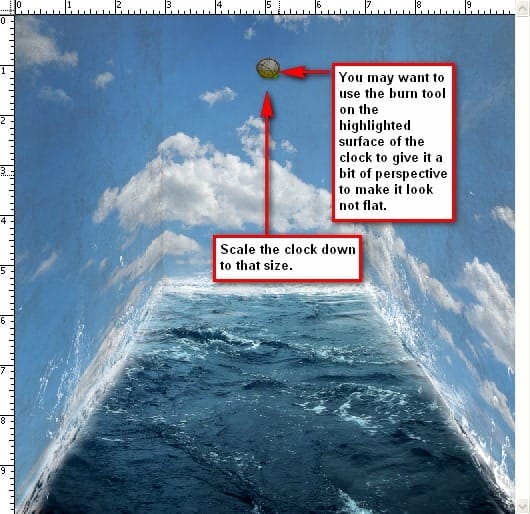
Now that you’ve cut the clock, let’s move it to our canvas by using the Move Tool (V). Rename the layer to “clock.” Activate the Transform tools and scale it down to the level shown in the image below:

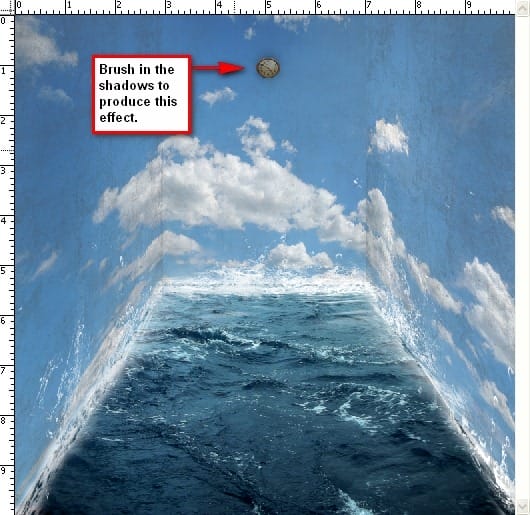
Create a new layer and put it under the clock’s layer and name it clock’s shadow. We will be adding some shadows to the back of the clock to give it depth and to reduce the flatness of it. Activate your brush tool and right click on the image to bring up the menu and click Reset brushes. Resize your brush to 150px (recommended) and then set its opacity to 25%. See reference below:

Now let’s add the boat. Open Toy Boat and cut it out from its background using the Polygonal Lasso Tool. Once you’ve done that move the boat using the Move tool to our canvas and put it on top of all the layers. We would need to change its Brightness/Contrast, so select the boat’s layer and “go to Image > Adjustments > Brightness/Contrast.” Set its values to:
8 responses to “Surrealistic Room Photo Manipulation”
-
Psd pleasd not link
-
We have fixed the broken link. Thank you for letting us know.
-
-
Thanks a lot! Great tutorial and love your precise approach =) I modified final part, but love your original idea. Here is my version http://milanaserk.deviantart.com/art/Setting-Off-484852574
-
I searched a lot, but the Anarasha wave brush seems to be offline. But after some searching I found equally good wave brushes at this site:
http://midnightstouch.deviantart.com/art/Stormy-Seas-38507114
A lot more ‘water brushes’ can be found here:
http://www.photoshopfreebrushes.com/25-sets-of-high-quality-water-brushes-for-creating-splashing-backgrounds/Hope this will help!
Kind regards,
Mike -
very very nice, your picture works.thanks sir………..
sorif, -
the waves brush by anaRasha is not a working link. I’ve tried looking for it and it would be really cool for a different download or something like that.
-
Not sure if your aware theres a guy selling prints of your Tuts, I’m guessing without any permission?
-
Not sure if your aware theres a guy following your Tuts as finished artwork out there…I’m guessing without any permission?


Leave a Reply