
Step 4
In this step I do a bit retouch for background. Create a new layer on the top. Use soft brush with color #373939 and paint on some parts of sky. I vary opacity of brush as shown below:

Change the mode to Multipy 80%:

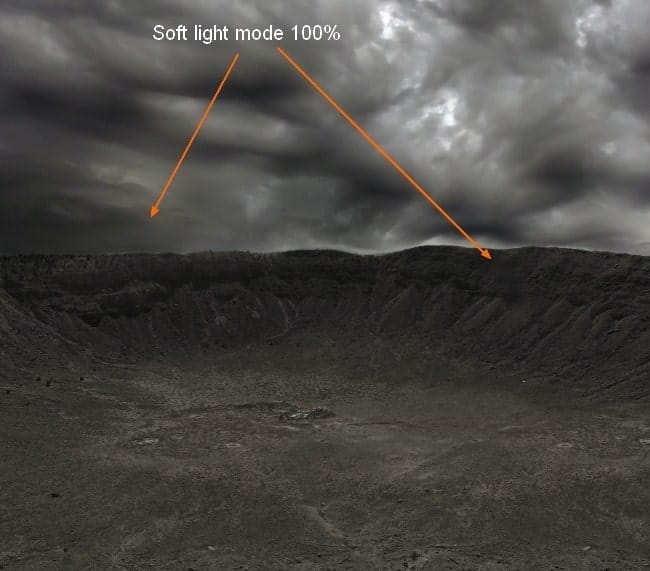
Make a new layer ( Cmd/Ctrl+Shift+N) and I use brush with color #9f9e99. Painting on the left side of sky and some parts of background to brighten them. Set the mode of this layer to Soft light 100%:


To darken another parts of sky I use brush and color #373939. On a new layer, use this brush and paint on sky center. Put the mode as Multipy 50%:

Step 5
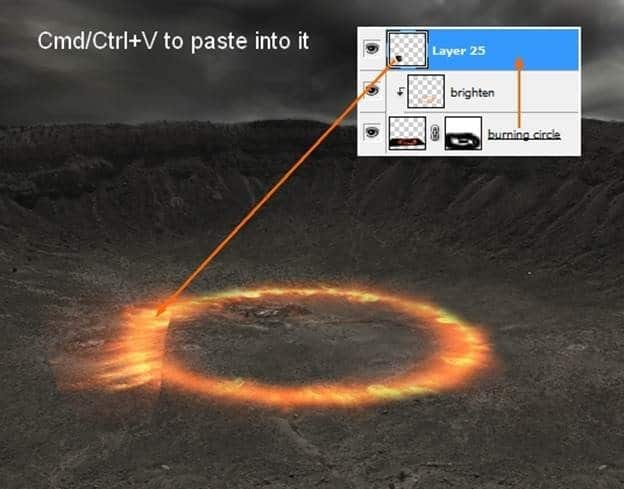
Open explosion stock. Use Move Tool to drag it into our canvas. Press Cmd/Ctrl+T to scale it down and transform it as shown below:

Change the mode to Screen 100% and add layer mask for this layer. Use soft black brush to remove the rough edges and the part within this explosion:

Name this layer as “burning circle”.
Step 6
I use a layer with Clipping Mask to brighten this circle. Take soft brush with color #fda25c. Painting around this circle and change the mode to Hard Light 100%:


Step 7
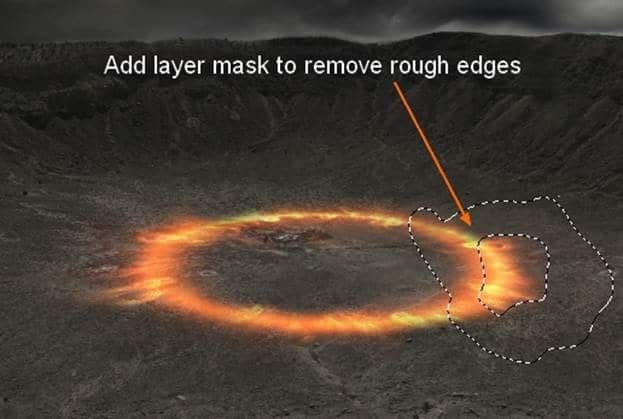
On circle layer, use Lasso Tool to make a selection on the left side of it. Press Cmd/Ctrl+C to copy it. Make a new layer on the top. Press Cmd/Ctrl+V to paste copied part into it. Apply Flip Horizontal and move to the right. Use layer mask to remove rough edges:


Step 8
I want to make glowing light for this circle. Create 3 new layers under this circle. On each layer I use brush with color #fda25c painting on different parts outside it and put the mode to Soft light and Overlay with different opacities.


Step 9
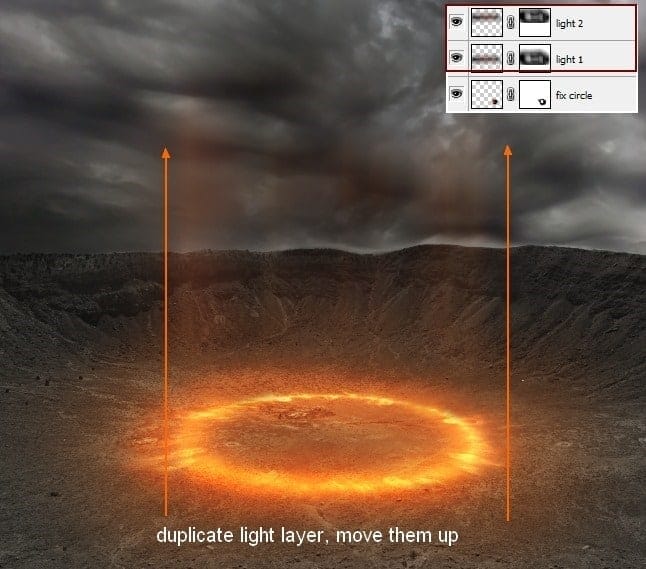
In this step we will make the light coming up from circle. Duplicate this circle layer. Move under layer to the top:

Go to Filter-Blur-Motion Blur:

Duplicate this layer and use Move Tool to move two these layers up. Name them as “light 1”, “light 2”:

You can erase any parts you don’t like on layer mask of these light layers.
Step 10
On burning circle layer, use Lasso Tool to make a selection with feather=15 as shown below then copy it ( Cmd/Ctrl+C):

Make a new layer on the top. Press Cmd/Ctrl+V to paste copied part onto this new layer ( as we did in step 7).
22 responses to ““The Controller” – Create this Floating Superhero Scene with Sci-Fi Lighting Effects in Photoshop”
-
Thanks for your tutorial
-
it was a little long winded
-
Thanks four your tutorial, and I wish I can make it. But something is lost, I can’t find the background and crack.
-
Wow amazing technique . I didn’t understand how to create firing motion blur effect ………. can you explain it ………??
-
Hi, I am a Sahebrao photo manipulator though I tend to focus more on a “pin-up” style of work. Great to see some I like, so I want more vedio tutorials. thanks!
-
Hi, I am a superhero photo manipulator though I tend to focus more on a “pin-up” style of work. Great to see some quality tutorials in the field!
-
I like the idea of this tutorial, it’s very creative and the result looks great.Thanks a lot for sharing with us.
-
ohhh awesome !!!!!!!!!!!!!
-
guys please hepl me! i cant get the pics. pls email them to me
-
hello the link to the rocks psd is broken.
-
I’d just like to say great tutorial – I have a crack for part of my one a week project and this was my result – http://www.flickr.com/photos/magsnorton/8415205138/in/photostream
-
Wowww..i like it so much. I will try it at home. I hope i can create it..thanks
-
wish i can make it. I try to make it for my national examination
-
Amazing Tutorial really
-
Dearest Sir…………Wonderful work done. Thanks for uploading,i hope u will be carry on yrs work. for us ………
Thanks a lot…..
Learner ….. Jehan zeb Khan …..( PAK ) -
@FazilZuhaib Thanks, buddy! I’m so busy with web work right now, but I promise I’ll have some new exciting web and PS stuff soon! :)
-
Really amazing, gonna try this out.
-
oh wow haha
-
Very nice tutorial, thank you!
-
Thanks Jenny! Your tutorials are awesome as always! :)
-
I cant wait to try this out. I know it will be major help for me especially with blending.
-
Superb graphic design tutorials. will be too much helpful and thanks for share…


Leave a Reply