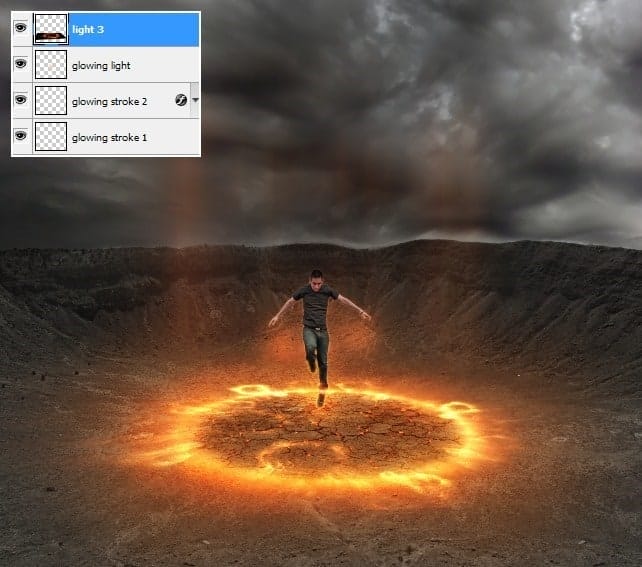
Apply Motion Blur with same settings in step 9:

Move this light up :

Add layer mask and use soft brush with opacity and flow 30% to blur light effect on some parts:
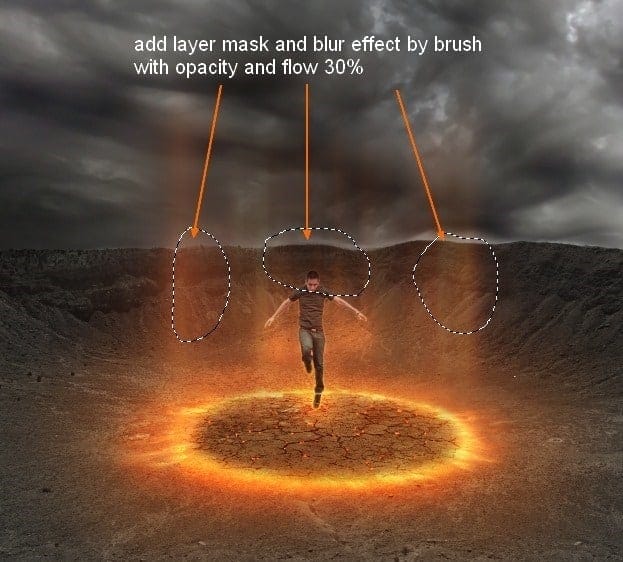
Duplicate this layer and move it down. Name it “light 4”. Use layer mask with brush 100% opacity to clear its top:

Step 18
Open rock stock pack, you can choose the one you like. I choose this one:

Go to Edit-Define Brush Preset and name it whatever you like:

Come back to our main document. Create a new layer and position it on the top. Choose brush tool and find the new brush we’ve just created. Set foreground color to black.
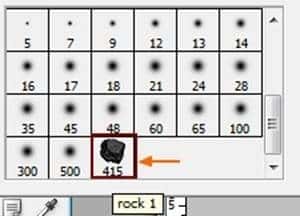
Press F5 to change settings for rock brush:

Paint inside the lights:

Step 19
Duplicate this layer and we have:

Add layer mask for each rock brush blur the top of them as the top get less light then the rest so less visible:

To make these small rocks get 3D effect, add layer style for them. Right click each rock layer, choose Blending options:

Choose Direction as Down because these rocks get light from underground.

Step 20
Open fireball image. Move it into our document, resize it as shown below:
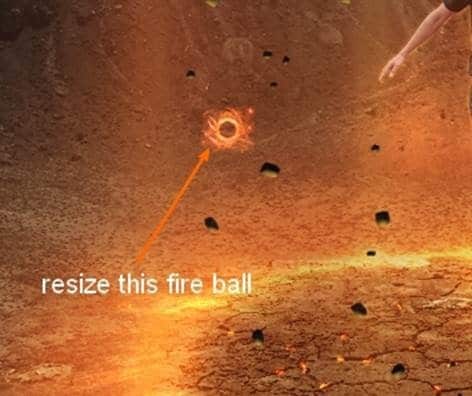
Move it onto a rock and change the mode to Screen 100%. Add layer mask to erase around it:


Duplicate this layer:

Choose two these layers, hit Cmd/Ctrl+G to make group for them. Name this group as “fireball 1”. Right click this group, choose Duplicate Group. Right click duplicated group, choose Merge Group. We have this merged group as a normal layer and remember to change the mode of it to Screen 100% :
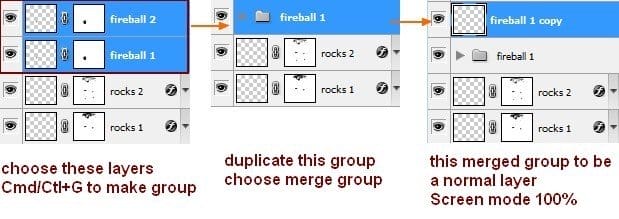
Duplicate it many times and place it onto the rocks randomly. Also place them onto man’s hands. Remember to resize them to fit the size of the rocks. I use 23 layers for this effect and call them from “fireball 1” to “fireball 23”, make group for them to be easier to manage:

Step 21
To change the focus of this picture, I use Gradient effect. Make a new layer on the top. Hit G to active Gradient Tool. Choose Radial Gradient Tool with default color ( black and white). Drag a line from center to bottom:

Change the mode to Soft light 100%. Add layer mask to remove contrasted part on the top left and blur around burning circle:
22 responses to ““The Controller” – Create this Floating Superhero Scene with Sci-Fi Lighting Effects in Photoshop”
-
Thanks for your tutorial
-
it was a little long winded
-
Thanks four your tutorial, and I wish I can make it. But something is lost, I can’t find the background and crack.
-
Wow amazing technique . I didn’t understand how to create firing motion blur effect ………. can you explain it ………??
-
Hi, I am a Sahebrao photo manipulator though I tend to focus more on a “pin-up” style of work. Great to see some I like, so I want more vedio tutorials. thanks!
-
Hi, I am a superhero photo manipulator though I tend to focus more on a “pin-up” style of work. Great to see some quality tutorials in the field!
-
I like the idea of this tutorial, it’s very creative and the result looks great.Thanks a lot for sharing with us.
-
ohhh awesome !!!!!!!!!!!!!
-
guys please hepl me! i cant get the pics. pls email them to me
-
hello the link to the rocks psd is broken.
-
I’d just like to say great tutorial – I have a crack for part of my one a week project and this was my result – http://www.flickr.com/photos/magsnorton/8415205138/in/photostream
-
Wowww..i like it so much. I will try it at home. I hope i can create it..thanks
-
wish i can make it. I try to make it for my national examination
-
Amazing Tutorial really
-
Dearest Sir…………Wonderful work done. Thanks for uploading,i hope u will be carry on yrs work. for us ………
Thanks a lot…..
Learner ….. Jehan zeb Khan …..( PAK ) -
@FazilZuhaib Thanks, buddy! I’m so busy with web work right now, but I promise I’ll have some new exciting web and PS stuff soon! :)
-
Really amazing, gonna try this out.
-
oh wow haha
-
Very nice tutorial, thank you!
-
Thanks Jenny! Your tutorials are awesome as always! :)
-
I cant wait to try this out. I know it will be major help for me especially with blending.
-
Superb graphic design tutorials. will be too much helpful and thanks for share…


Leave a Reply