

Step 24
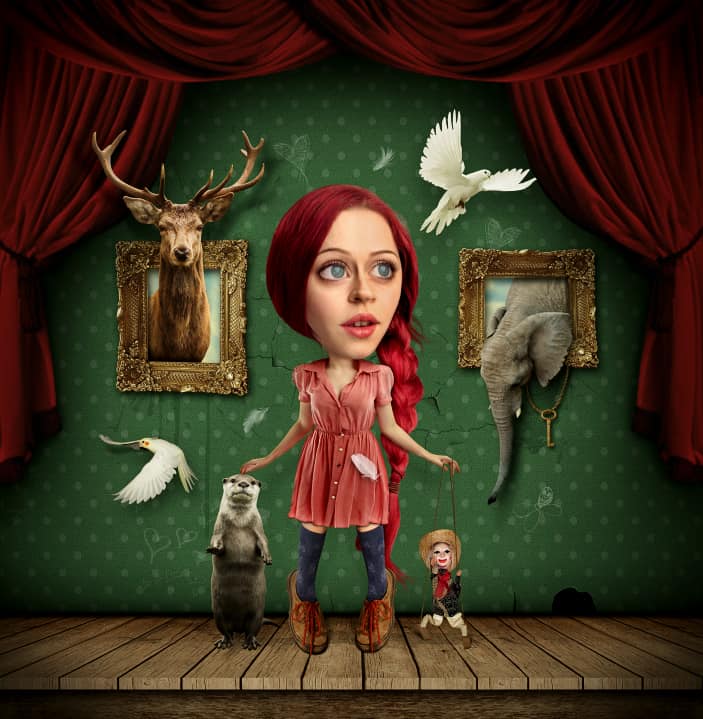
Now we can move to the next part. We will add several elements to make the illustration a bit more interesting. Place the Frame image to our canvas (File > Place) and put it above the Wall group. Add Hue/Saturation Adjustment Layer and then reduce the Saturation to -42. Using Magic Wand Tool, select the black background and mask it off with the Layer Mask.
Apply Layer Style > Drop Shadow to a layer with the settings as shown in the image below. Now open the Sky image, and using the Rectangular Marquee Tool, select the part of the sky you’re interested in and pasted underneath the Frame layer. Raise the Saturation to +47.
Group the layers and the adjustment layers, and name it “Frame 1”. To create the other frame, just duplicate the Layer Group, scale it up slightly, and rotate it to 90 CCW. Rename the group to “Frame 2”.


Step 25
Open the Elephant image. First, we need to do a little bit of touch up on and remove the black spots on its forehead.
Add a new layer and grab a Stamp Tool, Press Alt+click to define a sampling point, then simply paint over in the area you want to remove. Use about 20-30% Opacity, it’s good at softening areas while still leaving detail, and make sure the Sample is set to “Current & Below”.
Once you’re done retouching, extract the Elephant using a Pen Tool and put it above the Frame Layer. Place it exactly just like you see in the image shown below, click on the Frame layer’s thumbnail to load selection, and use a Layer Mask to get rid of the excess area we don’t need.


Step 26
In order to remove the blue color in its snout, apply an Adjustment Layer > Selective Color, and set the settings as shown below. Also add a Levels Adjustment Layer and move the Shadows slider to 10, Midtones to 0.93, and White Output slider to 246.
Apply Drop Shadow and Color Overlay Layer Style with each setting as below. Now grab a Brush Tool, and draw a straight line on a new layer above the elephant just like in the image below. Then clip the layer to the Elephant layer below it.
13 responses to “Transform a Portrait Into a Caricature Artwork”
-

A disgraceful explanation. nothing is understood.
-
Hello, your tutorial sucks. It gives no context to what I am actually doing, and it just expects me to know things not explained. I don’t care about what you are going to say to this because my opinion is already formed that this tutorial is no good.
-
This is super cool. Inspired me to a new piece I’ve been wanting to do for a while. Thanks for sharing :)
-
Really your method is very easy and helpful. I get complete idea to the work. Thanks for your kind post.
-
It’s really great tutorial.but how to do the first step? I mean the Gradient step.
-
1. Create a new layer (Layer > New > Layer).
2. Select the Elliptical Marquee Tool (Press Shift+M until the icon in the toolbar turns into a circular marquee).
3. Go to Select > Modify > Feature. Set the Radius to 150px.
4. Go to Select > Modify > Inverse.
5. Press Shift+Backspace. Set the contents to black.
6. Lower the current layer’s opacity to 21%.
7. Duplicate the layer by pressing Ctrl+J (Cmd+J on Macs).
8. Go to Edit > Transform > Scale. Scale it up by around 137% or larger.
9. Lower the current layer’s opacity to 41%. -
exactly i have no clue
-
-
there is no tutorial on the dall looking girl?
-
how do i find out more about this please…very interested..thankyou
-
where is the add button??
-
GOOD!!
-
How to download this ??
-
wow am so inspire men good tin
Leave a Reply