
Learn a better way to increase contrast using Photoshop. This Photoshop technique protects your image from having blown out highlights and shadows while you increase contrast. Follow this Photoshop tutorial to learn how to apply this new technique.
Adaptive Contrast Photoshop Tutorial
Step 1: Load a photo into Photoshop
To open an image, choose File > Open. Browse for the image file then click OK.

Step 2: Increase contrast
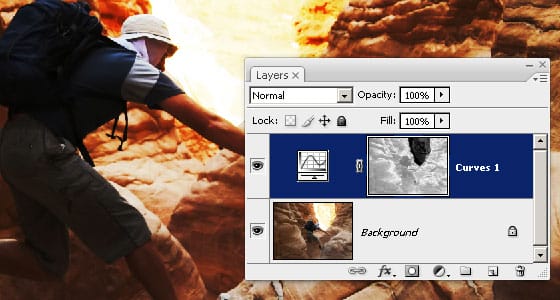
First, we’ll increase the contrast as we usually would. There are many ways to increase contrast but we’ll show you how to do it using Curves. Choose Layer > New Adjustment Layer > Curves. In the Curves tool, create a slight S curve like the image below.

Step 3: Create a new 50% gray layer
Now we’ll create the mask for the Curves adjustment layer. The mask will specify how visible the Curves adjustment layer is according to the brightness of the area. To do this, we first need to create a layer with a 50% gray fill. Create a new layer then choose Edit > Fill.

In the Fill settings, use the settings from the image below.

Step 4: Create a custom selection using Calculations
With the 50% gray layer created, we will use the calculations tool to create the mask that will be used for the Curves adjustment layer. Choose Image > Calculations and enter in the settings below. This will create a selection around the highlights and shadows of the image.

Step 5: Apply the selection to the layer mask
Delete the top layer with the gray fill then select the layer mask.

With the layer mask selected, press the delete key on your keyboard and choose Select > Deselect.

The data in the layer mask looks quite low in contrast. Choose Image > Adjustments > Auto Levels to automatically increase the contrast. As you can see in the layer mask, the highlights and shadows are darker and the midtones are brighter. This layer mask that we jut created is only allowing the Curves adjustment layer to affect the midtones in the image. Generally, this works well with landscape photos because it preserves the details in the shadows and highlights.
{end}
Step 6: Change the blending mode to luminosity
Your image should look more saturated than it was before. If you don’t like the increased saturation, change the blending mode of the Curves adjustment layer to Luminosity and the saturation will return to normal.
2 responses to “Adaptive Contrast”
-

I like the way it works, thanks.
-
Nice …
Leave a Reply